7 sof tw ar e f or d ata t ransf er – HEIDENHAIN TNC 426B (280 472) ISO programming User Manual
Page 336
HEIDENHAIN TNC 410, TNC 426, TNC 430
321
Data transfer between the TNC 410 and TNCremo
Ensure that:
■
The TNC is connected to the correct serial port on your PC
■
The data transfer speed set on the TNC is the same as that set on
TNCremo
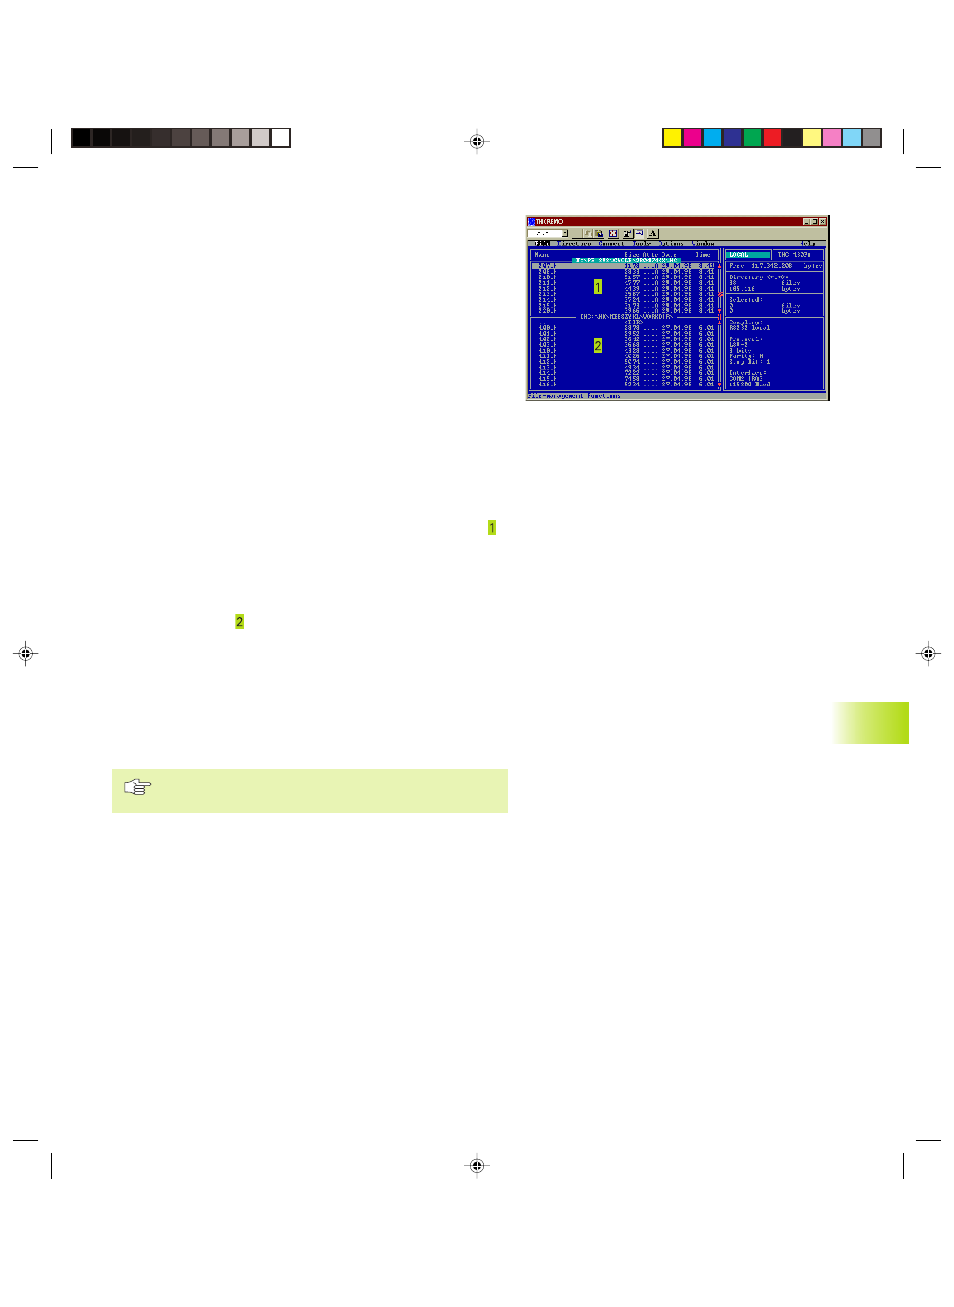
Once you have started TNCremo, you will see a list of all of the files
that are stored in the active directory on the left of the window
Using the menu items <Directory>, <Change>, you can change the
active directory or select another directory. To start data transfer at
the TNC (see section 4.5 ”File Management TNC 410”), select
<Connect>, <File server>. TNCremo is now ready to receive data.
Data transfer between TNC 426, TNC 430 and TNCremo
Ensure that:
■
The TNC is connected to the correct serial port on your PC
■
The data transfer speed set on the TNC for LSV2 operation is the
same as that set on TNCremo.
Once you have started TNCremo, you will see a list of all of the files
that are stored in the active directory on the left of main window .
Using the menu items <Directory>, <Change>, you can change the
active directory or select another directory on your PC.
To establish the connection with your TNC, select the items
<Connect>, <Link (LSV-2)>. The TNCremo now receives the file and
directory structure from the TNC and displays this at the bottom left
of the main window ( ). To transfer a file from the TNC to the PC,
select the file in the TNC window (highlighted with a mouse click)
and activate the functions <File> <Transfer>.
To transfer a file from the PC to the TNC, select the file in the PC
window and activate the functions <File> <Transfer>.
End TNCremo
Select the menu items <File>, <Exit>, or press the key
combination ALT+X
Refer also to the TNCremo help texts where all of the
functions are explained in more detail.
13.7 Sof
tw
ar
e f
or D
ata T
ransf
er
Pkap13.pm6
29.06.2006, 08:06
321