3 connecting the sunny webbox to the local network, Connecting the sunny webbox to the local network – SMA WEBBOX-BT-20 Installation User Manual
Page 33
SMA Solar Technology AG
Commissioning
Installation Manual
SWebBox20-IA-en-12
33
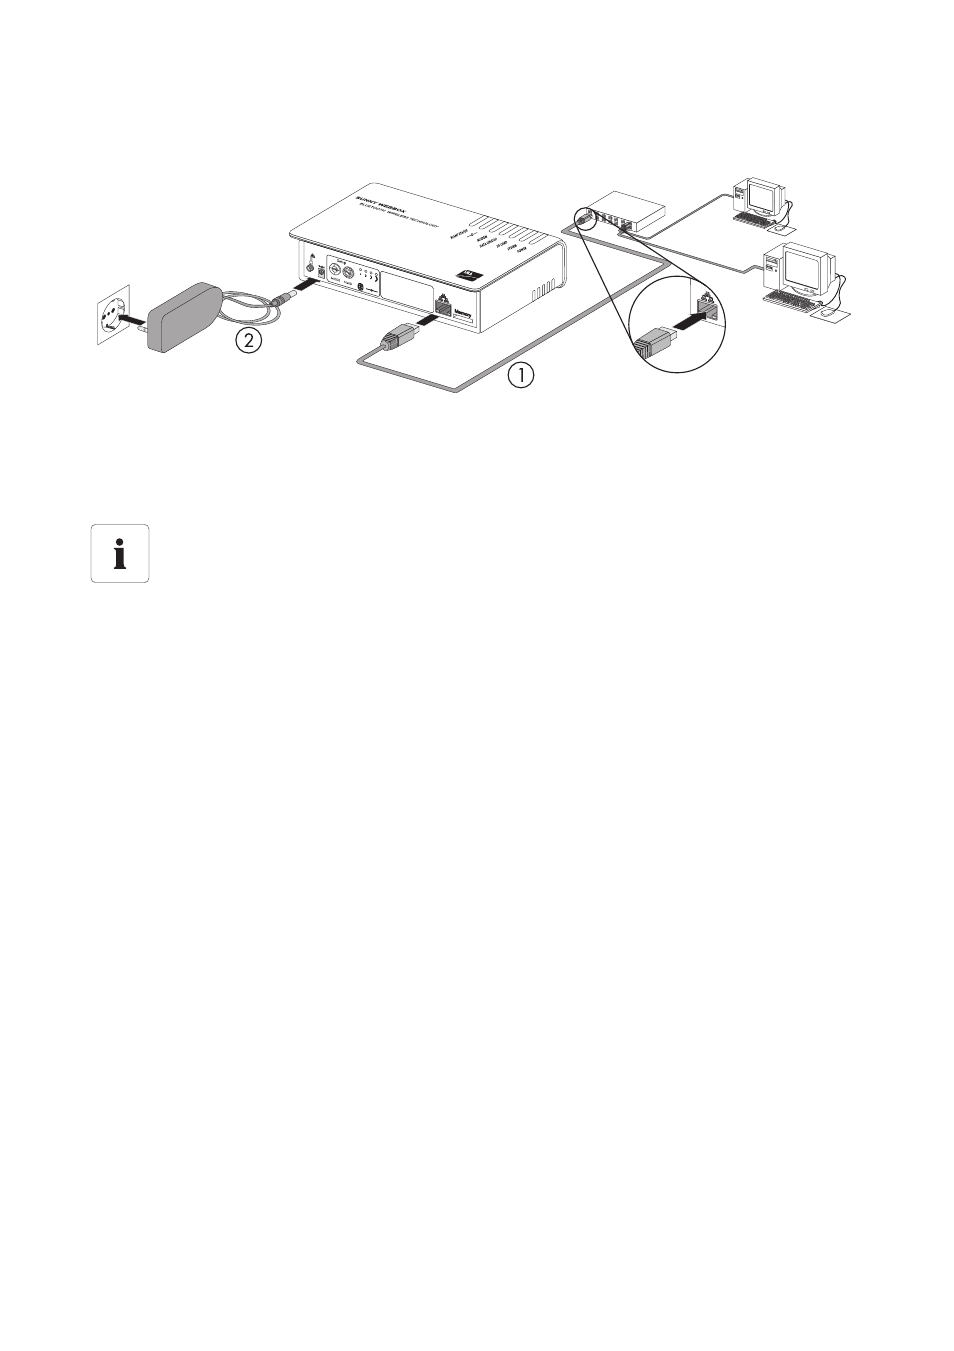
6.6.3 Connecting the Sunny WebBox to the Local Network
1. Connect the Sunny WebBox directly to the remote terminal (e.g. router, network switch or
Ethernet hub) of the local network using the red patch cable (see ➀ ). The connection of the
remote terminal is normally identified by the same symbol as the Sunny WebBox network
connection. If necessary, please refer to the remote terminal manual.
2. Connect the plug-in power supply to the Sunny WebBox and plug it into the socket-outlet
(see ➁ ).
☑ The Sunny WebBox starts up and is ready for operation once the "SYSTEM" and "POWER"
LEDs glow green. The start-up procedure can take up to 90 seconds.
– If the "SYSTEM" or "POWER" LEDs do not glow green, please refer to Section
12.1 "General Troubleshooting for the Sunny WebBox" (page 47).
☑ The user interface of the Sunny WebBox is now available via the new IP address or the URL
http://WebBox"serial number" (see Section 7 "Logging into and out of the Sunny WebBox"
(page 34)).
Recommendation on network cabling
Should the patch cable supplied be too short, observe the following when buying a longer
cable:
• You require a patch cable.
• Unnecessarily long cables have an adverse effect on the signal quality.
The maximum permitted cable length is 100 m per segment.
• Use a high quality shielded twisted pair cable of category 5 (FTP Cat 5) or higher.