English – Epson Stylus Scan 2500 User Manual
Page 17
17
Setting up your Stylus Scan 2500
English
Note:
❏
Do not open the ink cartridge packages until just before you install them, or the
ink may dry up.
❏
Always use new ink cartriges. Reinstalling partially empty ink cartridges causes
the printer to send inaccurate information to the Status Monitor regarding the
amount of ink remaining.
❏
Use the ink cartridges packed with your printer the first time you install ink
cartridges, otherwise the printer may not charge ink properly.
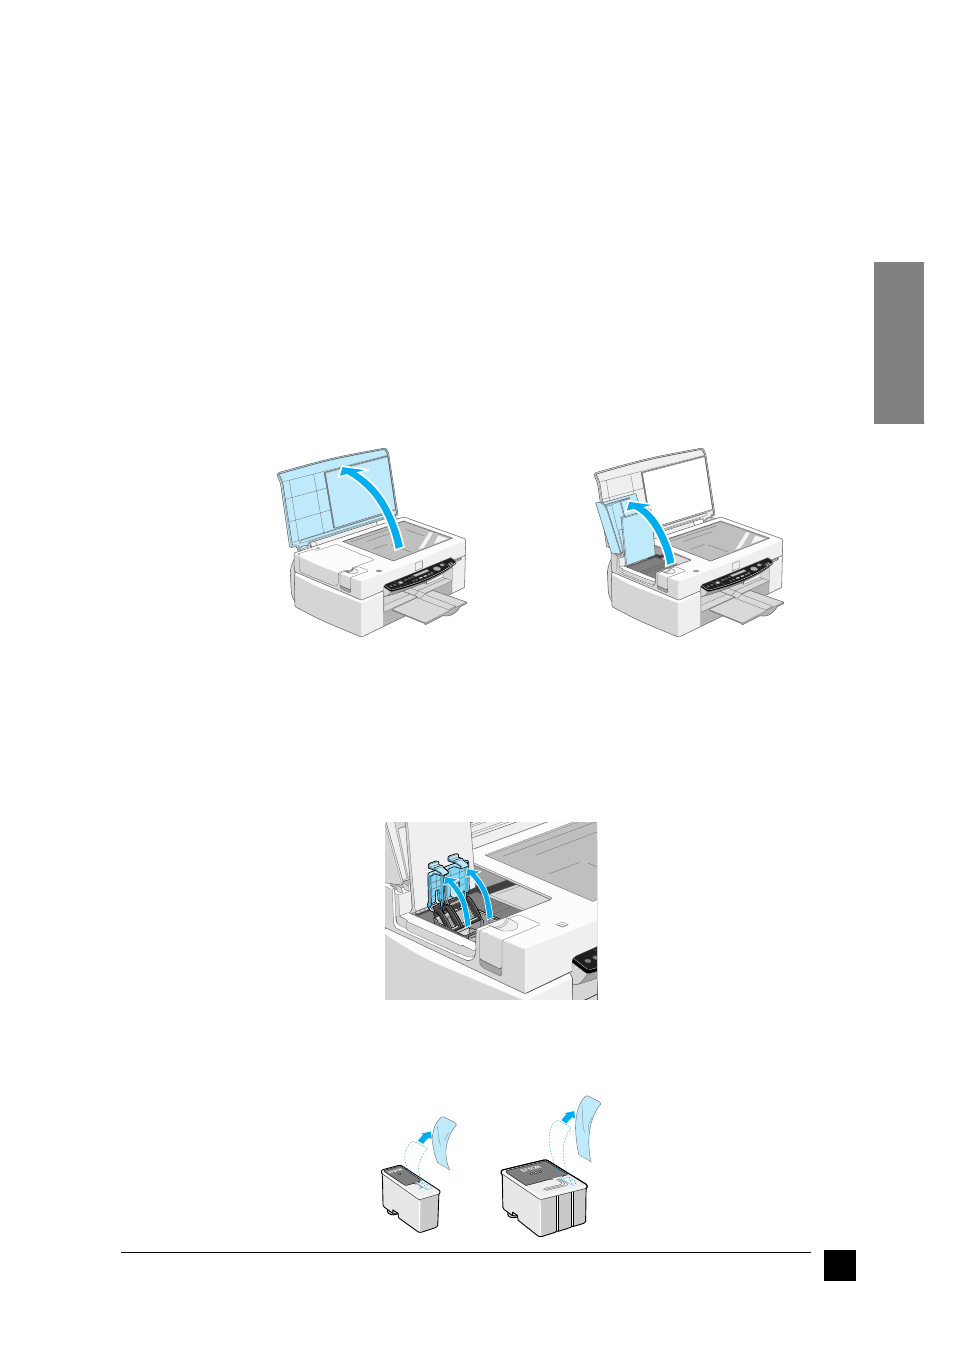
Follow the steps below to install the ink cartridges.
1.
Make sure the Stylus Scan is turned on.
2.
Open the document cover and the maintenance cover. The scanner carriage moves
out of the way automatically.
The print head moves to the left, to the ink cartridge installation position.
c
Caution:
Do not move the print head by hand. Doing so may damage the Stylus
Scan.
3.
Lift up the ink cartridge clamp.
4.
Open the ink cartridge packages that came with your Stylus Scan. Remove only
the yellow tape seals from the ink cartridges.