Epson Stylus Scan 2500 User Manual
Page 18
18
Setting up your Stylus Scan 2500
c
Caution:
❏
Be sure to remove the yellow tape seals from the cartridges before
installing them; otherwise the cartridges may become unusable.
❏
Do not remove the blue portion of the tape seal from the
cartridges; otherwise the cartridges may become clogged and
cannot print.
❏
Do not remove the tape seals from the bottom of the cartridges;
otherwise, ink will leak.
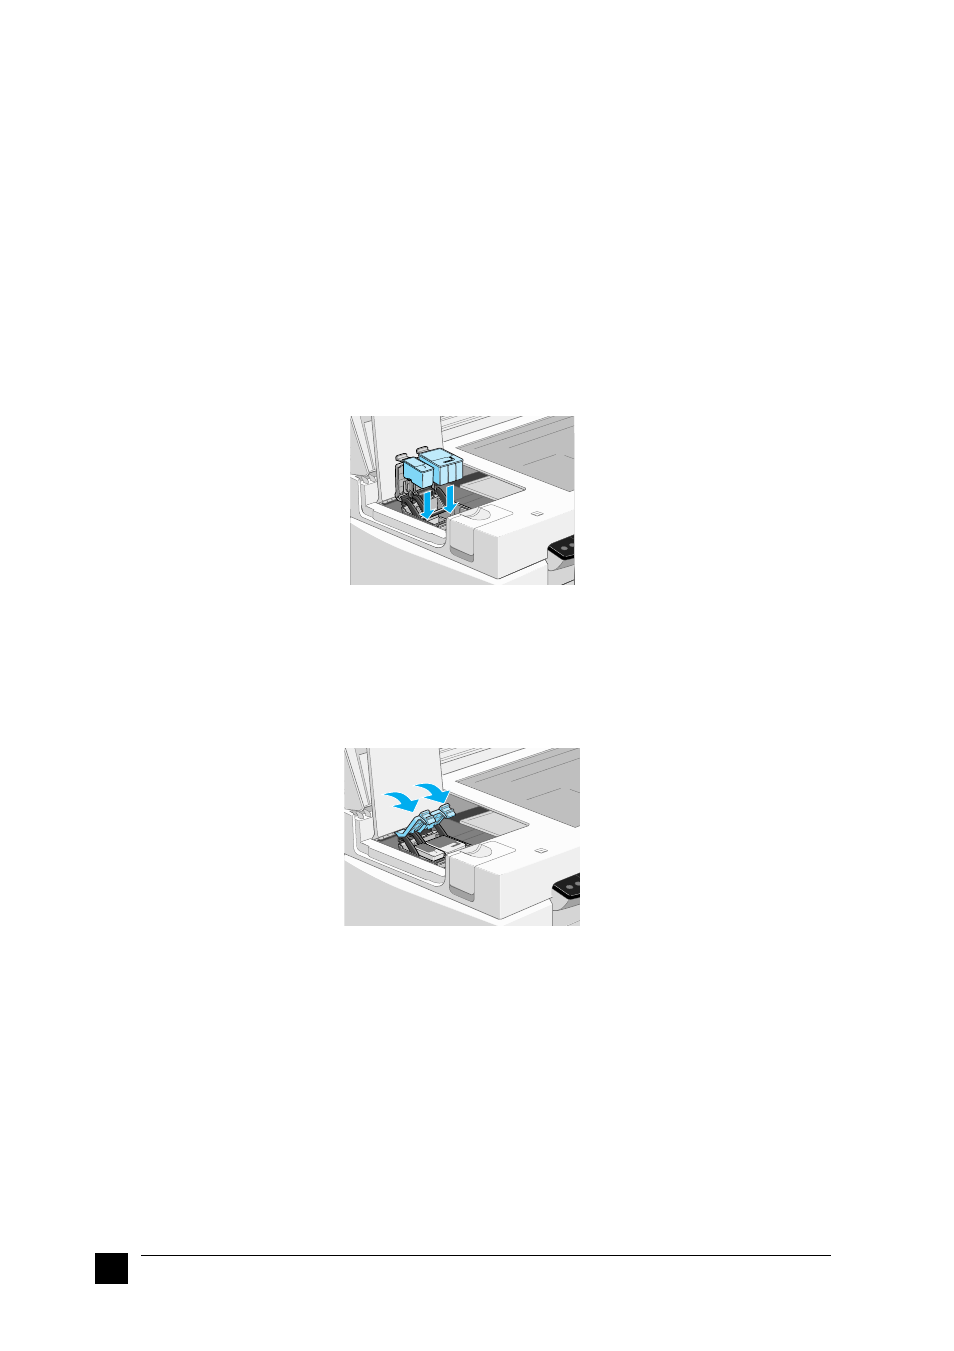
5.
Place the cartridges gently into their holders with the labels face-up. The color ink
cartridge goes on the right and the black goes on the left. Do not press down on
the cartridges.
c
Caution:
Install both ink cartridges. If either of the cartridges is not installed,
the EPSON Stylus Scan will not work.
6.
Press the ink cartridge clamps down until they lock into place.
c
Caution:
Once you install the ink cartridges, do not open their clamps again
until you replace the ink cartridges. Opening the clamps makes the
cartridges unusable.
7.
Close the maintenance and document covers. The scanner carriage will return to
the home position.
8.
Press the
R cleaning button and release quickly. The EPSON Stylus Scan moves
the print head and begins charging the ink delivery system.