Delete a fan/gauge pair, Attma required fan calibration factors, 6 delete a fan/gauge pair – Retrotec FanTestic (ATTMA) User Manual
Page 21: 7 attma required fan calibration factors
rev-2014-10-27
Page 21 of 58
©Retrotec Inc. 2011-2014
If you are using more than one fan, click the
button as many times as the number of
fans you would like to add (total number limited by the license in use).
Once new fans are added, you are given the option to note the Location - where the fan is set up in the
building- for your own information and to see on the Data set graph.
The first gauge in the list is used as the “Primary gauge” when running a multi-fan test (see section
1.9.1.4 for an explanation).
Click the
button to make the gauge on that line the primary gauge (placing it as #1 Fan).
3.5 Retrieve Gauge serial number and fan model automatically
To retrieve the gauge serial number and fan model automatically, click the
button.
Note that you need to ensure that the fan/gauge pair is still correct after a Find Gauges scan – FanTestic
will set the Fan model to whatever model is set on the gauge.
3.6 Delete a Fan/Gauge pair
You can delete the line corresponding to a fan/gauge pair if it is not being used in the Test, but it is not
necessary. If a fan/gauge pair line exists, a corresponding line will appear in the Data Set.
Click the
button to delete the line corresponding to a fan/gauge pair.
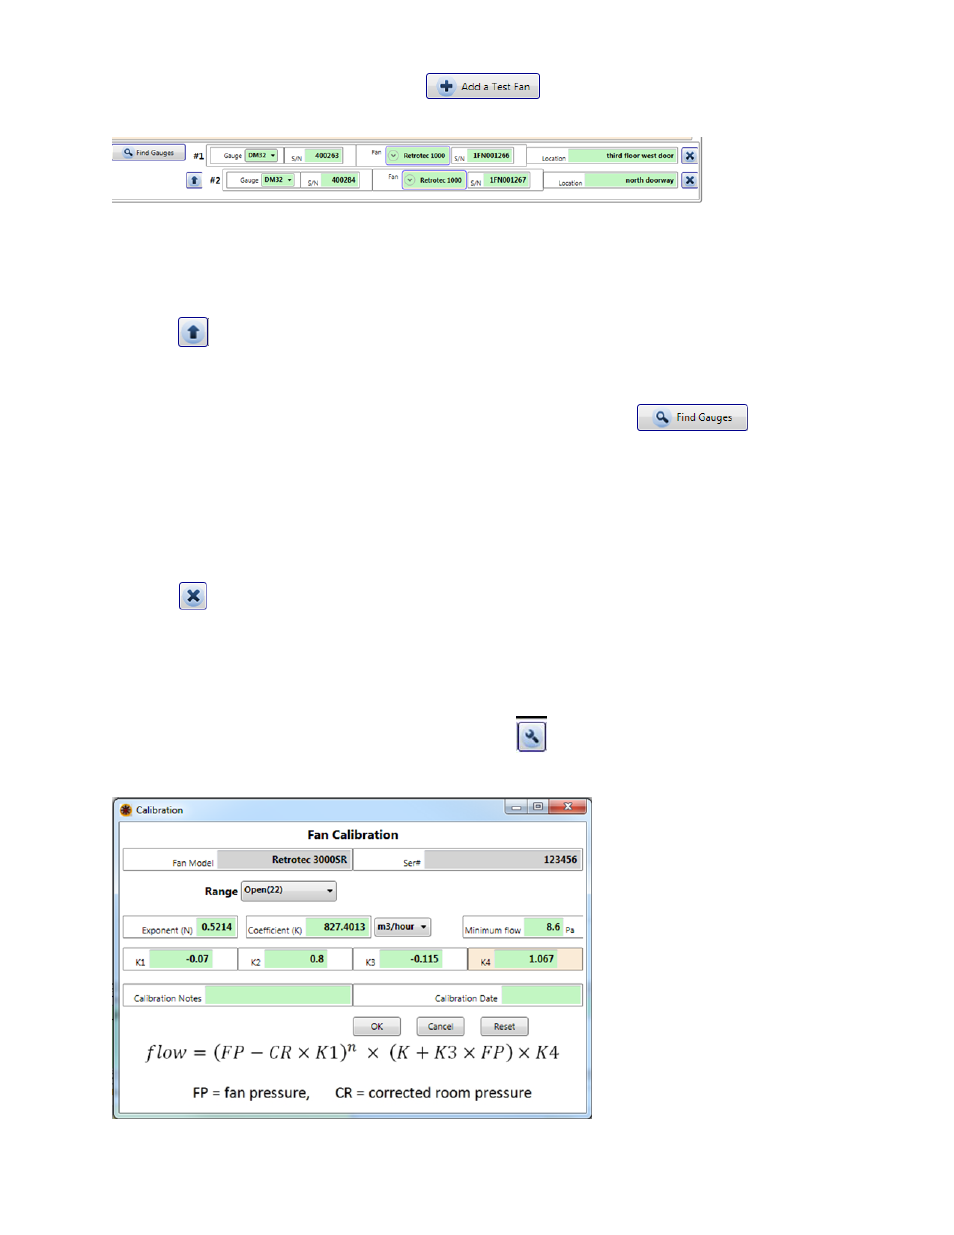
3.7 ATTMA required fan calibration factors
ATTMA requires that the fan(s) used in any test be calibrated by a third party calibration laboratory, and
that the corrections for the calibrations be made in the software program.
Click the small wrench icon beside the fan serial number:
Once clicked, the following screen will appear.