Retrotec FanTestic (ATTMA) User Manual
Page 24
rev-2014-10-27
Page 24 of 58
©Retrotec Inc. 2011-2014
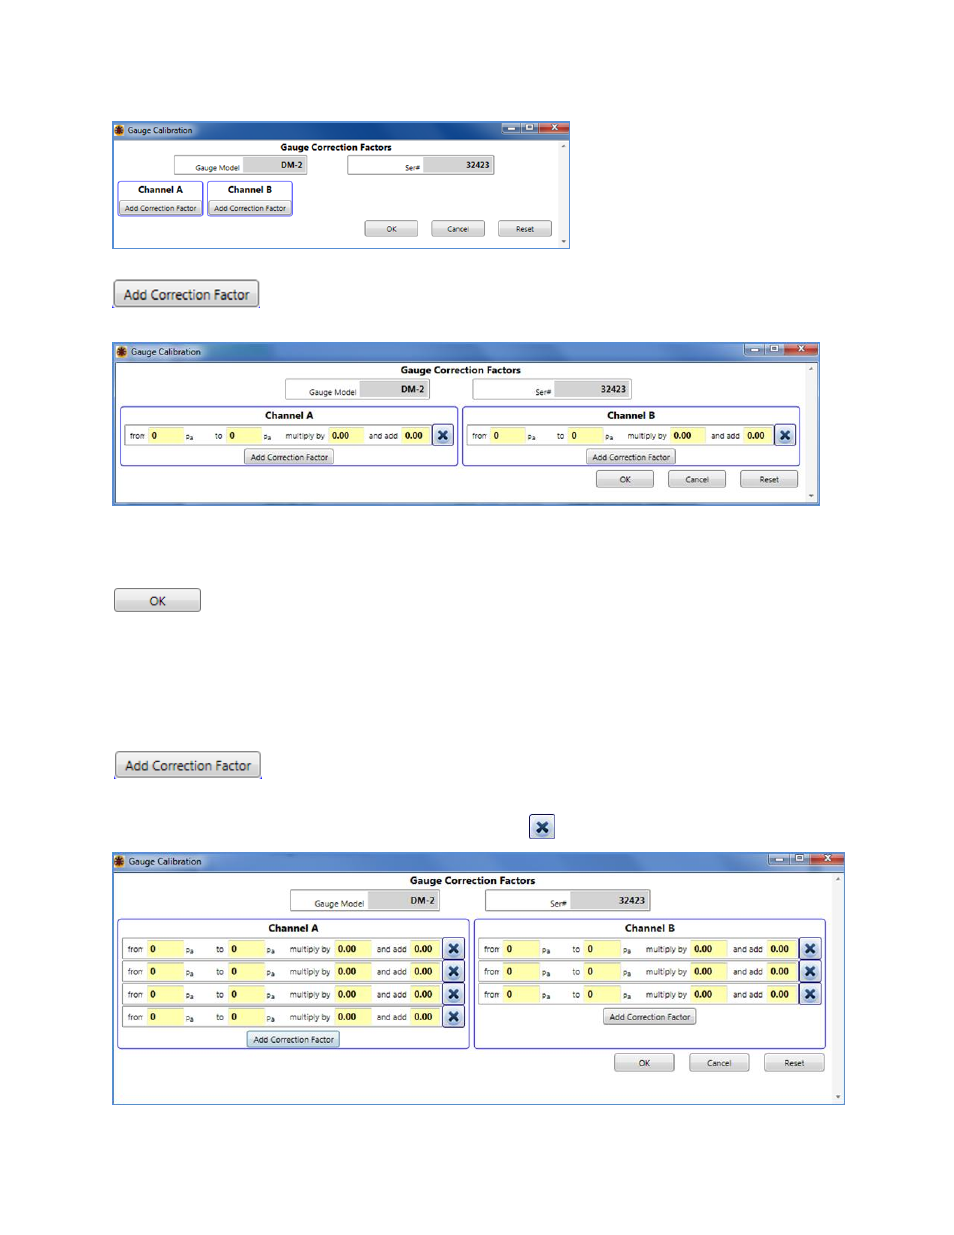
Select “Enter gauge correction factors directly” from the drop down, and the “Gauge Correction Factors”
dialog will open:
The Gauge Correction Factors window will originally contain no inputs for entry. Click the
button to Channels A and Channel B and a data entry box will open for each
channel:
Enter the pressure range for the correction factor values, then enter the correction factors directly into
the multiply by, and add fields. Once all entry fields are green (i.e. no yellow fields appear), click
. A 0 value may remain yellow, but this is okay – you can still click OK and the software will
operate properly.
FanTestic will save the correction factors to your computer’s local hard drive, and apply them to future
pressure readings/recordings on FanTestic using the gauge with the serial number being calibrated.
Separate correction factors can be provided for different pressure ranges so you can click
multiple times to add data entry lines for each set of correction factors you have
for different pressure ranges.
To remove a pressure range and its correction factors, click
.