Start the auto-test, Changing the range during an automatic test, 4 start the auto-test – Retrotec FanTestic (ATTMA) User Manual
Page 43: 5 changing the range during an automatic test
rev-2014-10-27
Page 43 of 58
©Retrotec Inc. 2011-2014
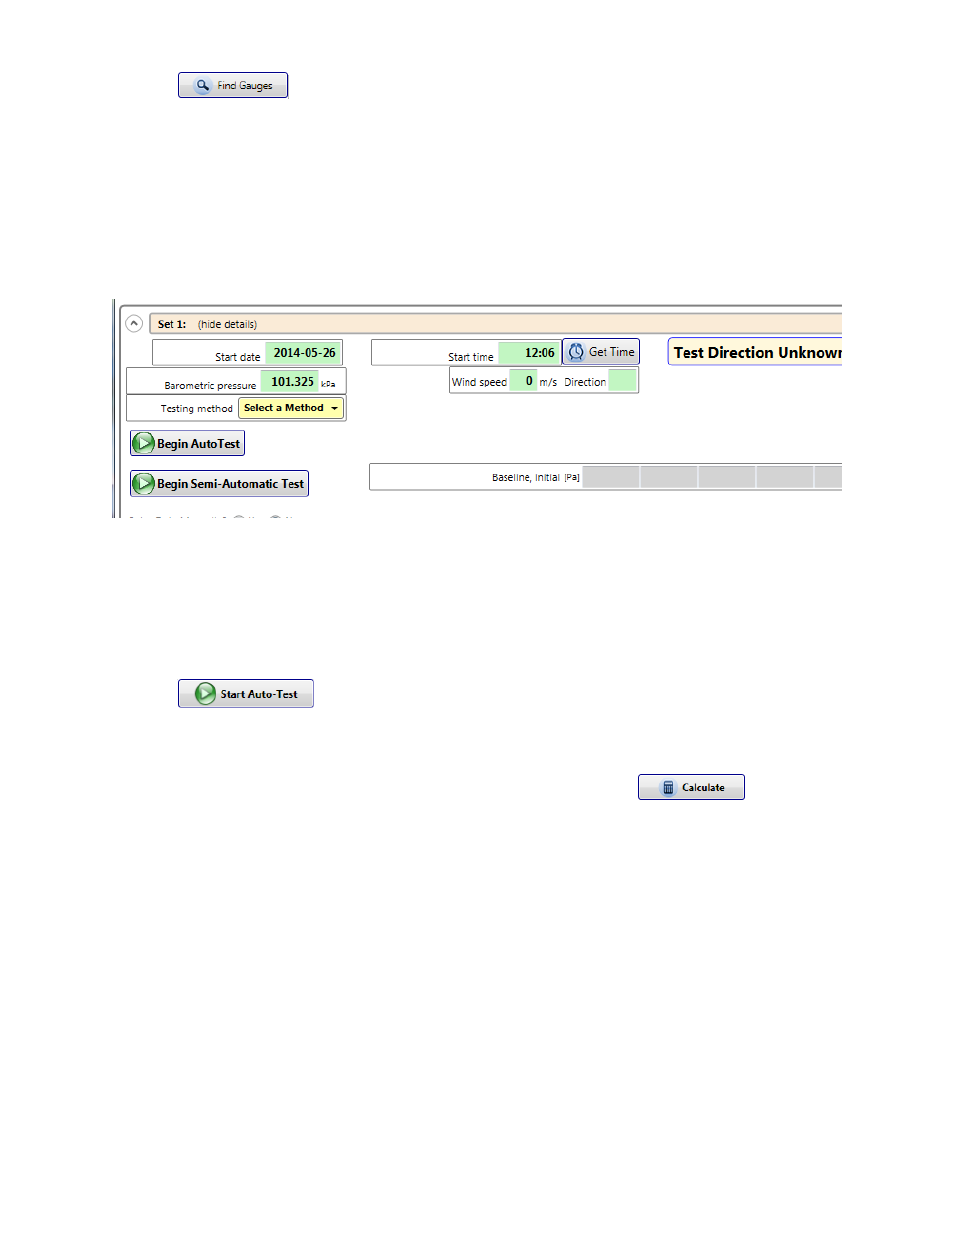
Click the
button. The FanTestic software will find the gauges and fill in serial number
automatically. The model of the fan will also be changed to whatever device is set on the gauge, but the
serial number of the fan must be entered manually.
The Range Configuration displayed on the gauge will be read in and used to create the fan pressure lines
in the data set.
If the device or range configuration is incorrect it can be changed in the software at any time after the
test is complete.
6.4 Start the Auto-Test
If the “Start Auto-Test” button is not visible, click on the “No” choice for the question “Enter Data
Manually?”. The software will ask if you want to lose any data entered.
If you have data entered in this data set that you wish to keep, start a new Data Set in which to capture
your automatic data, and then in the NEW data set click on the “No” choice for the question “Enter Data
Manually?”.
Click the
button. FanTestic will now capture data automatically, and new data will
be displayed on a regular basis until the test is completed.
The final temperature must be added manually in order to complete the test.
Data may be changed in any one of the green boxes but you must click the
button when
any input changes are made, to re-calculate the new results.
The Finish time will be filled in automatically at the end of the test on auto test mode, unlike manual
mode where it must be entered manually.
6.5 Changing the Range during an Automatic Test
The same issue may arise during an automatic test as in a manual test, in which the flow range must be
changed. FanTestic will automatically pause the test and request the tester to change ranges, if fan
pressures become too low or the induced pressure target cannot be reached.