Rose Electronics Xtensys User Manual
Page 20
XTENSYS INSTALLATION AND OPERATIONS MANUAL
14
Position (Default: X = 25, y = 45)
This option adjusts the screen position of the connection status box. Once set, this position is maintained at all video
resolutions. To change the connection status box position, select it from the menu and press [Enter]. Use the arrow
keys to position the status box anywhere on the screen and press [Enter] when the desired position is reached.
Do not set the screen position off the visible screen area. This could cause rainbows or bars of shaded video.
Valid position ranges are:
Horizontal: 0 – 64, Vertical: 0 – 99
Fadeout (seconds) (Default: 5 seconds)
Sets the amount of time the connection status box displays.
Valid fadeout times are 0 – 255 seconds. A value of zero disables displaying the connection status box; a value of
255 will cause the connection status box to always be displayed. If the connection status box does not display when
switching to a computer, increase the fadeout time. Some monitors will not display the connection status box if the
fadeout time is less than the time it takes the monitor to sync to a new video signal. To change the fadeout time,
select it from the menu and press [Enter]. Enter a valid new time in seconds and press [Enter].
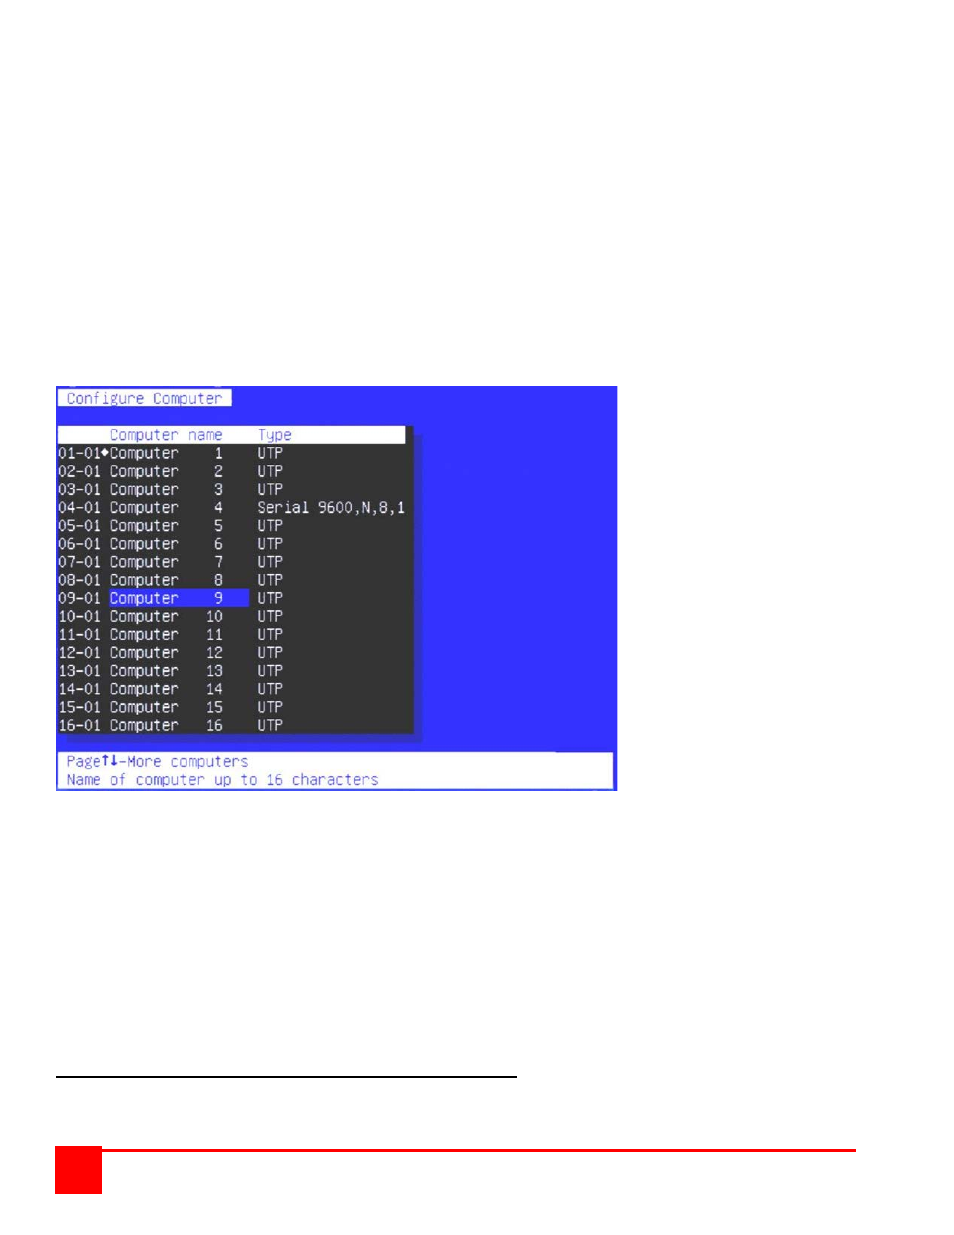
Configure Computers
Figure 5. Configure Computers
The “Configure computer” menu allows you to change each selected computers name and type. The left (untitled
column) indicates the logical location (RJ45 port) that a computer is connected to.
Computer name (Default: Computer x)
To change the computer name, select it from the menu and press [Enter]. An input box will display to enter a new
computer name. Type in the new name and press [Enter]. Names can be 16 characters in length, case sensitive.
Use the page up/down keys to show more computers.
Type (Default: UTP)
The type field defines to the system how the external equipment will be connected to each port, UTP or Serial.
Selecting the type field for a selected computer and pressing enter will display the selection choices for that port.
Select UTP or one of the serial options for each CPU (RJ45) port.
NOTE: DO NOT PROGRAM COMPUTER PORT #1 FOR SERIAL