Operating instructions – Rose Electronics Xtensys User Manual
Page 31
Operating Instructions
XTENSYS INSTALLATION AND OPERATIONS MANUAL
25
When you first start using a user station, it may require you to login. If the user station requires a login, a login box
will display. The login box appears when a Unit is powered on, when a user logs off, or when a preset time interval
passes with no keyboard or mouse activity. If a login is required, type in your User ID and press [Enter]. (User ID is
the user name defined on the configure user menu) If the user ID is validated, you can then type in your password
and press [Enter]. If the password is validated, the user station can be accessed. A user may login with the same
user ID and password at more than one user station. Both the User ID and password are case sensitive.
Once you have access to a user station, you can switch to any of the connected computers provided your security
profile allows access to that computer. To connect to a computer, you can use the “Direct CPU Connect” keyboard
command or the “Computer select” menu.
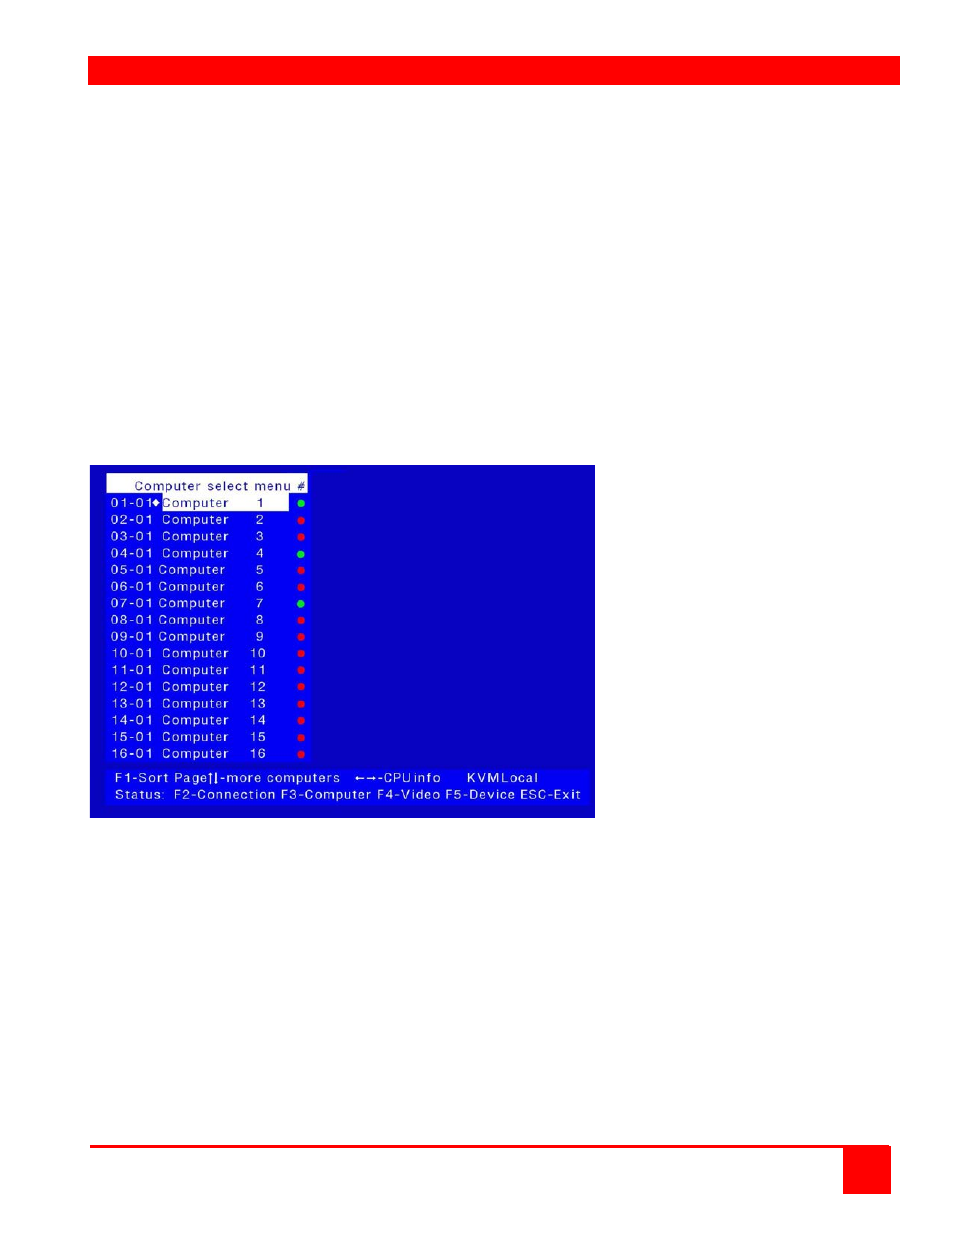
Figure 16 shows the Computer select menu. This menu is created from the system configuration. The configuration
used to produce the below menu is an XTR14 user station (4 port) and a 4 x 8 Xtensys switch. To invoke this menu,
press and release the left Ctrl key, then press the Esc key.
The first column indicates the Port # on the user station followed by the CPU port # on the Xtensys switch. Selecting
01-01 will connect port #1 on the user station to port #1 on the Xtensys switch. The computer connected to port #1
on the Xtensys switch would display on the user station’s monitor and the keyboard and mouse would control that
computer if authorized to do so. Using the page up or down arrow keys will display more computers. In this
configuration, pressing the page down key would display user port 03-01 thru 03-08 and 04-01 thru 04-08.
If the configuration was an Xtensys switch with 64 CPU ports, this screen would expand to show 01-01 thru 01-64,
02-01 thru 02-64, 03-01 thru 03-64, and 04-01 thru 04-64.
Figure 16. Computer select menu
Alternative or third party switching
The Computer Select menu allows you to perform alternative or third party switching. This alternative switching is
where, from the local KVM, you can switch any KVM station to any CPU port. On the Computer Select Menu in the
top row of the lower menu, there is the label KVM Local. This is the KVM station that will switch to a selected
computer. To perform this alternative switching:
1. Display the computer select menu (Right Ctrl key + ESC key)
2. Press tab key to select the KVM station to switch
3. Press the up / down arrow keys to select the Computer to switch the KVM station to
4. Press enter to switch all functions (keyboard/mouse/video) or Press “V” to switch only the video
From the Computer select screen you can also obtain additional CPU information. Use the up / down arrow keys to
select a computer, and then press the right arrow key. The screen shown in Figure 17 will display showing the
gathered information for that computer connection.