PLANET NVR-3280 User Manual
Page 79
32-Channel Rack Mount Network Video Recorder with 8-bay Hard Disks
NVR-3280
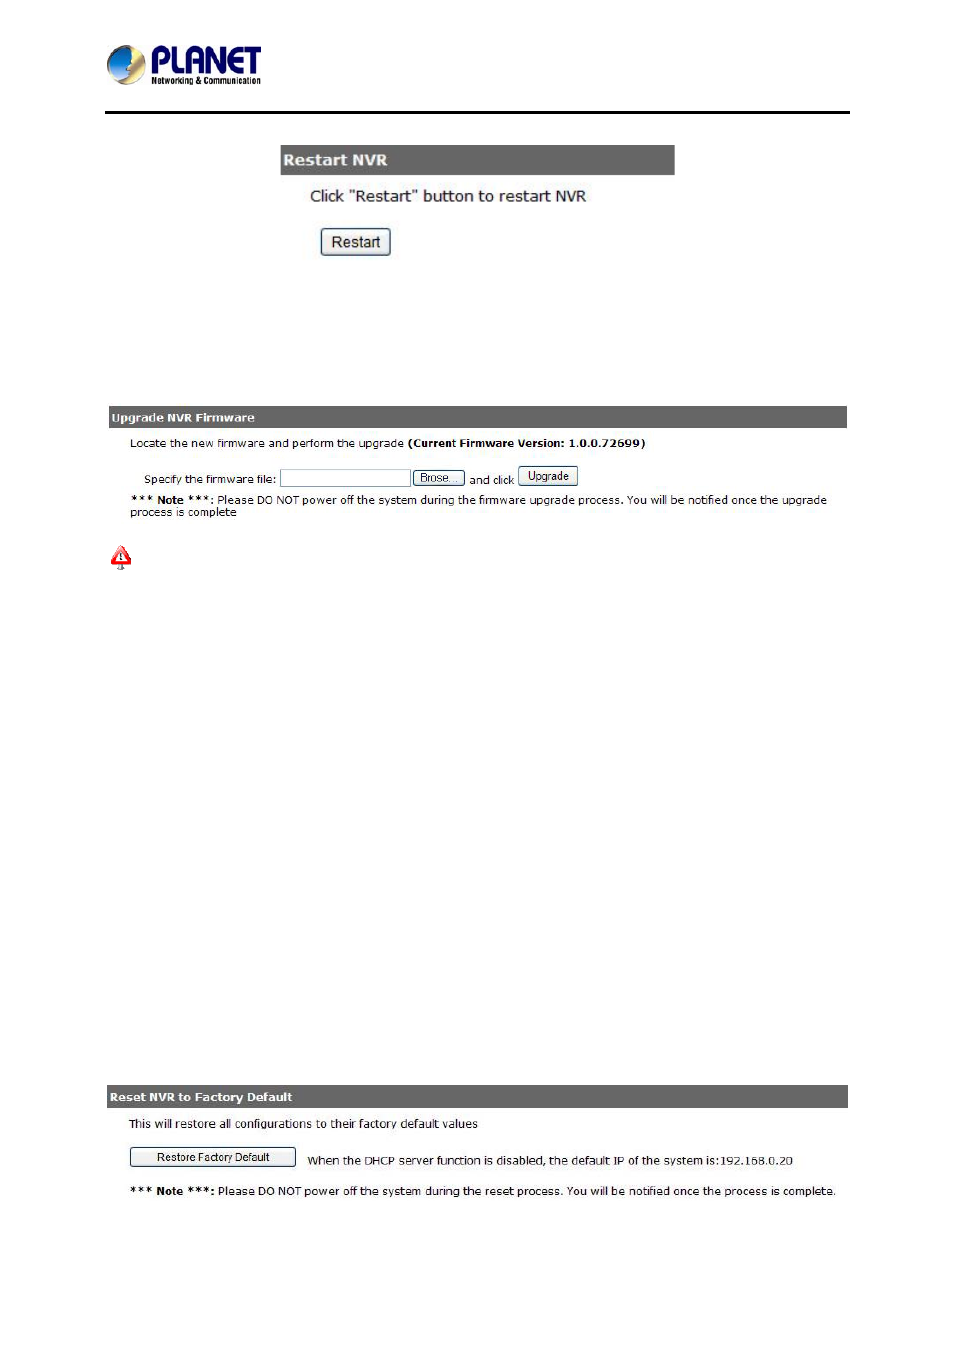
Simply click “Restart” to begin the reboot process and confirm the action.
The restart process should be displayed and you should be prompted back to the “Maintenance” page
after it is completed.
Firmware Upgrade
The firmware can be upgraded through Web UI or USB. Before upgrading firmware, please back up
configuration in advance.
** the firmware file comes with a “.tar.gz” file extension, please use the file as it is. DO NOT unzip it.
It’s normal that you may only see “.tar” as the file extension in Windows as the OS hides the known file
extension by default.
Upgrade through USB thumb drive
1. Prepare a USB flash disk and format with FAT or FAT32 format.
2. Place the firmware in the USB flash disk and make sure it’s placed at the top-level directory. Please
do not place the file in a folder. (Make sure to change the firmware file name to “firmware” and leave its
file extension “.tar.gz” as it is before placing the file to the USB disk.)
3. Plug USB flash disk into USB port on the NVR.
4. The System LED on the NVR will start to flash in amber. This indicates firmware upgrade is in
process.
5. *** Warning *** Please wait until upgrade process is finished. Interrupting the upgrade process may
cause system not to work anymore.
6. Wait until System LED remains solid in amber. This indicates firmware upgrade is finished.
7. Power off the NVR and remove the USB disk; power the unit back on again.
8. Restore configuration file back if needed.
Reset the NVR to Factory Default
To reset the recorder back to its factory default, click “Default” button and begin the process.
The process should be displayed and you should be prompted back to the “Maintenance” page after it is
79