Installing a lightning rod, Attaching a safety wire, Waterproofing the receptacle unit – Canon CR-X500 Outdoor 4K PTZ Camera with 15x Optical (White) User Manual
Page 8
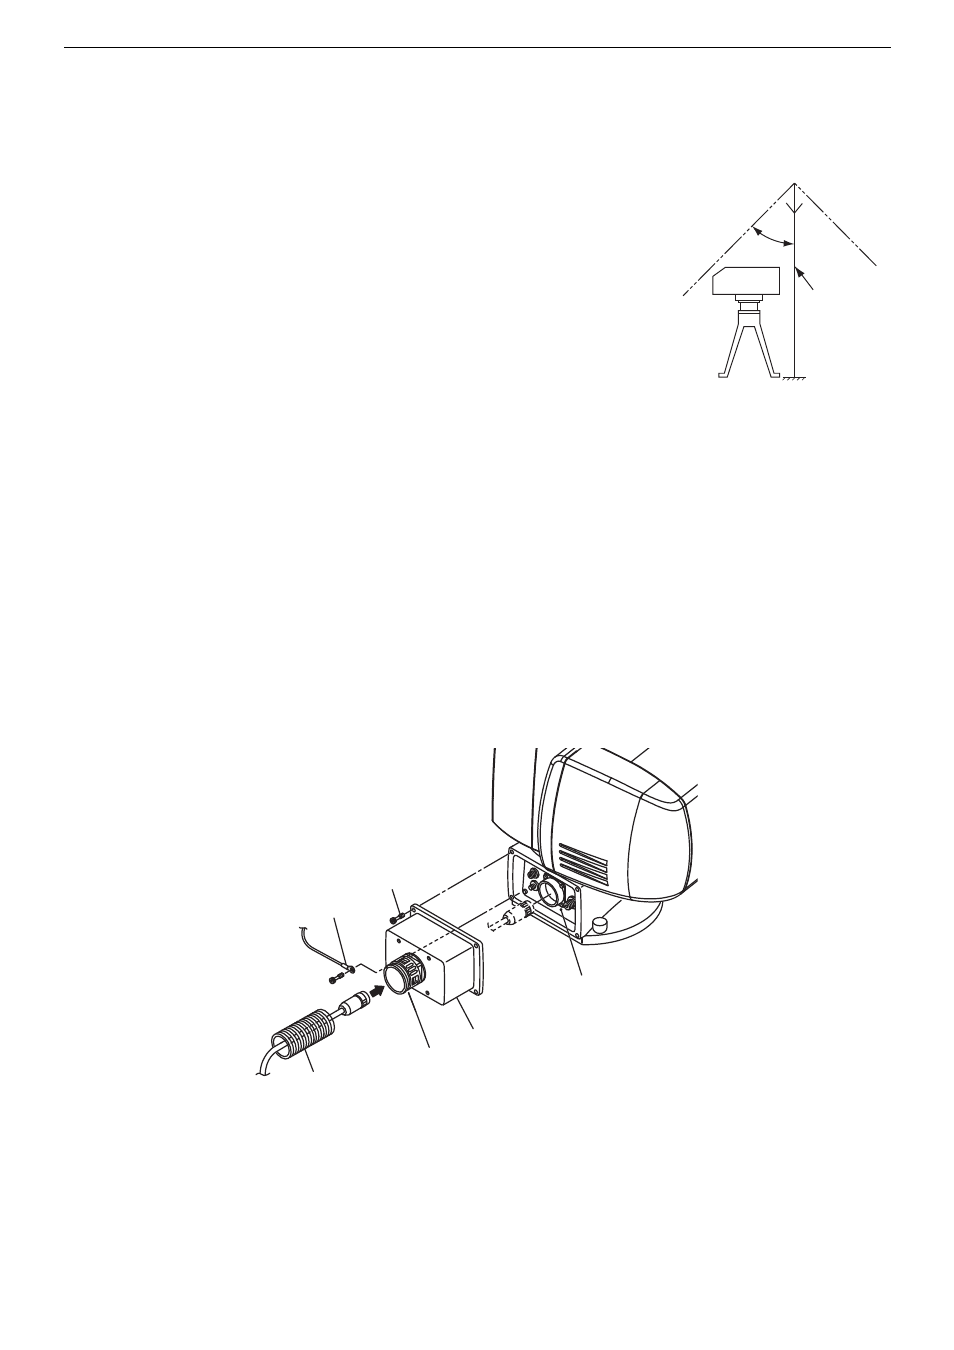
Installing a lightning rod
8
Installing a lightning rod
If precautions need to be taken against lightning in case the system is to be installed on a hill-top
or other such location, provide a lightning rod as shown in the figure.
Make sure that the system will not touch the lightning rod when the camera is panned.
In the case of a permanent installation, safety is further enhanced by providing a lightning-proof
transformer for the system's power supply.
Attaching a safety wire
In case a safety wire is necessary for the pan-tilt head, make sure to attach the wire to the handle section. When attaching the wires,
be careful that nothing blocks operation of the pan-tilt head.
Waterproofing the receptacle unit
Inspect the waterproof connector for looseness. After passing each cable through the waterproof tube and the waterproof unit, insert
the waterproof tube all the way into the waterproof connector until its tip touches the end and secure it in place. Put the end of the
waterproof tube in a safe place so that water, dust and moisture do not enter. Also, do not seal the end of the waterproof tube so as
to mitigate a pressure rise inside of the product caused by the temperature change. Connect each cable to the receptacle unit of the
main unit, and then secure the waterproof unit to the pan-tilt head using the supplied mounting bolts (x4).
Clamp the cables at appropriate intervals.
45°
Lightning rod
Receptacle unit
Waterproof unit
Waterproof connector
Waterproof tube (L = 500 mm)
RohrFlex: RF-36 FLEXA
Waterproof unit
mounting bolts (x4)
Fall prevention wire
(for waterproof unit)