Creating a new p roj e c t, Chapter 3: creating a new project – Argox Architect 1.11 User Manual
Page 18
14
3
A
RCHITECT
®
U
SER
’
S
M
ANUAL
Creating
a
New
P
roj
e
c
t
Chapter 3: Creating a New Project
Follow the steps below to create a new project:
Step 1: Configure Project Settings. See below.
Step 2: Create Nodes. See page 17.
Step 3: Create Links. See page 32.
Step 4: Create the Record File. See page 35.
Step 5: Compile and Simulate. See page 38.
Step 6: Configure the Communication Settings. See page 40.
Step 7: Download the Application to the Terminal. See page 41.
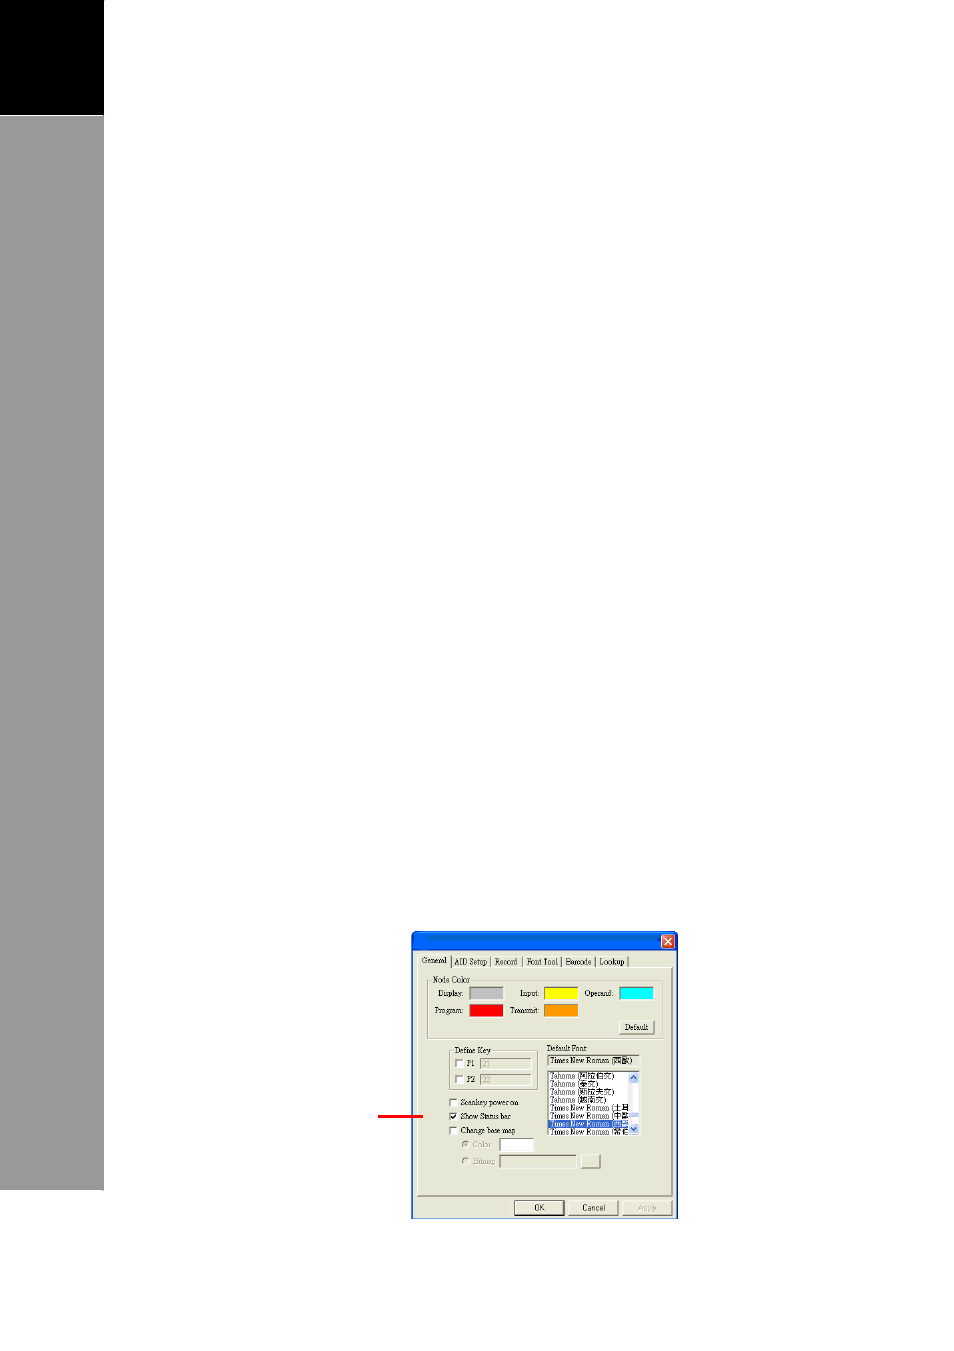
Step 1: Configure Project Settings
To open the settings page, click Define > Project or double
click on a blank area on the project window.
General Page
Define the color of each node as you want it to appear on the
project window.
1. Click on a color to open the color palette and select the
desired color. To apply the default setting, click [Default].
2. Define Programming Keys P1 & P2 ,if project requested
Check to display the
status bar on the
display node screen as
it appears on the
Terminal screen. See
page 18.
3. Click [OK].