Optional equipment, Fireback installation, For qualified installers only) – Avalon Firestyles 564 SS Gas Installation User Manual
Page 59
Optional Equipment
(for qualified installers only)
5 9
© Travis Industries
4 0 7 0 6 2 0
100-01188_000
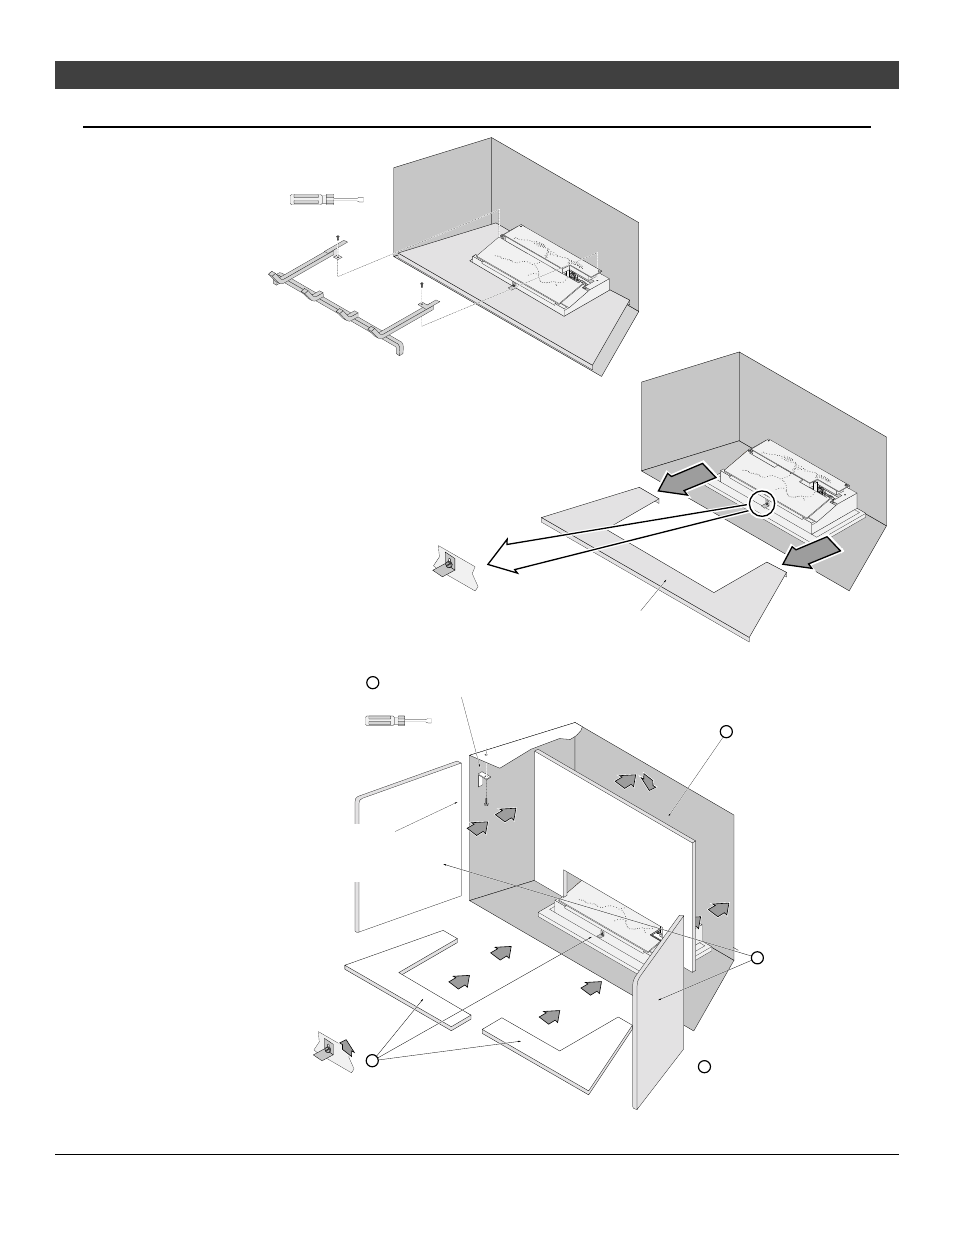
Fireback Installation
WARNING
Turn off gas to the
appliance and make
sure it has fully
cooled prior to
conducting service.
1
Remove the
glass frame and
logs.
2
Remove the
grate (replace
after fireback
installation).
Remove and
discard the
hearth plate.
3
Install the
firebacks
following the
directions
below. Select
either the
straight brick or
herringbone
brick pattern to
face outwards.
N O T E :
Due to the
construction of the
ceramic firebacks,
you may need to re-
position the
firebacks to achieve
the correct
alignment.
4
Restore the
fireplace to the
correct
configuration.
Remove the grate
(replace after fireback installation).
1/4" Nutdriver
Remove and discard
the hearth plate
Loosen this screw and
slide the bracket up.
Place the rear fireback in place. The side
fireback holds the rear fireback in place -
hold the rear fireback while installing the
side fireback.
Remove the clip and screw located on the
firebox ceiling near the front (both sides).
Place the side firebacks
in place.
a
1/4" Nutdriver
c
Replace the clips and screws
removed in step “a” to secure
the side firebacks..
e
d
NOTE: Place the fireback
so the vertical grout line on
the edge of the fireback is
facing the rear.
Loosen this screw and slide the bracket up. Place the floor
firebacks in place (under the bracket). Slide the bracket
down and tighten the screw to secure the firebacks.
b