Step five – merge & save – Honestech VHS to DVD 3.0 Deluxe User Manual
Page 45
45. VHS to DVD 3.0 Deluxe
Step Five – Merge & Save
When you are finished editing and customizing your video, you can click the
Preview button to review the entire contents of the Storyboard.
Merge and Save - If you are satisfied with your preview, use the Merge and Save
button to apply any changes (edits) and combine all the clips, transitions and/or images in the
Storyboard, into one new clip.
After clicking the Merge and Save button, you will be presented with a choice of four video
output formats to save your new clip as.
Choose the output format that matches the disc type you will be burning to, or that meets the
file requirements for watching on your computer or uploading to the internet.
*Typically you will want to remain with the same disc format option you chose in the Capture
screen prior to recording. For DVD, you would select the first option, DVD/VCD (MPEG), for
computer watching, AVI will suffice, and for internet sharing, WMV is recommended.
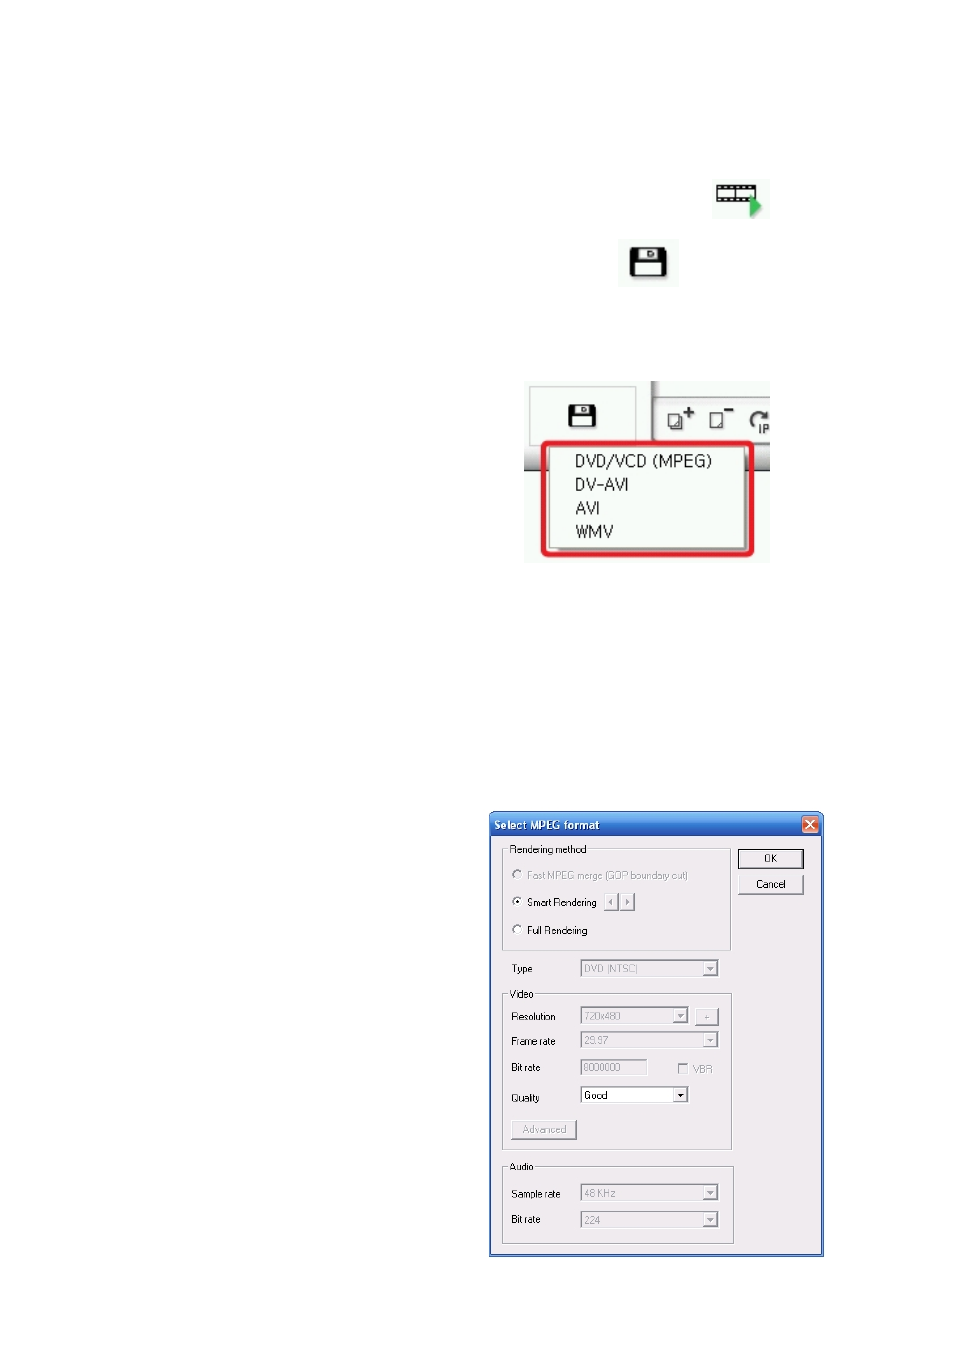
If the DVD/VCD (MPEG) output format is selected, a new window will open providing options
for the Rendering method (video calculation process), video format Type, Bitrate, Quality and
others. Make your settings based on the requirements for your recording.
For common DVDs, Smart or Fast Rendering are recommended as the best options for their
speed and good quality.
Full Rendering, which recalculates
every frame of video, provides slightly
better quality at a cost of much longer
render times.
Unless there is a specific need, the
remaining options can be left at their
default settings.
Additional information regarding the
remaining video output formats and
render options can be found in the
Merge and Save section of the
Appendix.