Honestech VHS to DVD 3.0 Deluxe User Manual
Page 46
46. honestech
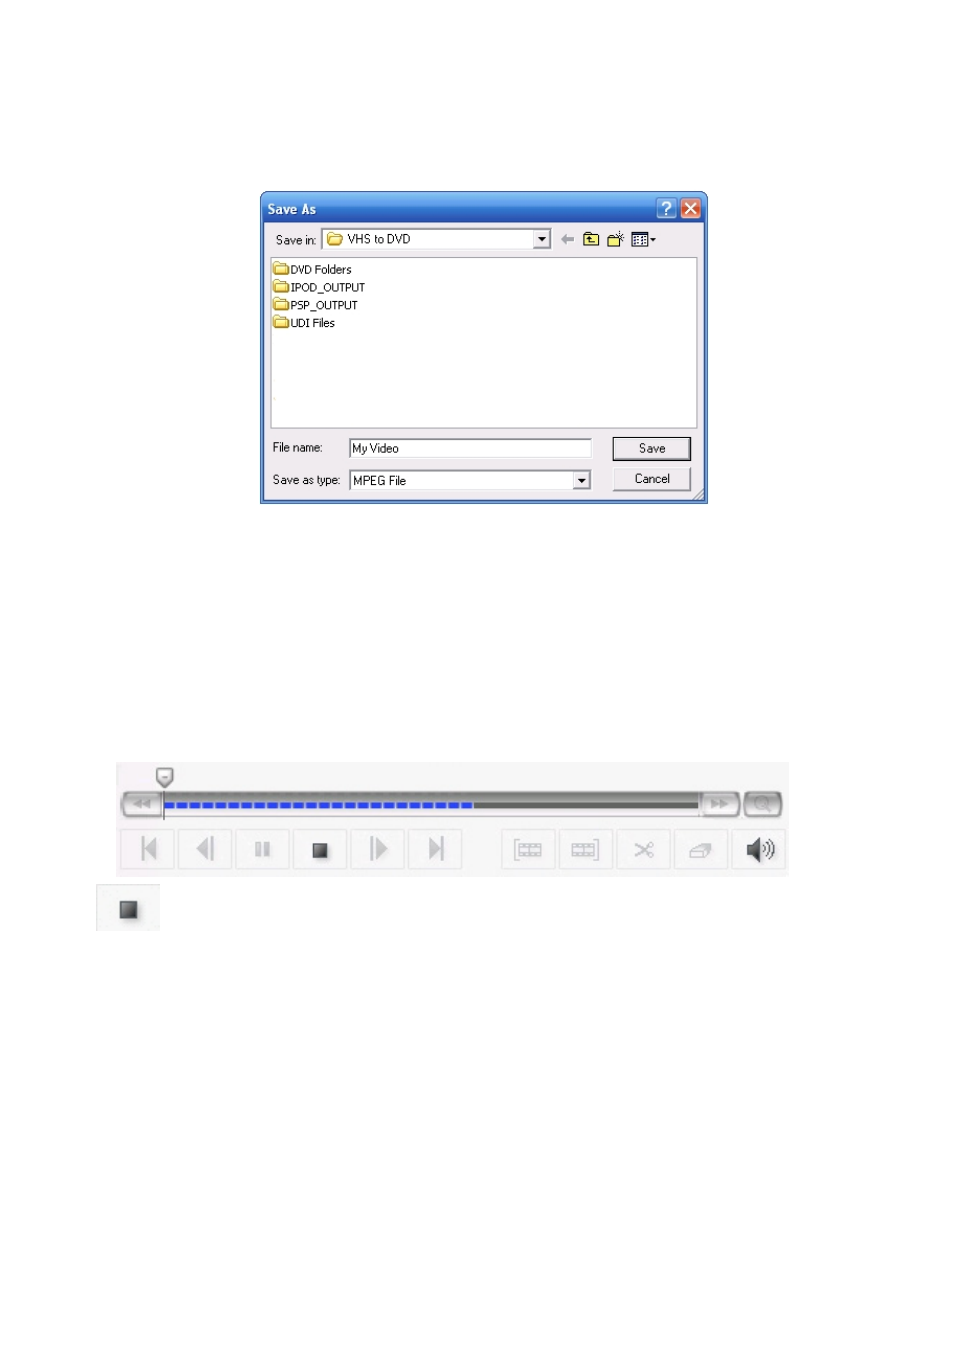
Once you have made your rendering settings click the OK button to proceed to the ‘Save As’
window.
Provide a descriptive File name that matches the Storyboard contents and save to a familiar
location on your hard drive.
*By default the program will save to the VHS to DVD folder inside your ‘My Documents’ folder.
During Merge and Save, the Storyboard contents will play in slow-motion in the Preview Panel.
This is the rendering process at work, and can take a few minutes or up to several hours,
depending on the length of video in the Storyboard and the rendering options selected.
The Timeline below the Preview Panel will display the rendering progress in blue dashes.
Stop: Use the Stop button below the Timeline to cancel the rendering process at
any time. *If the rendering process is canceled, no new or partial clips will be created.
All other options will be disabled during the Merge and Save to prevent any disruptions to the
rendering process.
When the Merge and Save is complete, the Storyboard contents will appear as a new video
thumbnail in the Clip panel.
Now you can repeat the process to edit more clips, or move on to the Burn screen and write
your edited video to disc.