Assembly instructions, Assembly procedure (continued) – Kleenmaid BBQ3BF User Manual
Page 11
Kleenmaid Professional - Outdoor Cooking Centres
11
Assembly Instructions
Assembly Procedure (Continued)
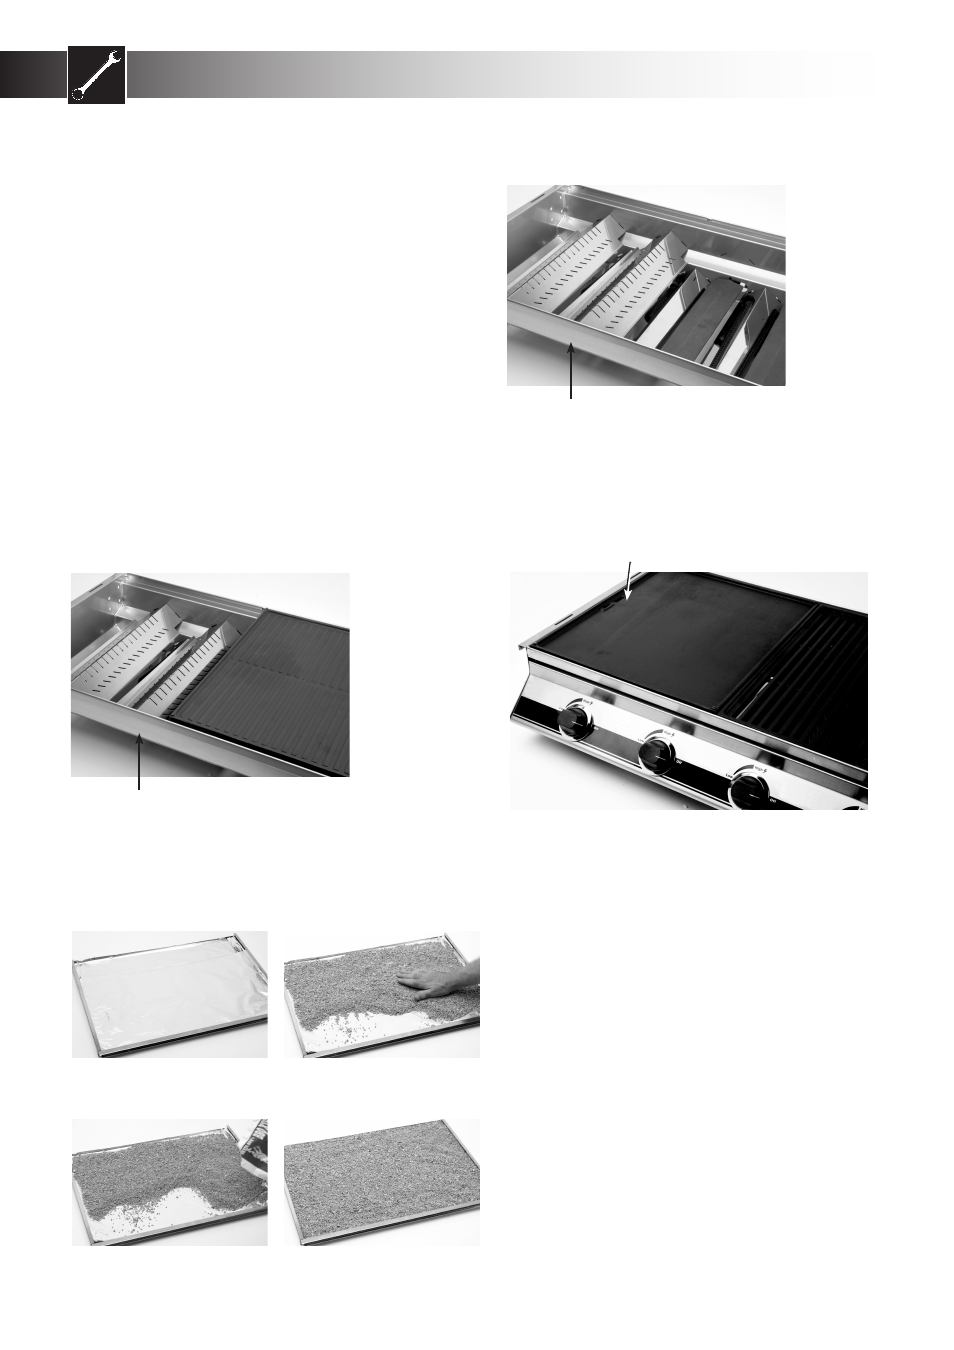
Fitting The Cooking Plates And Grills
We recommend fitting the plate to the left-hand side
of the barbecue frame (with the drain hole to the
extreme left). The grill(s) can be fitted to the right
hand side of the barbecue frame. (The grill(s) must always
be positioned over the Vaporizer grids). See Fig 14.
Kleenmaid Professional Series 3 burner barbecues
come standard with 1/2 plate and 1/2 grill and are
approved for use with a maximum of 50% plate over
the entire cooking area. Do not replace the grill with
another plate as this will cause severe heat damage to
the appliance.
Kleenmaid Professional Series 4 & 5 burner barbecues
come standard with 1/3 Plate and 2/3 grill and are
approved for use with a maximum of 2/3 Plate. Do
not cover the entire surface of the barbecue frame
with plates as this will cause severe heat damage to
the appliance.
Fitting The Grease Tray
Neatly line the drip tray with a couple of sheets of
aluminium foil. See Fig. 15. Cut the foil to shape and
make sure that the foil sits on the bottom of the tray.
Fold over any overhanging edges or corners of the
foil so that it does not foul in the tray sliders on the
bottom of the barbecue frame. The foil will aid in
clean up & help reduce leakage.
Fill the tray with a 6mm (1/4”) layer of non-
combustible absorbent material. See Fig. 16, 17 and
18. We recommend BBQXSORB available by phoning
the nearest Kleenmaid store on 13 13 08. Change the
foil and absorbent material regularly. This will reduce
the likelihood of a drip tray fire. DO NOT USE kitty
litter or similar products as they will cause drip tray
fires.
Fig. 13
Rear of Barbecue
Fig. 15
Fig. 16
Fig. 17
Fig. 18
Fig. 12
Rear of Barbecue
Fig. 14
Grease drain hole