Stainless steel cart assembly instructions – Kleenmaid BBQ3BF User Manual
Page 22
22
Kleenmaid Professional - Outdoor Cooking Centres
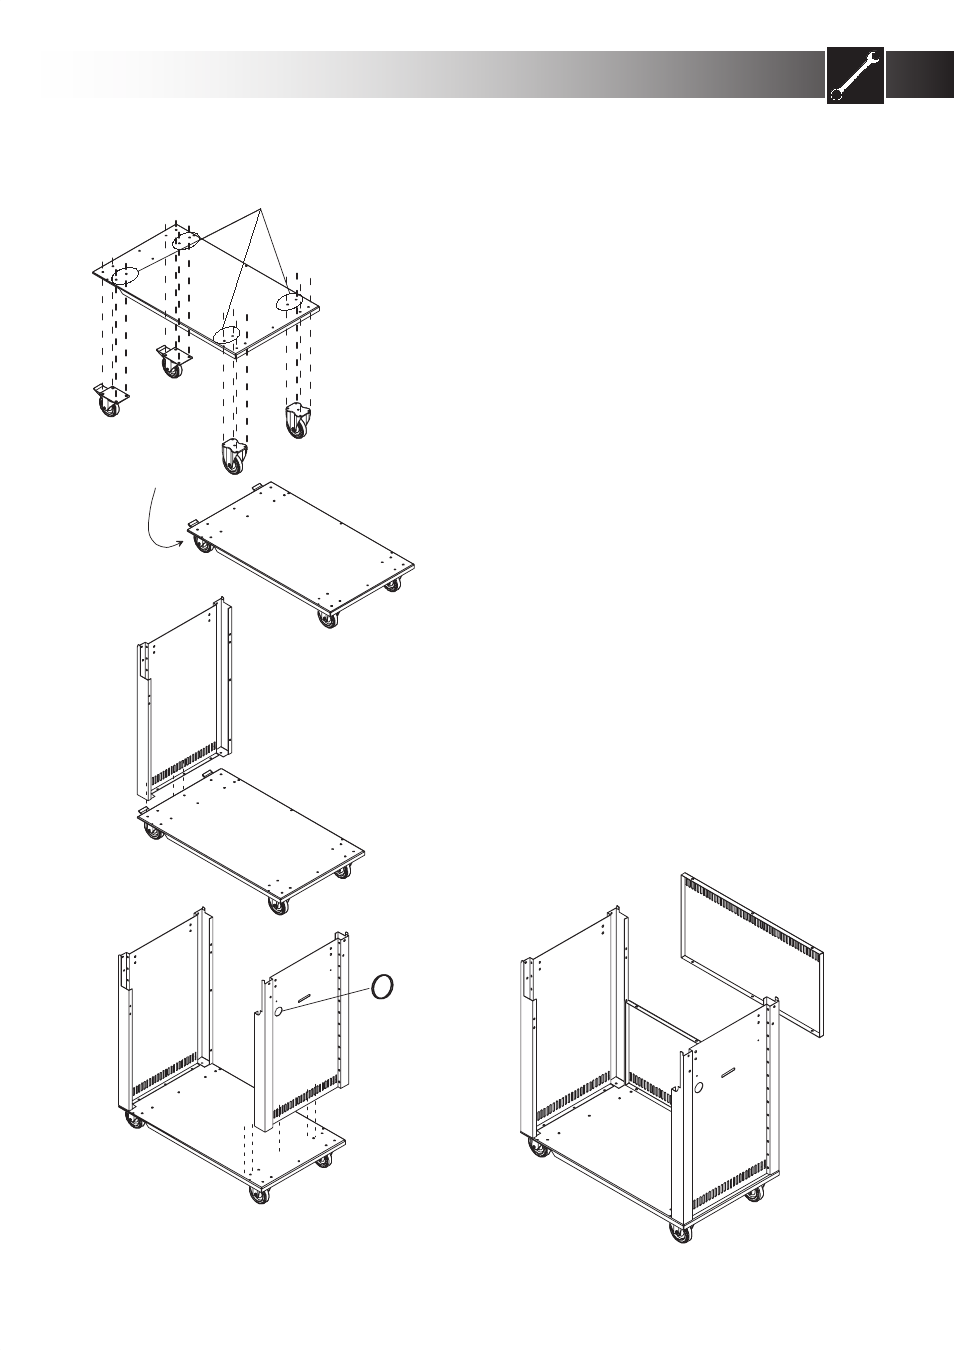
1. Attaching The Castors
There are four castors included in the trolley pack.
Two of these castors are fixed and two are swivel/
lockable. Ensure that the lockable castors are fitted
on the left-hand side of the trolley base plate. The
left-hand side is recessed to allow the lockable
castors to freely rotate in any direction.
There are four M6x10 screws, nuts and washers
provided for each castor assembly. When fitting the
castors only fit the inner screws first. The remaining
screws are fitted when you are assembling the left
and right side panels to the trolley base plate. See
step 1 and 2. Mount the swivel/lockable castors to
the left hand side first then fit the remaining fixed
castors to the right hand side. See diagram 1.
Some of the screws needed for fitting the castors
are also required for fitting of the side panels. When
fitting the castors only fit the inner screws first. The
remaining screws are fitted when you are assembling
the left and right side panels to the trolley base plate.
2. Trolley Body LH Side
Assemble the main body by bolting the trolley base
plate and the left-hand side panel together using five
M6x10 Screws, nuts and washers. Ensure that the
trolley base plate is correctly orientated. The recessed
area of the base plate must be on the left-hand side
and must be mounted to the Left-hand side body
panel. See diagram 2.
3. Trolley Body RH Side
Next, bolt the right side panel to the trolley base
plate using five M6x10 Screws, nuts and washers.
The right hand side trolley panel has two holes
(40mm in diameter) located at the side and rear
of the panel for locating of the gas hose to the
barbecue and optional side burner. Fit the 40mm
grommet to the hole.
See diagram 3.
Stainless Steel Cart Assembly Instructions
Fit the screws, nuts and washers
to the inner holes first. The outer
holes are completed when the
side panels are fitted.
The recessed area must be
on the left hand side
1
2
3
Fit Grommet
to Hole
4