Stainless steel cart assembly instructions – Kleenmaid BBQ3BF User Manual
Page 24
24
Kleenmaid Professional - Outdoor Cooking Centres
Stainless Steel Cart Assembly Instructions
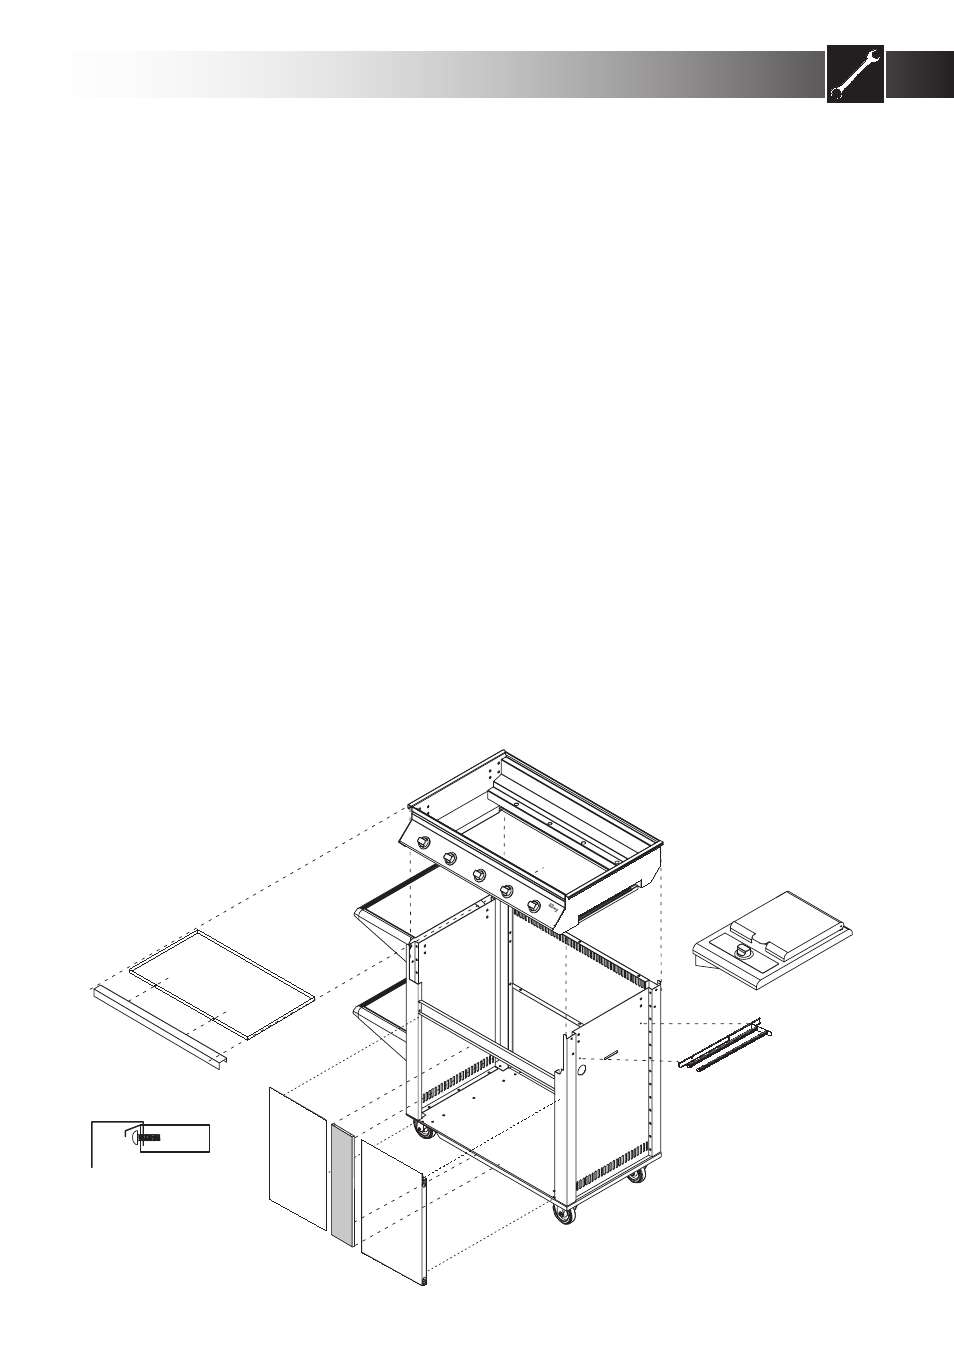
7. LH Side Shelves
Remove each side shelf from its carton and mount
the plastic end cap to the side shelf using the two self
tapping screws and fibre washers included in the side
shelf pack. The fibre washers fit between the moulded
end cap and the return on the stainless steel side
shelf. Mount the side shelf using four M6x10 screws,
nuts and washers provided. When fitting the top shelf,
fit the screws through the slotted holes. The two
round holes are to be used only when the side shelf is
to be fitted in a lower position. See diagram 7 previous
page.
8. Towel Rail
The towel rail can be fitted on either side of the
barbecue. Remove the towel rail from its packaging
and then remove the two plastic end caps from the
ends of the towel rail slider frame. Mount the towel
rail to the barbecue side panel using the two M3x10
Phillips head screws, nuts and washers provided. See
diagram 8.
9. Drip Tray And Dress Fascia Assembly
Unpack the barbecue from its carton and remove the
drip tray from the barbecue. Now fit the Stainless
steel Fascia to the Drip tray using two M3x10 Phillips
head screws nuts and washers. Fit the drip tray to the
barbecue after the barbecue has been installed into
the trolley frame. See diagram 9.
10. Barbecue Installation
Mount the barbecue into the trolley frame, ensuring
that the short gas hose (for the side burner if fitted)
fits through the 40mm diameter hole on the side
panel. This will connect to the valve inlet on the side
burner. Ensure that the holes on the body of the
barbecue frame line up with the locating holes on
the sides of the trolley. Secure the left hand side of
the barbecue frame to the trolley using four M6x10
screws, nuts and washers.
Secure the left-hand side first, then the right hand side
when you are fitting the side burner.
See diagram 10.
11. Side Burner
When fitting the side burner ensure that the barbecue
is installed in the trolley first. Using four M6x10
screws, nuts and washers mount the side burner to
the right side of the trolley frame.
See diagram 11.
For more detail on the side burner installation see the
instructions that come with the side burner.
The upper hinge pins must now be located in the
corresponding holes on the underside of the cross
brace. Some adjustment of the cross brace will be
required. When the correct alignment between the
doors and cross brace has been achieved, ensure
that the bolts and nuts holding the cross brace to the
trolley frame are tightened firmly. To open the doors
simply pull gently on the top of the doorframe. See
diagram 12.
10
11
12
9
8
Back edge of Dress
Fascia must overlap
the front edge of
drip tray
Drip tray