Stainless steel cart assembly instructions – Kleenmaid BBQ3BF User Manual
Page 23
Kleenmaid Professional - Outdoor Cooking Centres
23
Stainless Steel Cart Assembly Instructions
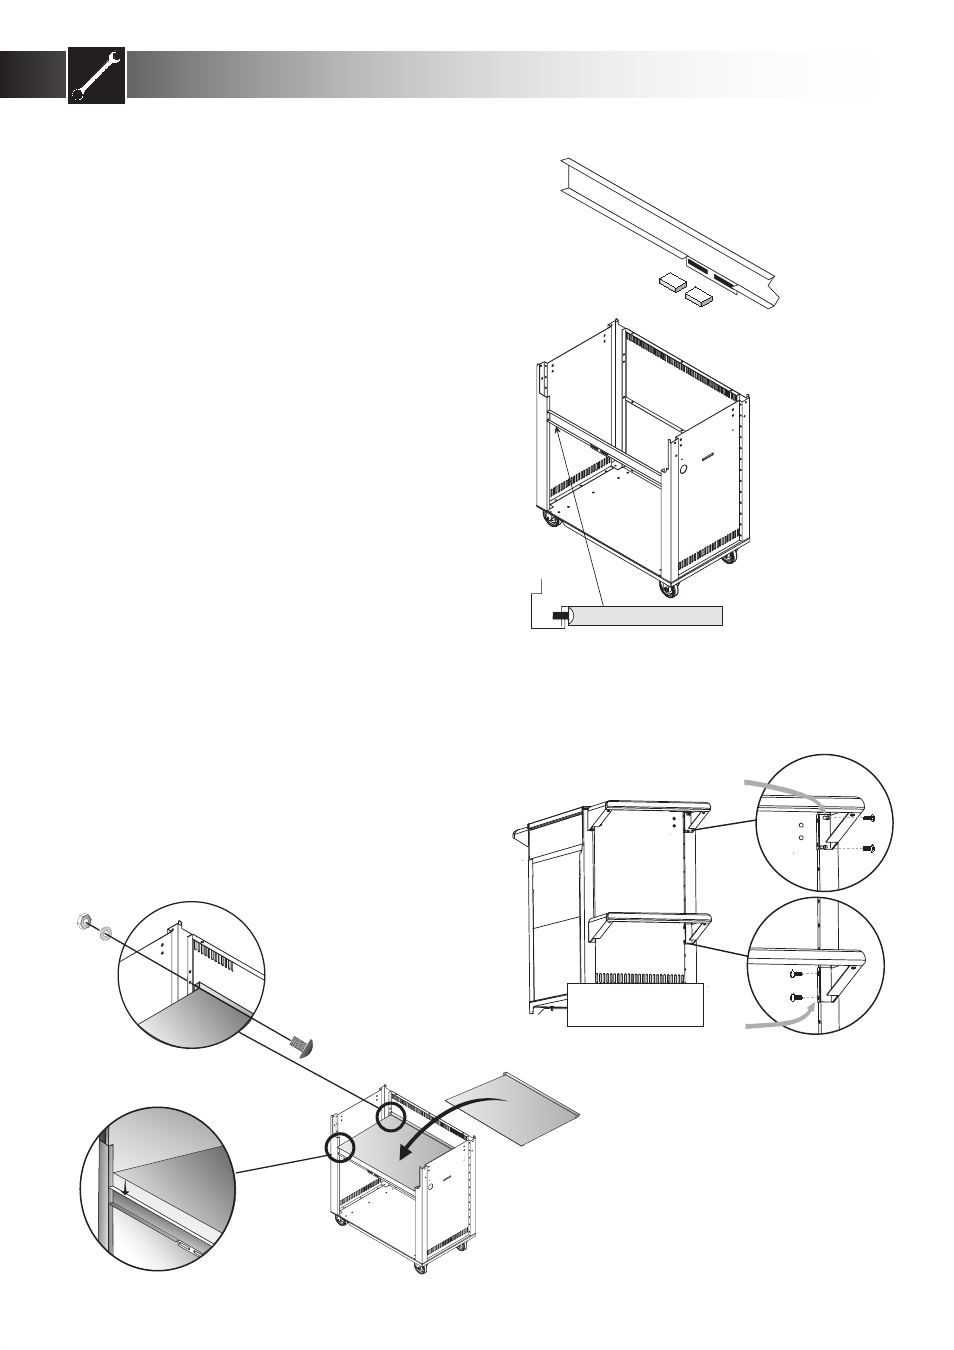
5
Cross Brace Top View
Cross brace end section
must overlap the return
on the side panel
5A
When fitting the side shelf in
the top position, screws must
be located in the slotted holes.
When fitting the side shelf in
the lower position, screws must
be located in the round holes.
7
4. Rear Panels
Fit the two rear panels sections to the rear of the
trolley using the M6x10 screws, nuts and washers
provided. It is easiest to fit the rear panels one at a
time. Fit the first panel so that the vents are positioned
at the bottom (closest to the trolley base). Loosely
finger tighten the screws & nuts to hold the panel in
place. Now fit the second panel now with the vents
positioned at the top using the M6x10 screws, nuts
and washers provided. See diagram 4 - see previous
page.
Note: Some slack is required in the trolley frame prior
to fitting the barbecue frame in place, therefore it is
best to do a final tighten with a spanner or wrench
after the barbecue has been fitted to the trolley.
5. Front Cross Brace
First, fit the magnets to the cross brace by pushing
them into the slots on the front of the cross brace.
See diagram 5. The front cross brace must be fitted
so that the hinge pin holes face downwards so that
they engage correctly with the top of each door. Fit
the cross brace between the left and right body panels
using four M6x10 Screws, nuts and washers. Do not
fully tighten until after the doors and center panel have
been fitted to the trolley frame. (Step 11) Ensure that
the ends of the cross brace overlap the returns of the
left and right side panels. See diagram 5A.
6 Fit Separator Panel
Your trolley includes a separator panel to completely
close off the bottom cabinet from the barbecue frame.
(fig 6) The front edge of the panel simply rests on the
cross brace (6a). The back edge of the panel screws
into the lower of the two middle holes in the top back
panel (6b). Use an M6 screw, nut and washer on each
side.
6
6a
6b