Roasting hood assembly instructions – Kleenmaid BBQ3BF User Manual
Page 17
Kleenmaid Professional - Outdoor Cooking Centres
17
Roasting Hood Assembly Instructions
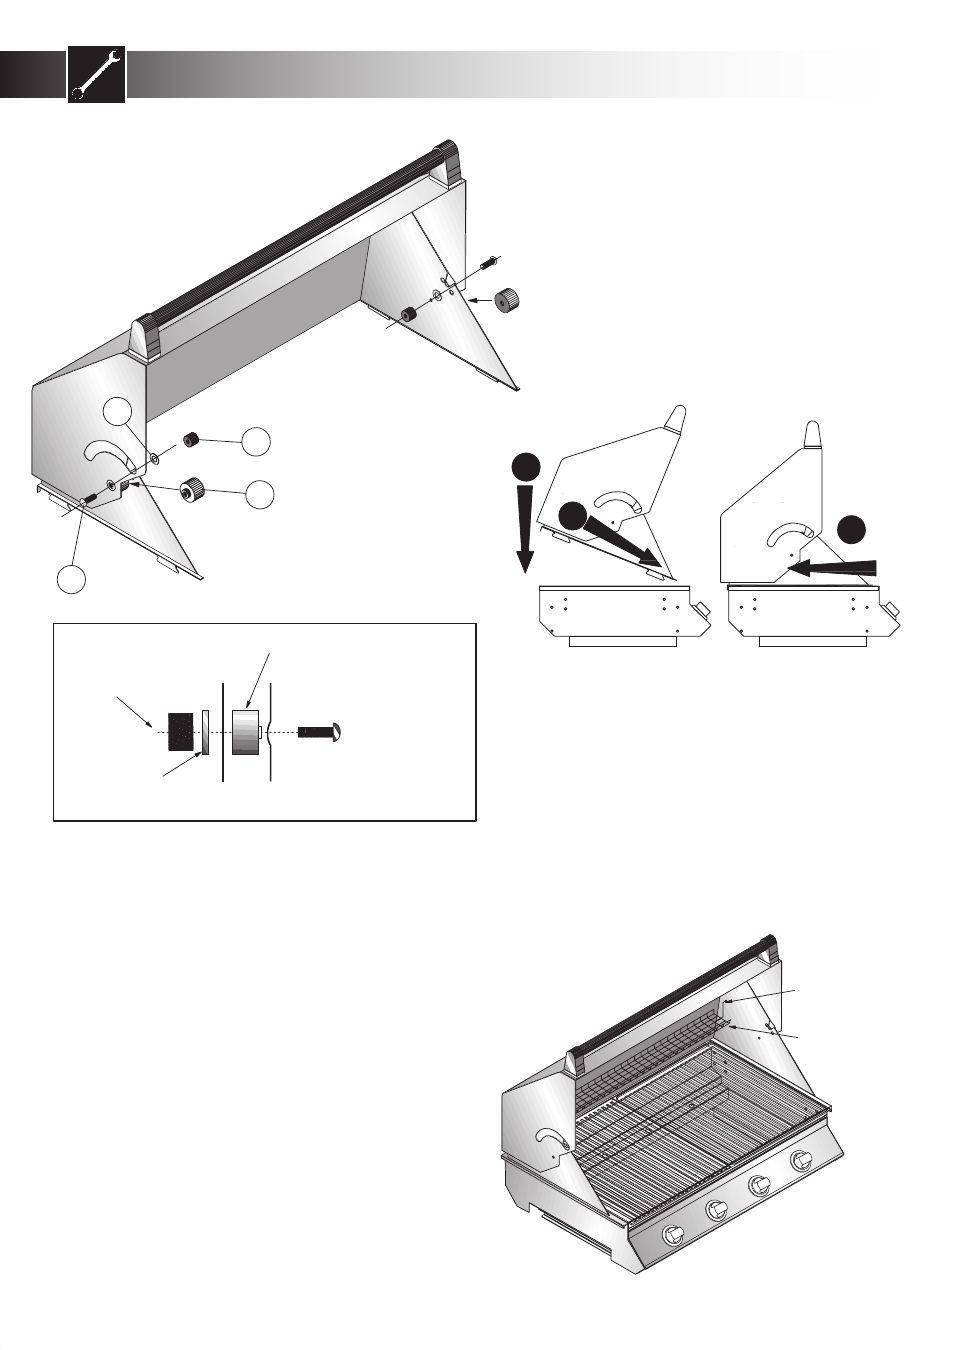
5. Fitting The Roasting Hood To The Barbecue
There are four securing lugs (two each side) fitted to
the base of the roasting hood. These lugs correspond
with the slots on the left and right hand side of the
top of the barbecue frame. Using the lifting points
on the hood base, lift the hood into position over
the top of the barbecue and guide the front lugs into
the front slots (a). Then allow the rear of the hood to
gently drop into position so that the rear lugs position
themselves in the rear slots (b). When the hood is in
place, push it to the rear of the frame to ensure that
the lugs are engaged in the slots (c).
See Fig 5.
6. Fit Warming Rack
The warming rack sits in the saddle at each side of
the hood. The length may be adjusted if necessary by
stretching or compressing the uprights to suit.
See Fig 6.
7. Wash Roasting Hood Thoroughly Before Use
Wash the Roasting hood thoroughly with warm soapy
water or an approved non-abrasive cleaner before use.
Use a suitable stainless steel cleaner to remove all
fingerprints prior to lighting and operating barbecue.
If not removed, fingerprints will discolour the stainless
steel surface.
Fig 4A
16
12
14
6A
Right hand side shown - Flip orientation for left hand side
(12) Pivot Screw (M6 x 20mm)
(14) Pivot Spacer
(15) Metal Flat Washer
(16) M6 Knurled Nut
Fig 4B
Fig 5
1
2
3
Warming Rack
Adjustable
pivot arm
Fig 6