3 preparing – a good preparation is everything – MacroSystem Arabesk Ver.6 User Manual
Page 12
12
setting is selected, the burning speed will automatically be
adjusted for the blank disc that has been inserted .
Tip: As a rule, ‘auto’ should always be selected here. Only
when certain discs cause problems, should a burning speed be
set manually.
You also have the possibility to use the ‘Reset to factory
defaults’ button to restore your Arabesk product to its original
settings . Additionally, the menu templates you have created
yourself can also be deleted .
CAUTION, after confirming the confirmation prompt with OK,
you will lose
all disc projects in Arabesk, not only the current
one . Bogart SE projects will remain unchanged . You will nor-
mally never need this option . It should only be helpful in case
of technical problems .
If you have a system with two drives, such as a Casablanca
Karat, you will also have the option ‘Use two drives’ which
you will be able to select by putting a checkmark next to it .
This option will also appear when you are using an additional
external drive .
Tip: The changes in this menu will affect all disc projects.
2.2.4 Miscellaneous
Under this menu item, you will get information about the
inserted medium as well as about the built-in drive in your
device . Here, you have the opportunity to play a Video DVD
and to copy a disc that was burned with Arabesk . When you
want to copy a disc, clicking on this button will first instruct
you to insert the original disc and subsequently an empty
disc . The corresponding drives will be opened automatically
to allow this . You may also erase a rewritable disc (which can
be recognized at the abbreviation RW, such as DVD – RW) by
clicking on the ‘Erase CD/DVD-RW’ button .
Before the disc is erased, a dialog window opens in which you
have to confirm with Yes that the data on the inserted disc
should be erased . Click on No, should you not wish to erase
the disc .
If you have a device with two drives, a dialog field will appear
asking for which drive the corresponding option should be
activated . Click on the ‘Drive 1’ or ‘Drive 2’ buttons to select
the drive you need .
If you have installed the ‘Disk-Transfer’ add-on program on
your device, Disk-Transfer Export will be available here .
Tip: Erasing a disc may take from a few minutes up to two
hours, depending on the disc and the installed drive.
A Blu-ray RE does not need to be erased, same for a DV-
D+RW. These media are overwritten directly, simply by burning
a new disc.
2.3 Preparing – A good preparation is
everything
2.3.1 Movies
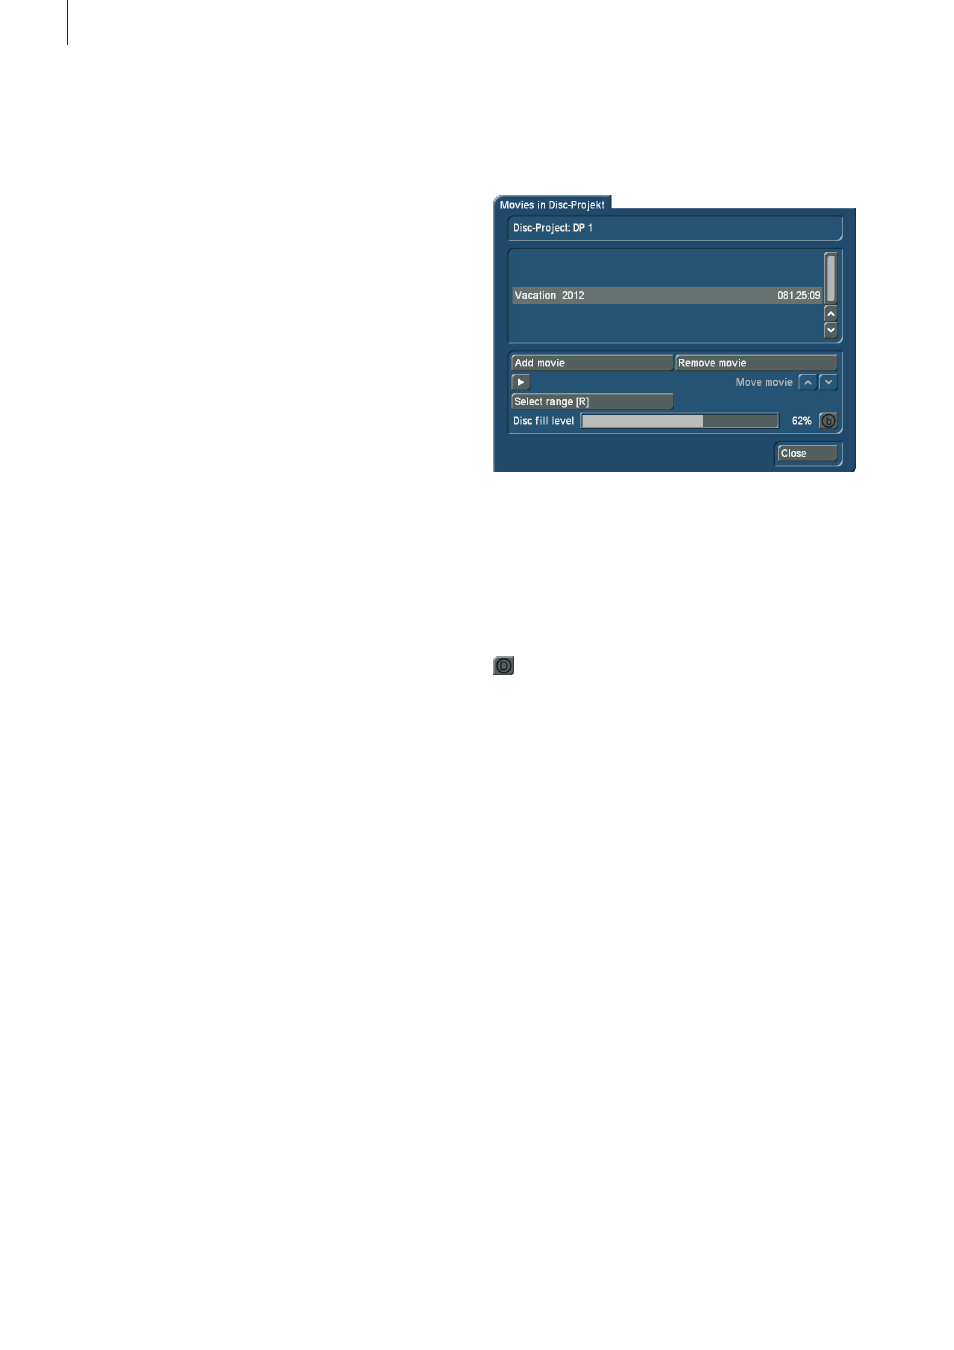
After clicking on the Movies button, a new dialog window
opens up, the top part of which indicates the currently active
disc project . Below this, a list will be displayed with the movies
that have already been inserted, and any changes, marked
with symbols that will be talked about later on .
Moreover, in the bottom third of the dialog field, there is a ca-
pacity meter for the currently selected medium type as well as
an indication of the disc fill level as a percentage and a button
to change the reference medium, when necessary . This
option is also available in all other menu points with a disc fill
level indicator .
Tip: The medium change does not happen globally for all disc
projects, but only individually for each disc project. DVD is the
standard setting for disc projects.
Should the used capacity exceed the capacity of the storage
medium, the percentage indicator and the used-capacity bar
will be displayed in red.
Add movie: In the Movies menu, you have the possibility to
use the ‘Add movie’ button to add one or more movies from
different Bogart SE projects to the previously selected ‘Disc
project’ . Click on the ‘Add movie’ button to do this . The ‘Add
movie’ dialog window appears . Use the ‘Select project’ button
to select the Bogart SE project you want to burn as a disc . It
speaks for itself that you can also burn several movies on a
disc . All you have to do is to repeat the process . When you
do this, you should keep an attentive eye on the used disc
capacity . After adding to the list, the movie(s) will be listed in
the middle of the ‘Movies in disc project’ dialog window . The
duration of the movies is also indicated there .
Remove movie: Should you want to remove a movie from the
disc project, you should select the corresponding movie so
that it is marked with a line in the middle of the list and then
click on the ‘Remove movie’ button .