MacroSystem Arabesk Ver.6 User Manual
Page 19
19
Arabesk 6 User manual
a shadow for the text . Moreover, it is possible to italicize the
text and to smooth the edges with the ‘Italics’ and ‘Smooth’
functions . You have furthermore also the possibility to display
text with a 3D effect in different colors and patterns .
Tip: Some of the style options are not available with older
versions of Bogart SE.
Besides these functions, at the right-hand side of the toolbar,
you will also find the
button, to insert a new text in the
main/chapter menu (a maximum of 10 texts is possible), the
button to remove the currently selected text field in the
design window, and the
button to change the position of
the currently selected text field .
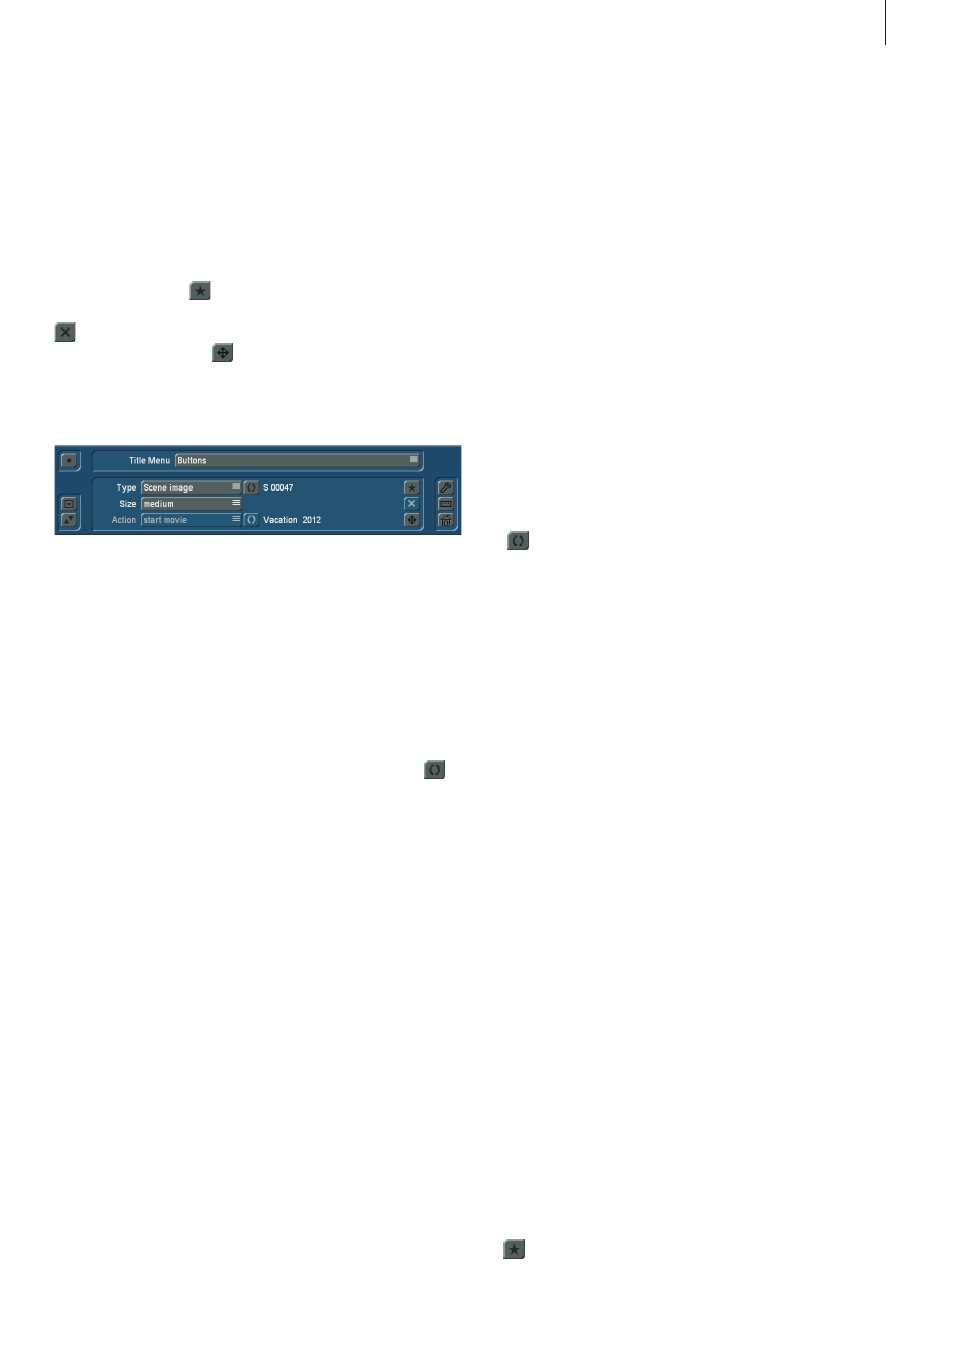
Buttons:
With this option, buttons in your main/chapter menu can be
modified to your wishes, and new buttons can be added and
selected buttons can be removed .
To this end, you have the following three selection buttons at
your disposal .
Type: Just as with the Background option, a selection button
offers you a choice between Image, ‘Image (animated), ‘Scene
image’ and ‘Scene (animated)’ . In addition, you also have the
Transparent type . Just as for the Background option, the
button after the selection function changes . Its purpose is to
select more precise settings for the ‘type’ of the button . If the
type is Transparent, the button has no function .
Tip: Instead of creating the entire design of the menus with
Arabesk, there is also the possibility to do it by other means.
To to this, you could use Bogart SE and possibly an add-on
product (such as ‘Akaba 2 HD’) to create a scene with all the
graphical elements of the menu (including buttons and texts).
You could then use this scene as a background scene in Ar-
abesk. You can then set the buttons in Arabesk to the Trans-
parent type and place them with fitting sizes and positions on
the graphical buttons already present in the background image.
Size: The selection button ‘Size’ gives you the possibility to
choose between the functions ‘small’, ‘medium’, ‘big’, ‘free -
evenly’ and ‘free - stretched’ . The first three functions select
preset sizes . You will use the functions ‘free - evenly’ and ‘free
- stretched’ when you select the desired function and then
change the size of the button selected in the design window,
using the trackball . To do this, you should go the bottom right
corner of the currently selected button . The mouse pointer
now changes to a double arrow . When you see this double ar-
row, you can change the size of the button, by clicking the left
trackball button and changing the size by rolling the trackball .
A click on the left button will then confirm the new size (click
on the right button to cancel) . If you select ‘free - evenly’, and
then move, the size of the button will change and the height
and width will change without changing the aspect ratio of
the button . Images, scenes and others are displayed without
stretching . When you use the ‘free - stretched’ function, the
height and width will not be adjusted to each other, which
means that images and scenes can be stretched .
Action (main menu): For buttons you have created your-
self, you can specify actions that should be performed when
clicking this button in the disc menu . You have the function
‘start movie’ to start the selected movie, or the function ‘goto
chapter menu’ which will bring you to the chapter menu of
the movie by clicking on the corresponding button . The None
function makes sure that no action happens when someone
clicks on the button, but that the button may be used as a
design element (please also refer to the menu background) .
The
button next to the Action selection button is used
in the main menu to select the movie it has been assigned
to, and for which the previously specified action should be
performed . In the case of buttons that have automatically been
inserted by Arabesk, the action is usually predetermined .
Tip: If you have created chapters for a movie, a button ‘goto
chapter menu’ will automatically be inserted in the main menu.
This will also be shown in the info box, until you open the menu
item ‘Main menu’ for the first time to verify after the chapters
have been created.
If you remove the chapters again, the corresponding ‘goto
chapter menu’ button will also be removed.
Action (chapter menu): Just as for the main menu, you can
specify actions for the buttons you have created yourself,
which should be performed by clicking on the corresponding
button . The following functions are at your disposal to do this:
‘start movie’: to start the movie with the corresponding button,
once created
'goto main menu’: this function takes you to the main menu of
the disc when the corresponding button is clicked upon
'prev. page’: to switch to the previous screen of the chapter
menu
'next page’: to switch to the next screen of the chapter menu
'none’: To ensure that no special action will be performed with
the button
In addition to the selection buttons for the different functions,
the
button is also here for the main/chapter menu, to insert