5 finish – last but not least – MacroSystem Arabesk Ver.6 User Manual
Page 21
21
Arabesk 6 User manual
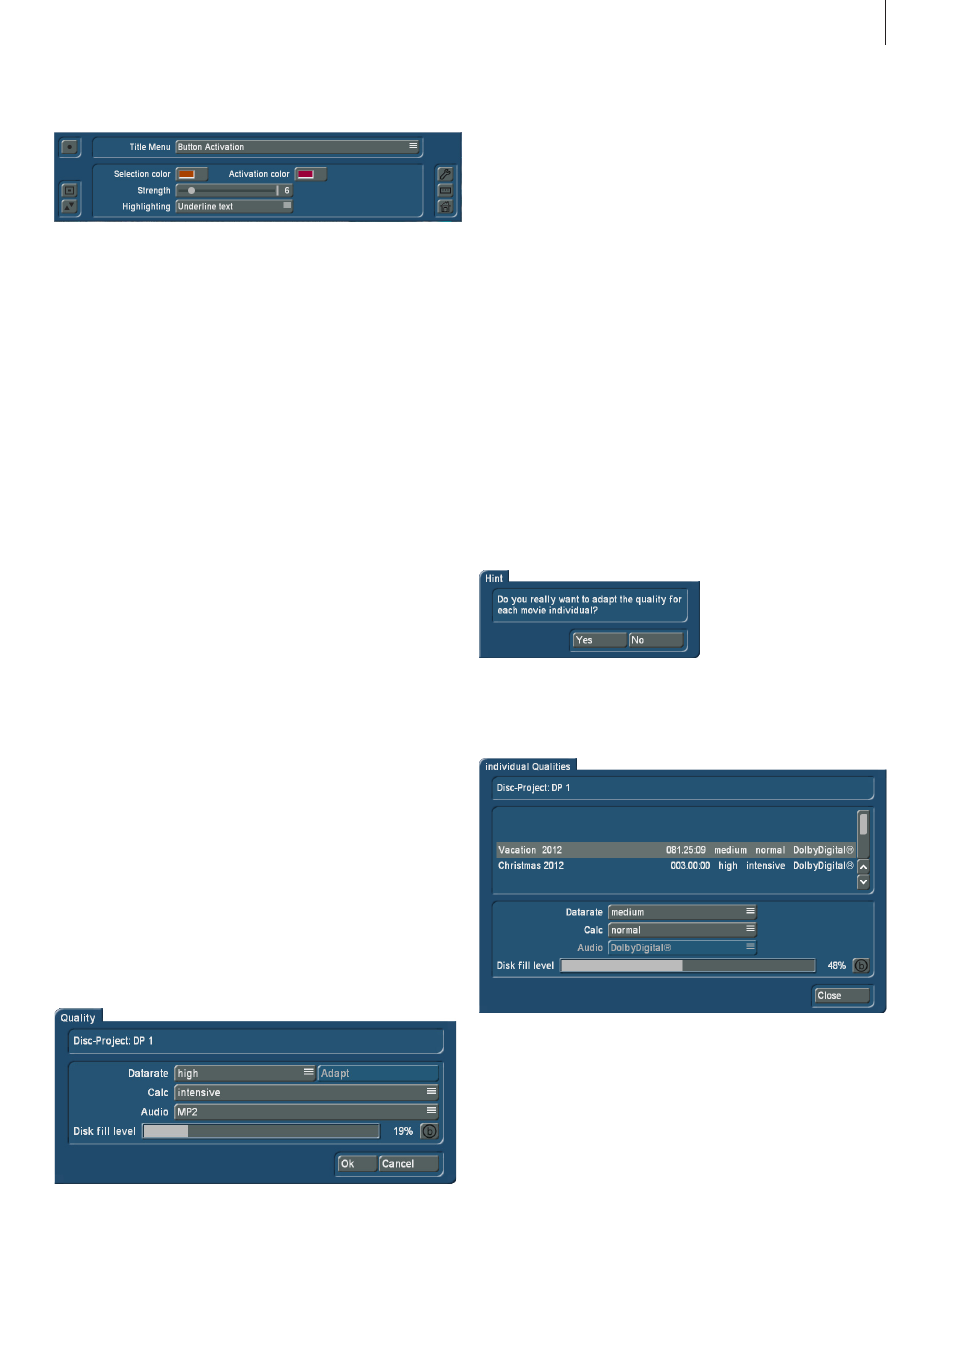
Button activation:
With the ‘Button Activation’ main/chapter option, you specify
the look of the selection and activation of a button when navi-
gating the main/chapter menu .
Selection color: The ‘Selection color’ button opens a dialog
field to select the color of the button border in the main/chap-
ter of the disc, when a button is selected .
Activation color: Just as for the selection color, the ‘Activation
color’ function button opens a dialog field to select the color
that will later indicate in the main/chapter menu of the disc that
this button has been clicked on .
Tip: Both colors are always applied to the complete current
menu. They cannot be changed independently for individual
buttons. This is a specification from the DVD standard.
Strength: The slider of the Strength function determines the
strength of the lines for the selection and activation colors . To
precisely cover a selected button border, the same strength
should be set as in the ‘Button Border’ menu .
Highlighting: Use the selection button for the Highlighting
function to determine how the selection or activation of a but-
ton should be indicated . You have a choice between ‘Outline
button’, ‘Underline text’, ‘Mark button area’ and ‘Mark text’ .
Tip: There is no direct indication of button activation in the
design area of Arabesk. Please use the menu preview to check
for Video DVDs.
2.5 Finish – Last but not least
2.5.1 Quality
Use the Quality button in the main menu of Arabesk 6 to get to
the Quality dialog window . Here, you have the opportunity to
make settings with respect to calculating the movie or movies
in the active disc project that are to be burned on a disc . You
can not only select the data rate, but also the way the calcu-
lations are made . You can select between the options ‘fast’,
‘normal’ or ‘intensive’ . When the RenderBooster is used, the
calculation will always be intensive .
Selecting the type of calculation also affects image analysis
and can, together with the chosen data rate and depending
on the contents of the image, influence the quality of the disc
when it is burned later on .
The quality settings can be made independently for each indi-
vidual disc project .
At the top of this dialog window, you see the name of the cur-
rently selected disc project .
Below this, there is a data rate selection button with which you
can choose between the data rates ‘low’, ‘medium’, ‘high’,
‘max’ (only with Gold Edition) and ‘individual’ . If you select the
individual option, you will be able to select a separate data rate
for every movie added to the disc project with which the movie
should be burned to the storage medium . In this case, the
Adapt button to the right of it will become active .
When you click on the Adapt button, the following message
will appear:
A new dialog window, ‘Individual qualities’ appears . This is
where you can make the settings you need for the individual
movies .
To do this, you should select the movie to which the settings
should apply, in the list in the top area of the dialog window .
The available options correspond to those in the Quality dialog
window . You can not only select the data rate, but also the
way the calculations are made . You can select between the
options ‘fast’, ‘normal’ or ‘intensive’ . When the RenderBooster
is used, the calculation will always be Intensive .
Selecting the type of calculation also affects image analysis
and can, together with the chosen data rate and depending
on the contents of the image, influence the quality of the disc
when it is burned later on .