MacroSystem Arabesk Ver.6 User Manual
Page 8
8
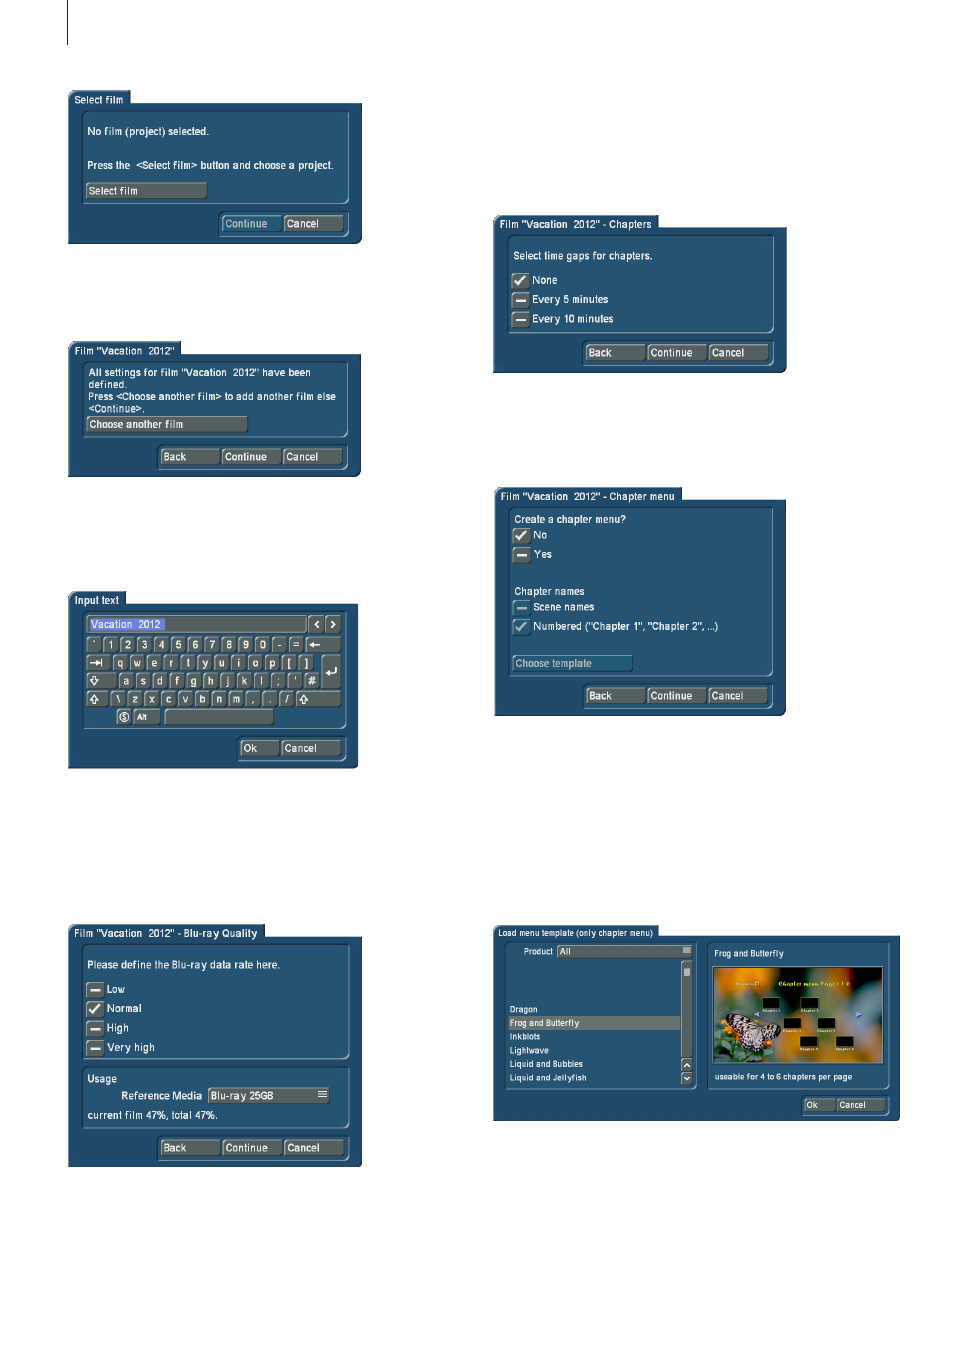
When you have selected your project, it will appear in a se-
lectable text field in the dialog window (in the picture below,
this field contains ‘Vacation 2012’ .
Click on this field to change the name of the project which will
later be shown in the main menu of the disc, next to the button
for the corresponding movie . To this end, the familiar ‘Input
text’ dialog box will appear .
The Quality editing step allows you to select between the
following quality levels: Low, Medium, High and ‘Very high’ (the
‘Very high’ quality level is only available in the Gold Edition) .
In order to determine the expected storage capacity needed
for the disc, you will also be able to select the reference stor-
age medium using the corresponding selection button .
The editing step ‘Chapters’ is used to define chapter marks
by setting a checkmark . Should you not wish to set chapter
marks, just leave the checkmark at ‘None’ . Should you wish to
set chapter marks, you may choose between ‘Every 5 minutes’
and ‘Every 10 minutes’ .
Tip: If a movie is shorter than five minutes or if you do not have
the Silver or Gold Edition, the assistant will not allow you to set
chapters and this option will be omitted .
If you have set chapter marks, the following editing step will
allow you to use a checkmark to determine if you want to set
a chapter menu for the disc and what names the individual
scenes should get .
A choice can be made between the names of the correspond-
ing scenes or a sequential numbering of the chapters .
In case you wish to create a chapter menu and you have set
the checkmark accordingly next to Yes, the ‘Choose template’
button will also become active, as well as the buttons to name
the chapters . Click on the ‘Choose template’ button to open a
new dialog window, ‘Load menu template . . .’, in which you will
be able to select a template for the chapter menu .
The chapter menu selected in the list is also displayed in a
preview window at the right-hand side of the ‘Load menu
template . . .’ dialog window . Confirm your selection with the OK
button . You will now be returned to the assistant and be able
to continue editing your disc .