MBM Corporation MBM 256 LS Folder User Manual
Page 13
11
Rev. 03/05
Operating Manual
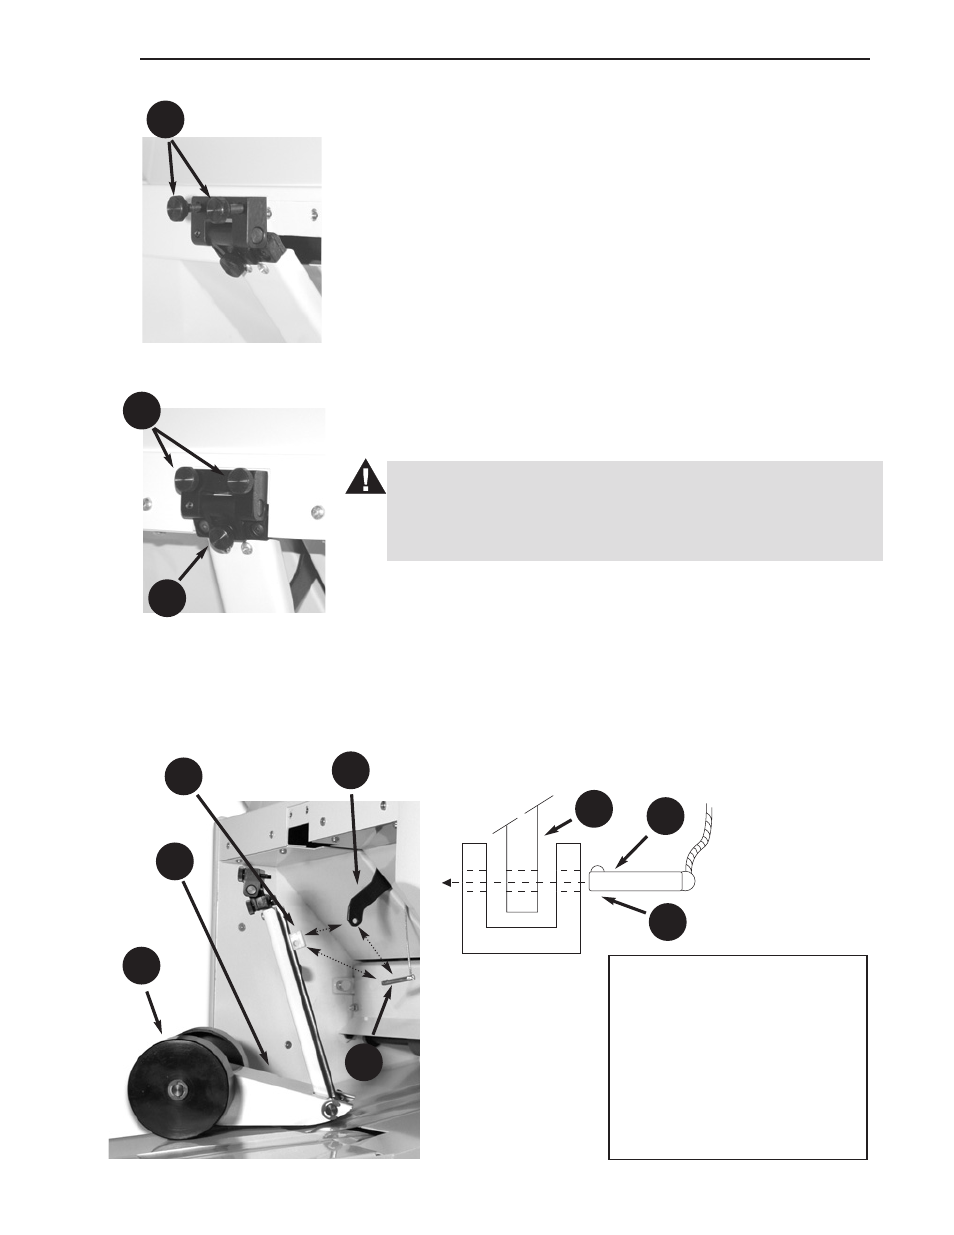
Set Up
20
20
19
21
35
36
37
Ready to Attach
Attached
Stacker
To attach the stacker assembly (21) to the machine, position it
above the exit conveyor and fasten it with the stacker assembly
thumb screws (20) as shown in the two illustrations at left.
After the stacker assembly is attached to the machine:
FOR STANDARD FOLDS:
1. Move the fold stop lever extension (36) to about the mid-
point of the table.
2. Engage the extension with the stacker connection slider
(35) and insert the snap pin (37). The stop lever extension
fits into the slot in the stacker connection slider and their
holes must be aligned to insert the snap pin as shown in
the detail illustration.
3. Allow the stacker to self-adjust its position to each fold.
CAUTION
The stacker assembly center knob (19) must be loose (turned
fully counter-clockwise) when the stacker is connected to the
stop lever extension.
FOR CUSTOM FOLDS:
1. Pull the snap pin (37) to disconnect the stacker assembly
from the stop lever extension.
2. Place a sample of the custom folded sheet at the machine
exit.
3. Manually position the stacker assembly rollers (34) about
1” from the folded sheet.
4. Tighten (clockwise) the stacker assembly center knob (19)
to keep the stacker in position.
19. Stacker Assembly Center
Knob (adjustment)
20. Stacker Assembly Thumb
Screw (attachment)
21. Stacker Assembly
34. Stacker Assembly Roller
35. Stacker Connection Slider
36. Fold Stop Lever Extension
37. Snap Pin
36
37
35
34