Section 7: finishing the fireplace, Installation – Montigo R320 User Manual
Page 27
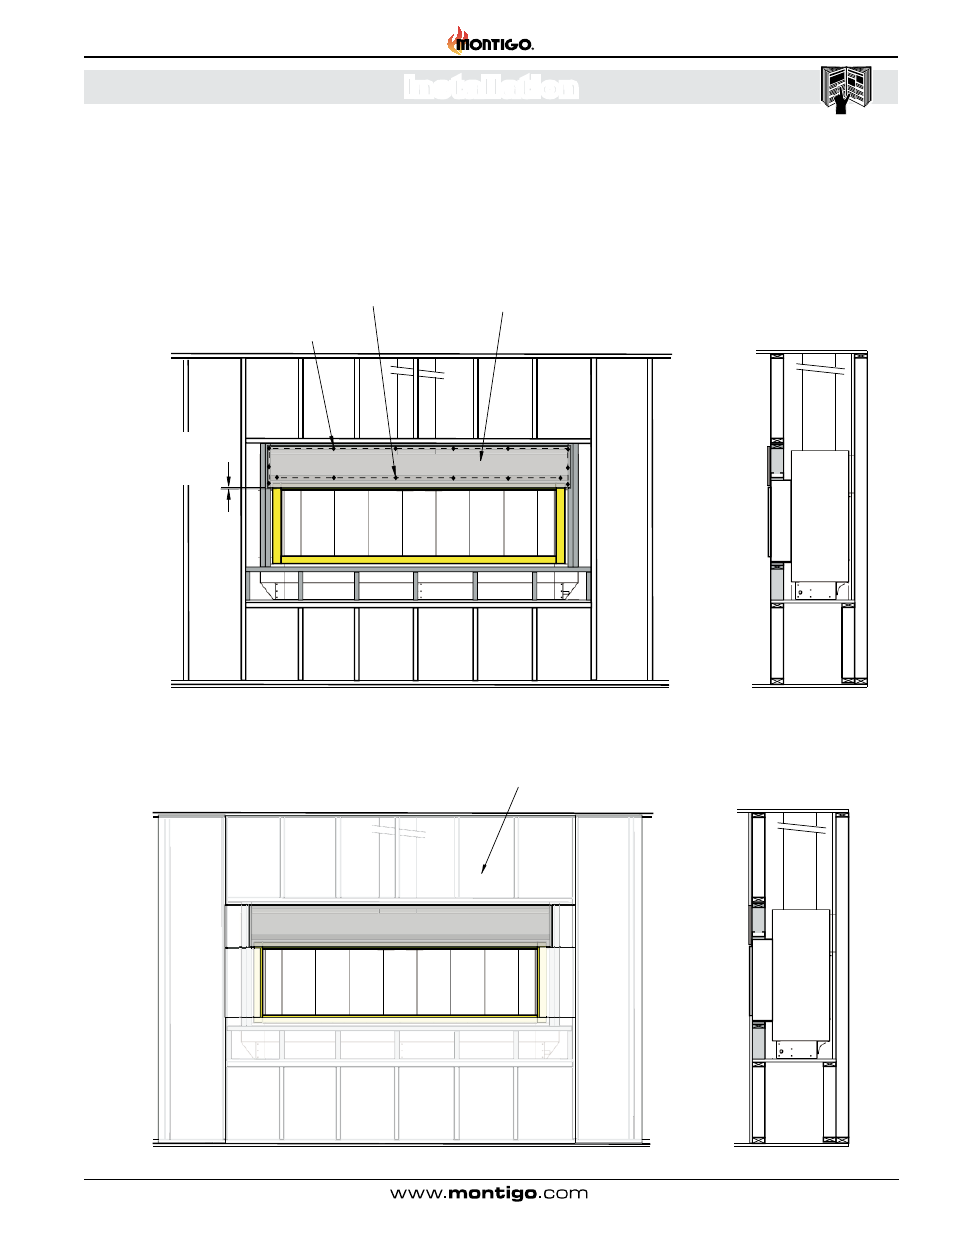
As shown in Figure 19; Install the supplied Non-combustible cement board to overlap the new Horizontal & Vertical 2 x 4's, See Figure 5.
Place the Non-combustible wall board above the fireplace throat, allowing 1/8" clearance from the rim above the fireplace opening. Pre-drill
the board with 1/8" drill and secure to framing with Nails, use flat heat sheet metal screws to fasten the board to the metal header.
Please
note, images are shown without screens for clarity purposes. However, your fireplace should not be operated without proper installation
of screens.
(Non-Combustible cement board
R320*: 52 1/2" x 15 1/2" R420*: 62 1/2" x 15 1/2")
Figure 19. Non-combustible Board over the Fireplace, (supplied by Montigo).
Non-Combustible cement board,
(supplied by Montigo) or Equiv.
Pre-drill for Nail fasteners
Combustible framing
Sheet metal Screws to attach Non-Combustible
cement board to Steel header.
1/8”
Clearance required for
expansion of the fireplace
when in operation.
Section 7: Finishing the fireplace
Wall board / Gyproc or
Equiv. (Bottom & Sides)
Cut standard Gyproc / Drywall board to complete the installation of the surround. Fit the edge of the board to the rim around the fireplace
opening. Fasten the board in place using standard drywall screws.
Figure 19a. Fireplace installation (Cut the remainder of Gyproc / Wall board to complete the fireplace surround).
R320 & R420 Power Vent Indoor Gas Fireplace
Page 27
XG0770 - 150105.1
Installation