Figure 3.2, Protocol converter login screen, Figure 3.3 – RLE Protocol Converter V.2.4 User Manual
Page 23: Change the ip address through the web interface
rletech.com
Protocol Converter User Guide
23
3
Configuration
7
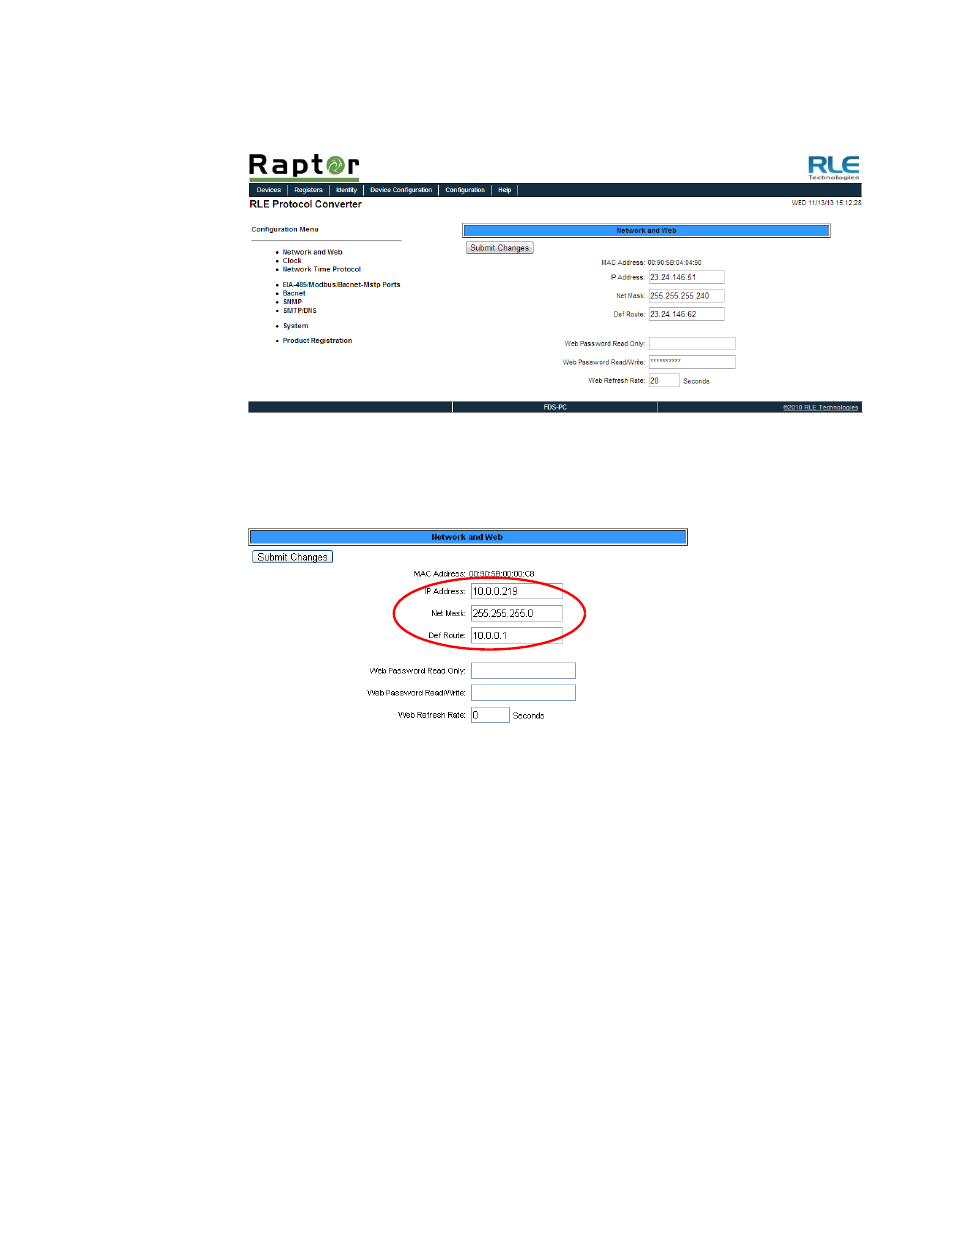
Select the Configuration link from the top bar, then select the Network and Web link from
the Configuration menu.
Figure 3.2
Protocol Converter Login Screen
8
On the Network and Web page, change the IP address, Subnet Mask (Net Mask), and
Default Gateway (Def Route) to one provided by your network administrator.
Figure 3.3
Change the IP Address Through the Web Interface
9
Press the Submit Changes button.
The Protocol Converter saves the new IP address, Subnet Mask, and default Gateway and
then reboots.
10
Change the IP address of the computer back to its original IP address.
11
If the computer was configured as DHCP (the network domain controller assigns an IP
address) return it to this state. This procedure might require assistance from your IT
department, or you might need to consult the computer's manual.
The computer and the Protocol Converter are both configured to communicate on the
network. Both should be accessible via the network.
12
Connect the computer and the Protocol Converter to the network.
13
From the computer's Web browser, type the new IP address of the Protocol Converter.
Enter the user name and password as stated in step 8 to verify network access to the
Protocol Converter.