Skutt KilnMaster Kilns Manufactured between 2000 and 2006 User Manual
Page 11
9
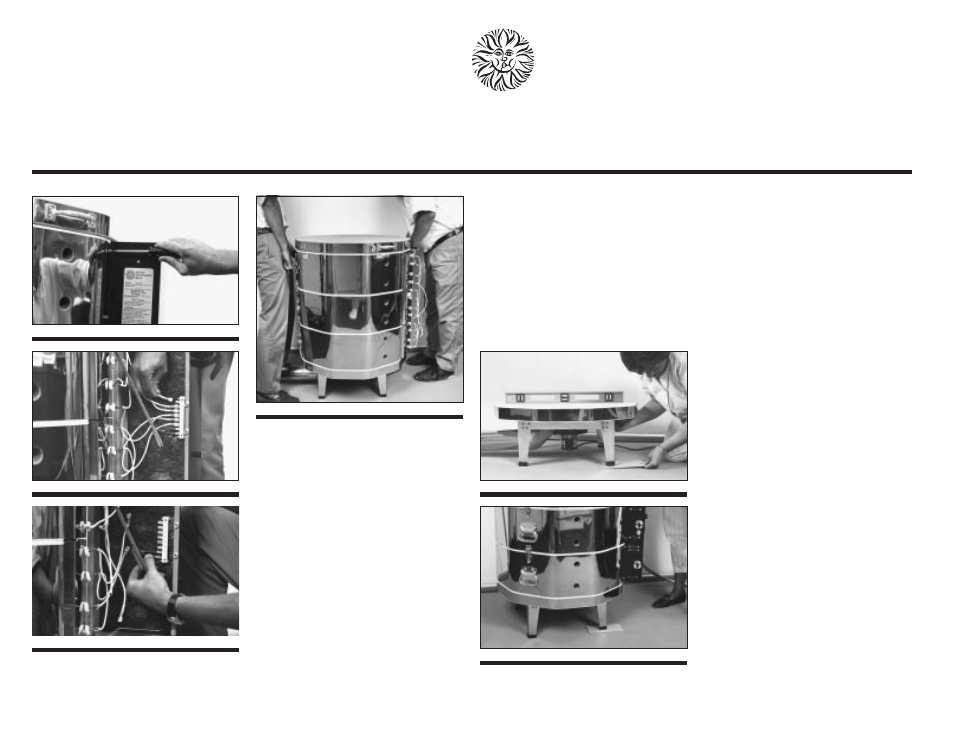
5. There are section handles on the kiln.
With a partner, lift the kiln, using the
lower section handles, off the kiln floor
and rest on a clean, flat surface.
6. You may separate the kiln into sections
if it is too heavy to move.
a. The electronic control panel of your kiln
has a hinged box for easy removal.
Remove the screws on the left side of
the box that secure the box to the kiln.
b. Swing the panel to the side.
c. Slide the connectors off of the terminals
noting the placement of the wires. Slide
the thermocouple connectors off the ter-
minal strip, also.
d. Lift the box up to remove it.
7. Position the kiln floor on top of the
stand making certain that the weight is
evenly distributed.
8. Level the kiln. Make sure the stand and
kiln floor are level and do not teeter.
Leveling problems may put unneces-
sary stress on the kiln during firing. To
level the stand, place firm shims under
the legs (never above them touching the
kiln). Center the kiln’s bottom slab on
the stand and double-check teetering.
9. Again, with a partner, pick the kiln up
and rest it on top of the kiln floor.
10. Replace the kiln control box on the kiln
if removed in step 6 above.
a. Stack the sections on the kiln floor.
b. Return the kiln control box to the side of
the kiln.
c. Slide the connectors back into place.
Plug thermocouple in.
d. Close the box and secure it with screws.
If the lid was removed in step 3 above,
place the lid on top of the kiln, replace the
lid rod and cotter pin and the lid brace
and tighten the thumbscrew.
11. Place peep plugs in all but the top
peep hole. Always leave the top peep
hole open to allow vapors to exhaust
from the the kiln unless you are using a
fan-driven ventilation system such as
the Skutt EnviroVent
®
. The EnviroVent
allows you to fire with all peep hole
plugs installed.
6a
6b
6c