Setting-up a project – Smithy Ez-Trol2 User Manual
Page 46
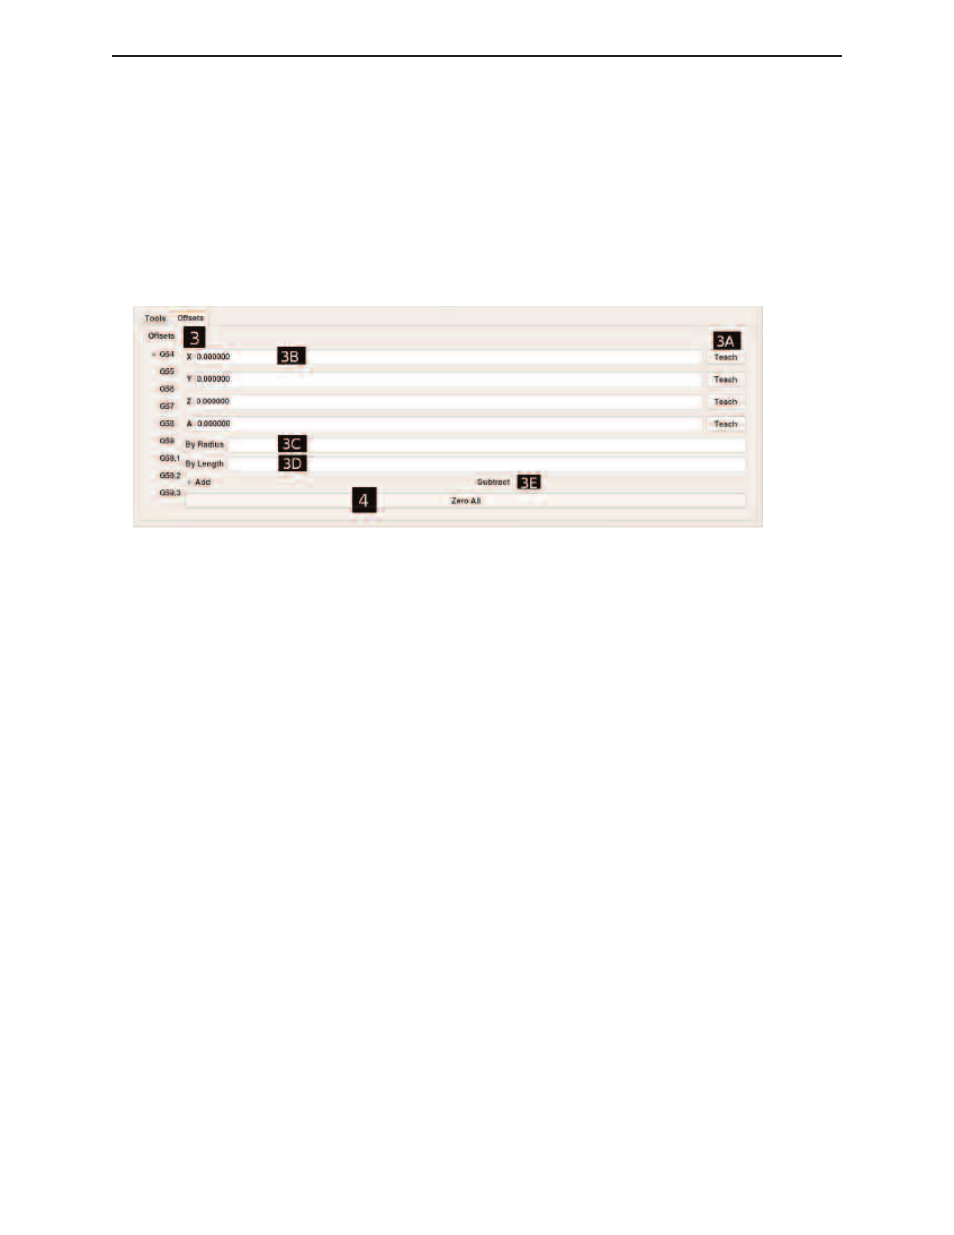
The add and subtract radio buttons, denoted by item 3E, tell EZ-Trol to “Add” or “Subtract” the tool
radius or length to/from the part zero position.
4
ZERO ALL
Clicking on the Zero All button will zero the current values in the X, Y, Z and A axis values for the
selected offset. It will not zero all offsets, only the offset that is currently selected.
SETTING-UP A PROJECT
Regardless of the method you use to create G-code, you will need to set your project up in EZ-TROL.
An overview is given below of this process.
1
Secure the work piece to the table.
2
Left Click on the manual tab. Left click on the Axis Set-up button and click on the “All
Home” button. Remember if this is the first time homing the machine, Smithy suggest
homing one axis at a time to become familiar with the feed rate and distance of travel.
3
Using a wiggler or some other sort of edge finding device, determine the edges of your
work piece by jogging each axis in place until you have found the edge. Remember to
compensate for the tool radius.
4
When the work piece edges have been located, the machine tool needs to learn this
position to each axis. This action is completed in the Setting Tab. (See Chapter 8 for
more details.)
5
Once the cutter is located at part zero, select an offset that is not being used. Teach
each axis its current location by clicking the “Teach” button after the field displaying
the axis’s position.
◗
SmithyCNC EZ-Trol II Control System
40 |
Toll Free 1-800-476-4849
Figure 11.2 Settings Offsets Screen