1 making snapshots, 2 copying images to buffer, 3 limit recording – Sumix SMX-15M5x User Manual
Page 43: Limit, Recording
41
Last updated:
June 11, 2015
Sumix Video Camera: User Guide
Capturing
6.2.1 Making Snapshots
To make snapshot:
1
Make sure that video is running
2
Press Control+Space or the
Make Snapshot button under the name of the camera
at the Camera Controls screen; you may as well select Control>Make Snapshot from
the main menu
3
The snapshot is made immediately. It is shown at the screen and saved as Bitmap
Image File in the folder, specified in Video record and snapshot path. To change
folder for saving captured frames follow the instructions in
The file is named automatically, according to the time when file was created. The name
looks like:
Year_Month_Day_Hours_Minutes_Seconds.bmp
To open folder with saved snapshot click
Open recording folder icon at the top of
Camera Controls screen.
6.2.2 Copying Images to Buffer
To copy image to buffer:
1
Make sure that video is running.
2
Click application screen to make it active
3
From the main menu select View >Copy to Buffer or use shortcut Ctrl+C to make the
copy of snapshot
You may paste this copy into your files by using Paste option or Ctrl+V shortcut.
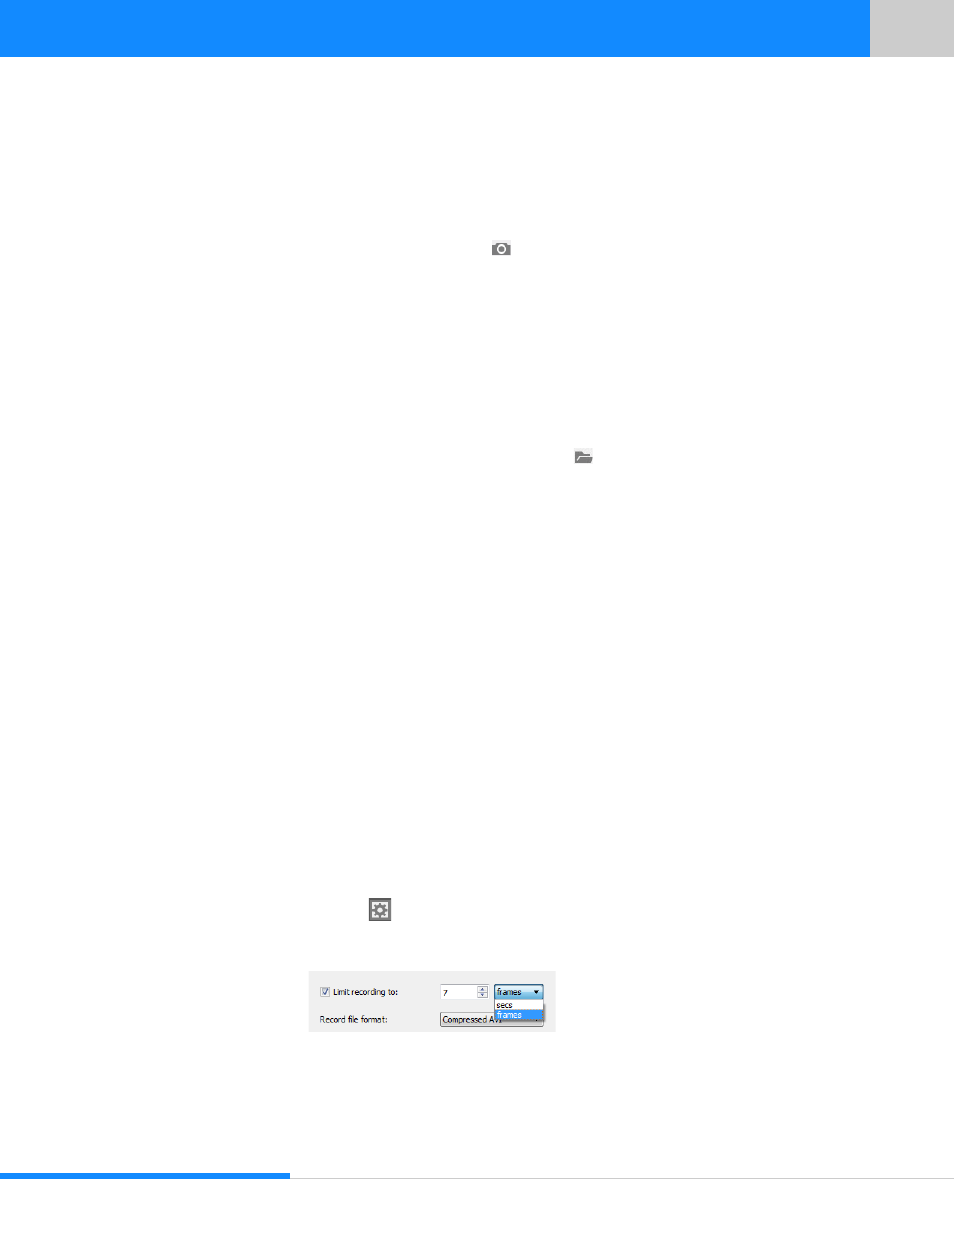
6.3 Limit Recording
You may set limit in seconds or in number of frames on duration of recording.
1
Click the
Preferences icon below the name of the camera at the Camera Controls
screen or select File>Program Preferences... from the main menu
2
At the Preferences screen check Limit recording to box
3
Key in or select the number of seconds or frames in the corresponding field
4
Select in what units you would like to limit duration: in seconds or in frames