Super Systems HP15 User Manual
Page 11
HP 15 Manual Rev A
Page 11 of 11
default values for that type, certain settings may be lost. When the PVT type is changed, the
user will have to confirm the changes. Pressing the Yes button will change the PVT type, and
pressing the No button will not change the PVT type. The Menu button will return the user to
the configuration menu.
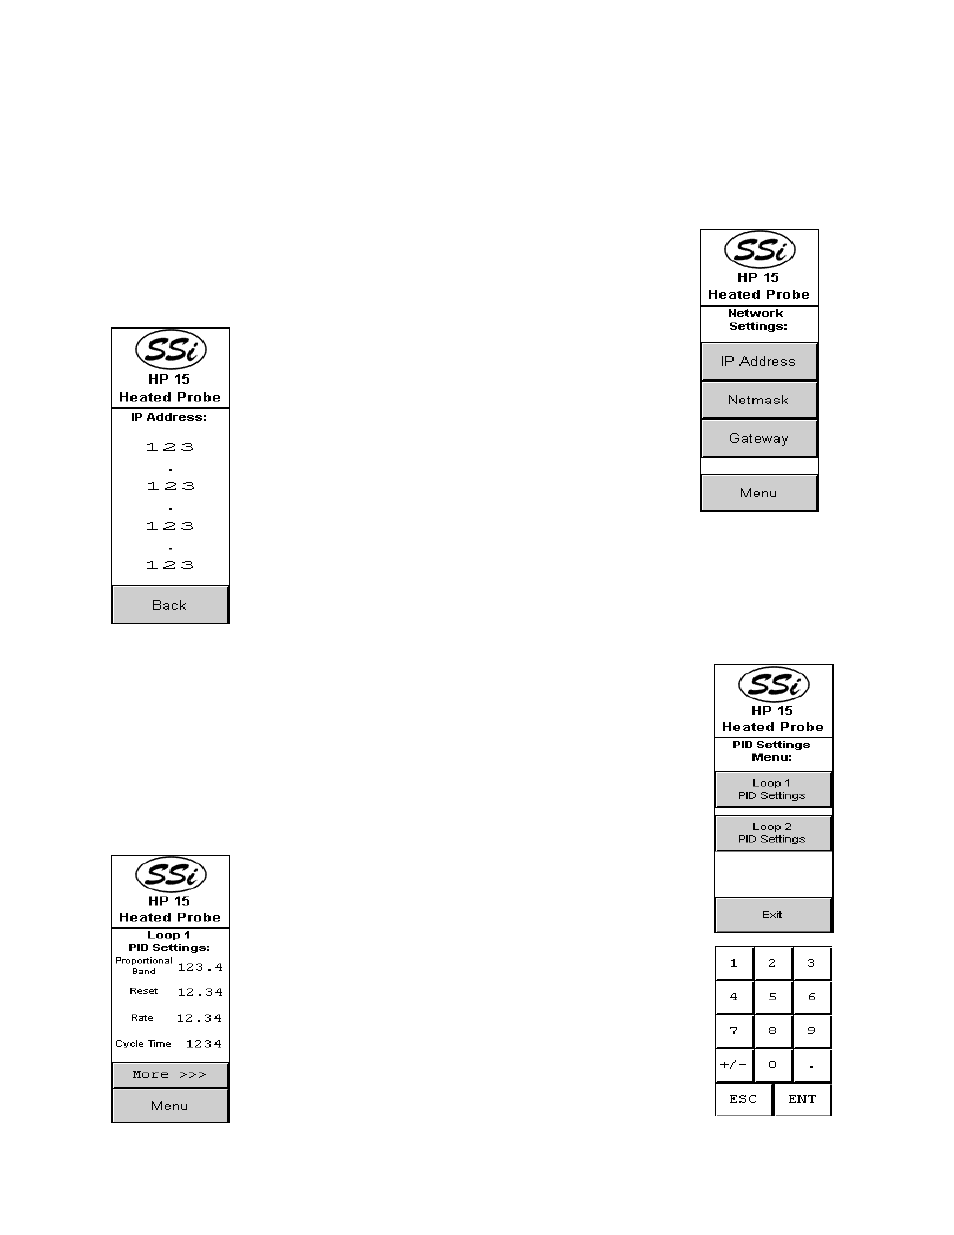
Network Settings
The Network Settings screen will allow the user to set up the network
addresses for the HP15. Each screen – IP Address, Netmask, and Gateway
– will function identically. The IP Address button will allow the user to
change the IP address of the device. The Netmask
button will allow the user to change the Netmask of the
device. The Gateway button will allow the user to
change the gateway of the device. To change a specific
section of an address, press the value and enter the new
value on the numeric keypad.
PID Settings
This menu screen will allow the user to select which loop to change the PID
settings for. Press the Loop 1 PID Settings button to change the PID
settings for Loop1, or press the Loop 2 PID Settings button to change the
PID settings for Loop 2. The Exit button will return the user to the
configuration menu screen. The screens for the Loop 1 PID settings and
Loop 2 PID settings function identically.
Loop PID Settings – Page 1
From this screen, the user can modify the proportional
band, reset, rate, and cycle time. To edit any of these
values, press the value and enter the new value from the
numeric keypad that is displayed. The More >>> button
will display Page 2 of the PID Settings menu. The Menu
button will display the
PID Settings
menu.