Installing cage nuts – H3C Technologies H3C S9500E Series Switches User Manual
Page 36
26
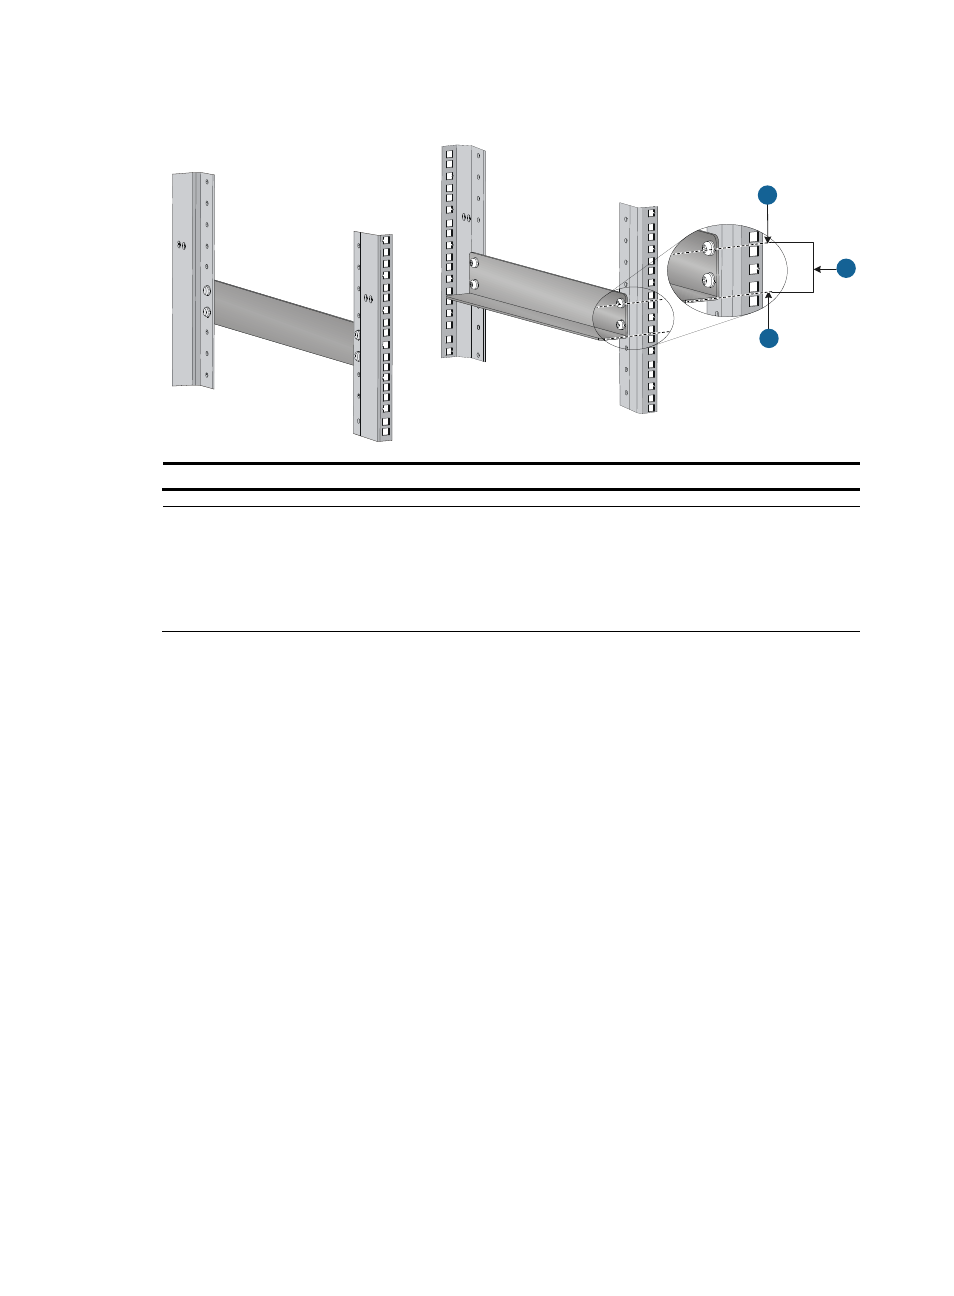
Figure 19 Installing the slide rails
(1) Middle of the narrower metal area between holes
(2) 1 RU
NOTE:
•
The appearance and installation methods of slide rails depend on the slide rail types.
•
To ensure stability of the rack, install the slide rails to the lowest possible position when installing a single
switch on the rack. To install multiple switches on the rack, mount the heaviest switch at the bottom of the
rack.
Installing cage nuts
Before mounting the chassis to the rack, install cage nuts to the front square-holed brackets of the rack.
To install cage nuts to the rack:
1.
Align the mounting bracket with the left rack post, making sure that the bottom edge and the slide
rail are level.
2.
Mark the positions of the cage nuts on the rack post according to the installation holes on the
mounting bracket (each installation hole on the mounting bracket corresponds to one cage nut).
3.
Insert one edge of a cage nut into the hole.
4.
Compress the other edge of the cage nut to push the cage nut fully into the hole.
5.
Repeat steps 3 and 4 to install cage nuts to all the marked positions on the right rack post.
1
1
2