Hdr – edit recordings – Bang & Olufsen BeoVision 9 User Guide User Manual
Page 29
HDR – Edit recordings
You can protect, delete or name recordings. You can also split a recording into
two separate parts or trim it. If the optional hard disc is full, the TV
automatically makes room for new recordings by deleting old recordings.
NOTE! Protected recordings are never deleted.
Viewed or edited recordings are deleted before
recordings that have not been viewed or edited.
The oldest recordings are deleted first.
1
*Protect a recording
2
*Delete a recording
Max. number of
recordings
If ‘FEATURE LEVEL’ is set to ‘BASIC’, simply toggle the red button to
protect and unprotect a selected recording.
If ‘FEATURE LEVEL’ is set to ‘BASIC’, simply press to mark a selected
recording then the yellow button to delete it.
The max. number of recordings that can be stored on the hard disc
recorder is approx. 300. If the max. number of recordings is reached, it is
not posssible to split recordings.
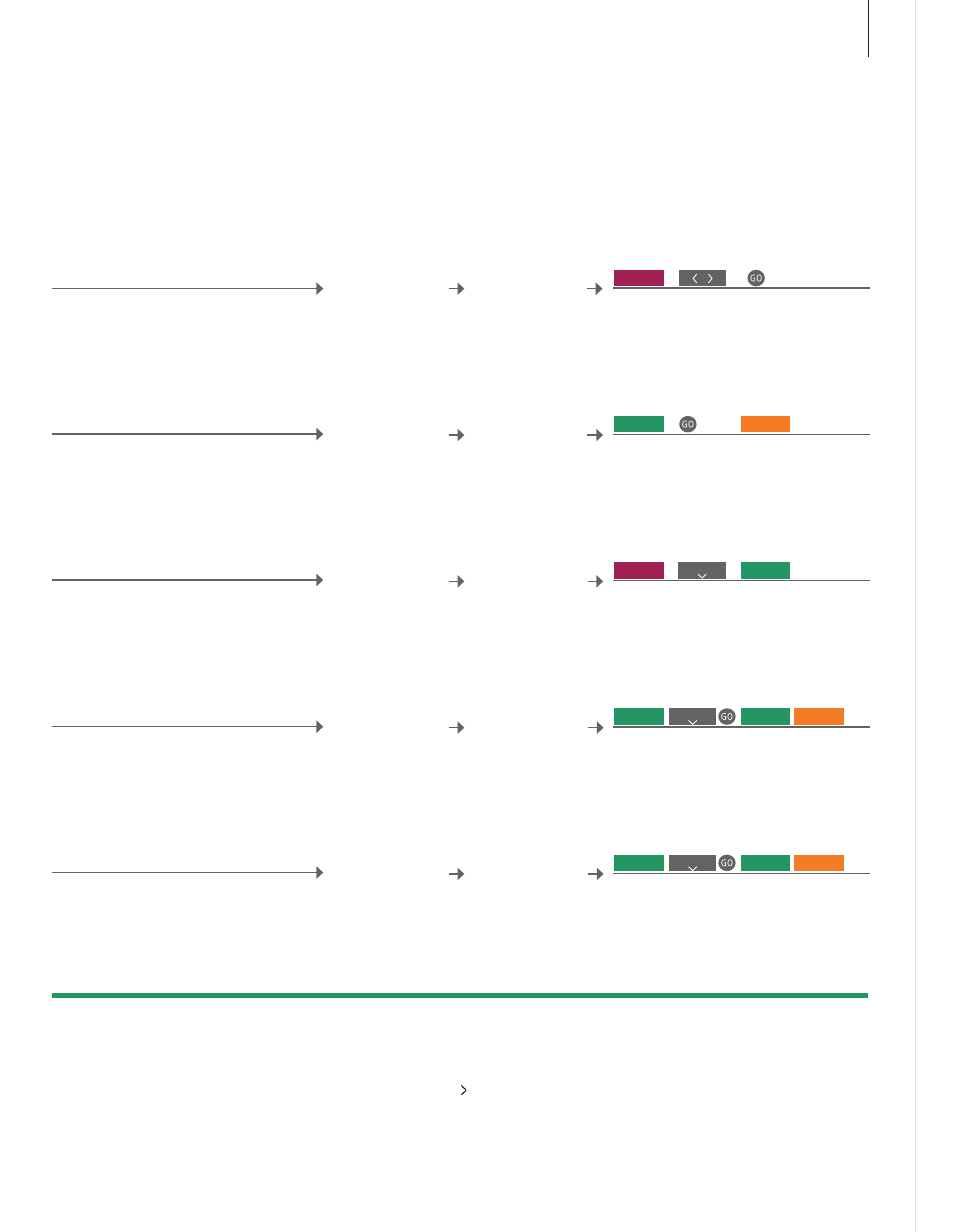
Protect or unprotect a recording
Protected recordings are not deleted if a new
recording is started and the hard disc is full.
Select recording*
1
Bring up hard disc
recorder menu and
select ‘HARD DISC
CONTENT’ menu
Delete a recording
Delete a recording you do not want, including
protected recordings.
Name a recording
Name or rename a recording as often as you
want.
Bring up
‘OPTIONS’
Select recording*
2
Bring up hard disc
recorder menu and
select ‘HARD DISC
CONTENT’ menu
Mark
recording
Delete recording
Select recording
Bring up hard disc
recorder menu and
select ‘HARD DISC
CONTENT’ menu
Bring up
‘OPTIONS’
Select
‘NAME’
Start editing
Split a recording
Split a recording into two parts.
Trim a recording
Trim away a section of a recording.
Select recording
Bring up hard disc
recorder menu and
select ‘HARD DISC
CONTENT’ menu
Select
‘SPLIT’
Cue to point of split
and follow on-screen
instructions
Select recording
Bring up hard disc
recorder menu and
select ‘HARD DISC
CONTENT’ menu
Bring up
‘EDIT’
Select
‘TRIM’
Protect/
unprotect
Bring up
‘EDIT’
Accept
Bring up
‘EDIT’
Cue to point to trim
from and follow on-
screen instructions
27