Ba c d – MCZ Boxsystem 75 FR User Manual
Page 18
Chapter 4
INSTALLATION AND USE MANUAL
page
18
Installation and assembly
Technical service – MCZ S.p.A. all rights reserved - Reproduction prohibited
4.3. GENERAL ASSEMBLY RULES
The insert can either be inserted on existing fireboxes or inserted as an
autonomous firebox thanks to its self-supporting structure.
If the insert is positioned in an existing firebox,
check that the dimensions of the firebox are
compatible for insertion.
If the insert is positioned over a floor or close to
walls made of flammable materials, these surfaces
should be suitably insulated in a safe manner.
The Superclima model has special requirements for
positioning and assembly. The installer should refer
to section 4.5
4.4. ASSEMBLY OF THE INSERTS (all models)
To facilitate insertion of the insert, especially on an irregular existing
firebox surface, the optional INSERTION GUIDE FRAME can be
used, while the flue gas connection can be made using the optional
TELESCOPIC CONNECTION
. These accessories are not available for
the SmartBox model.
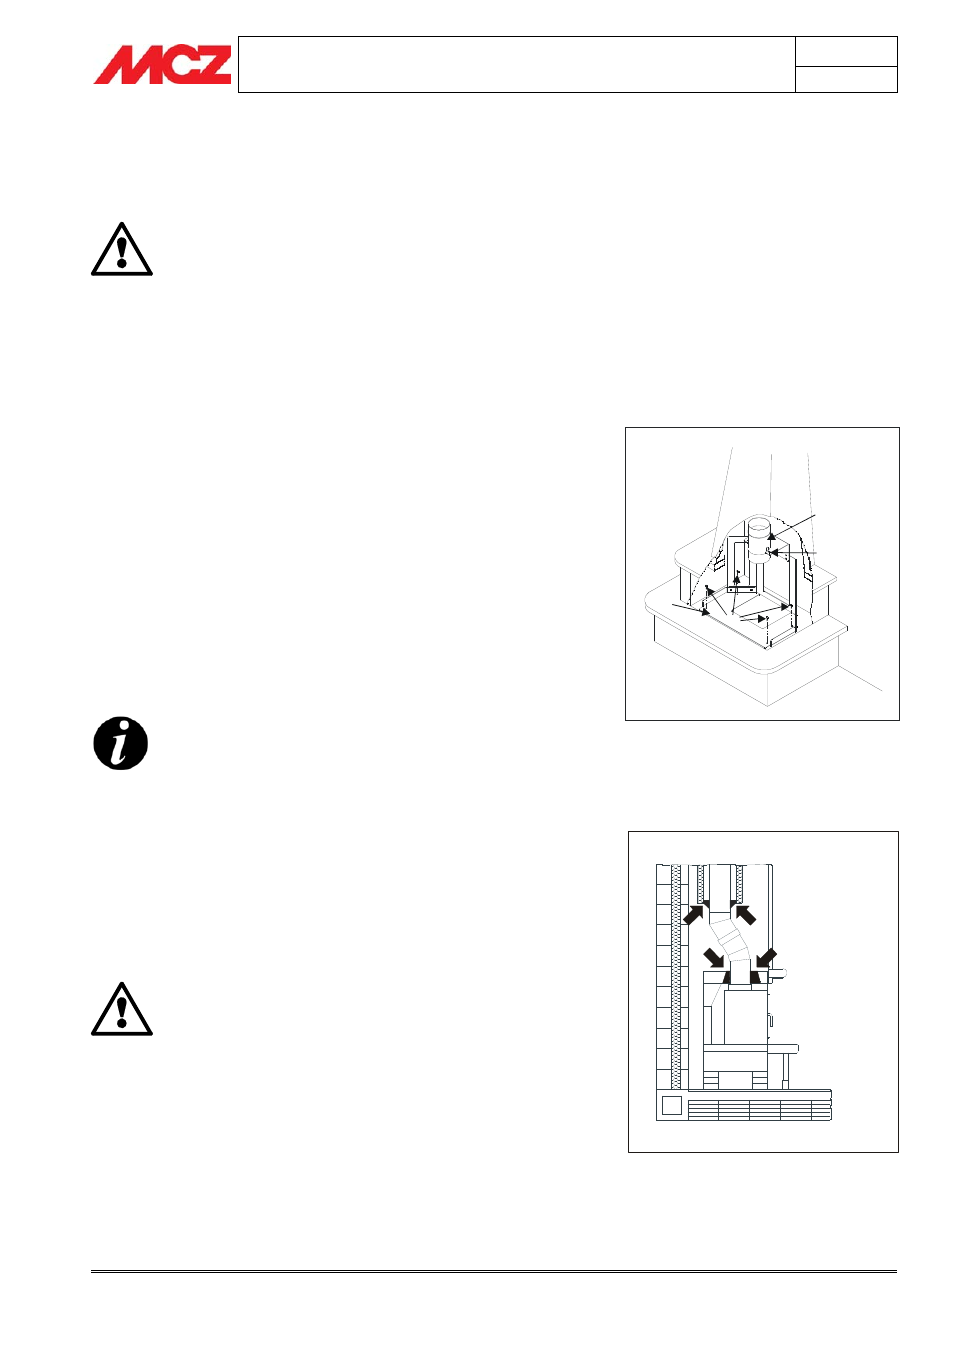
For this operation just fix the frame (A) to the firebox surface using the
plugs (D) provided and, if necessary, use shims to level the frame.
Together with the insertion guide it is recommended to also use the
telescopic connection (B) that can be screwed onto the insertion guide
using the anchorings (C) and allows to make the connection to the
chimney flue before inserting the product
(see section 4.5.2)
The "Insertion guide" and "Telescopic connection"
accessories are not available for the Smartbox
model.
4.5. CONNECTION TO THE CHIMNEY FLUE (all models)
We recommend connecting the insert to the chimney flue using pipes
and bends in aluminium-clad steel, capable of withstanding the high
temperatures reached in that section of pipe and resisting corrosion
from the fumes. These connecting pipes are available on request in
various sizes (see MCZ accessories), and they simplify installation since
they are assembled by fitting one into another.
Flexible pipes in steel or aluminium cannot be used
to connect the insert to the chimney flue as they are
prohibited by current regulations.
4.5.1. Direct connection between insert and flue
pipe
Drill and disassemble the existing clay hood and engage the elements
in the chimney flue, being careful not to exceed the 45° inclination and
to correctly carry out any infilling necessary in order to prevent soot or
ashes of the chimney flue from settling above the insert.
(Figure 3)
Infill of direct flue gas connection
B
A
C
D
Insertion guide positioning and telescopic
connection