Ab c d e – MCZ Boxsystem 75 FR User Manual
Page 21
Chapter 4
INSTALLATION AND USE MANUAL
page
21
Installation and assembly
Technical service – MCZ S.p.A. all rights reserved - Reproduction prohibited
For those who do not have the possibility to perform this type of
connection, it is in any case required to connect both air ducts
regardless of whether they are both connected to the exterior or the
interior. Depending on the choice of connection, the operating
temperature will be slightly higher or lower than average, but this does
not compromise correct operation.
When the installation of the fan compartment box and air ducts is
finished, proceed to the next phases for connection of the chimney flue
and the ventilation kit.
All the ventilation components can be assembled
from inside the fire mouth of the insert except the
motor housing which, however, we have already
installed beforehand.
(Figure 1)
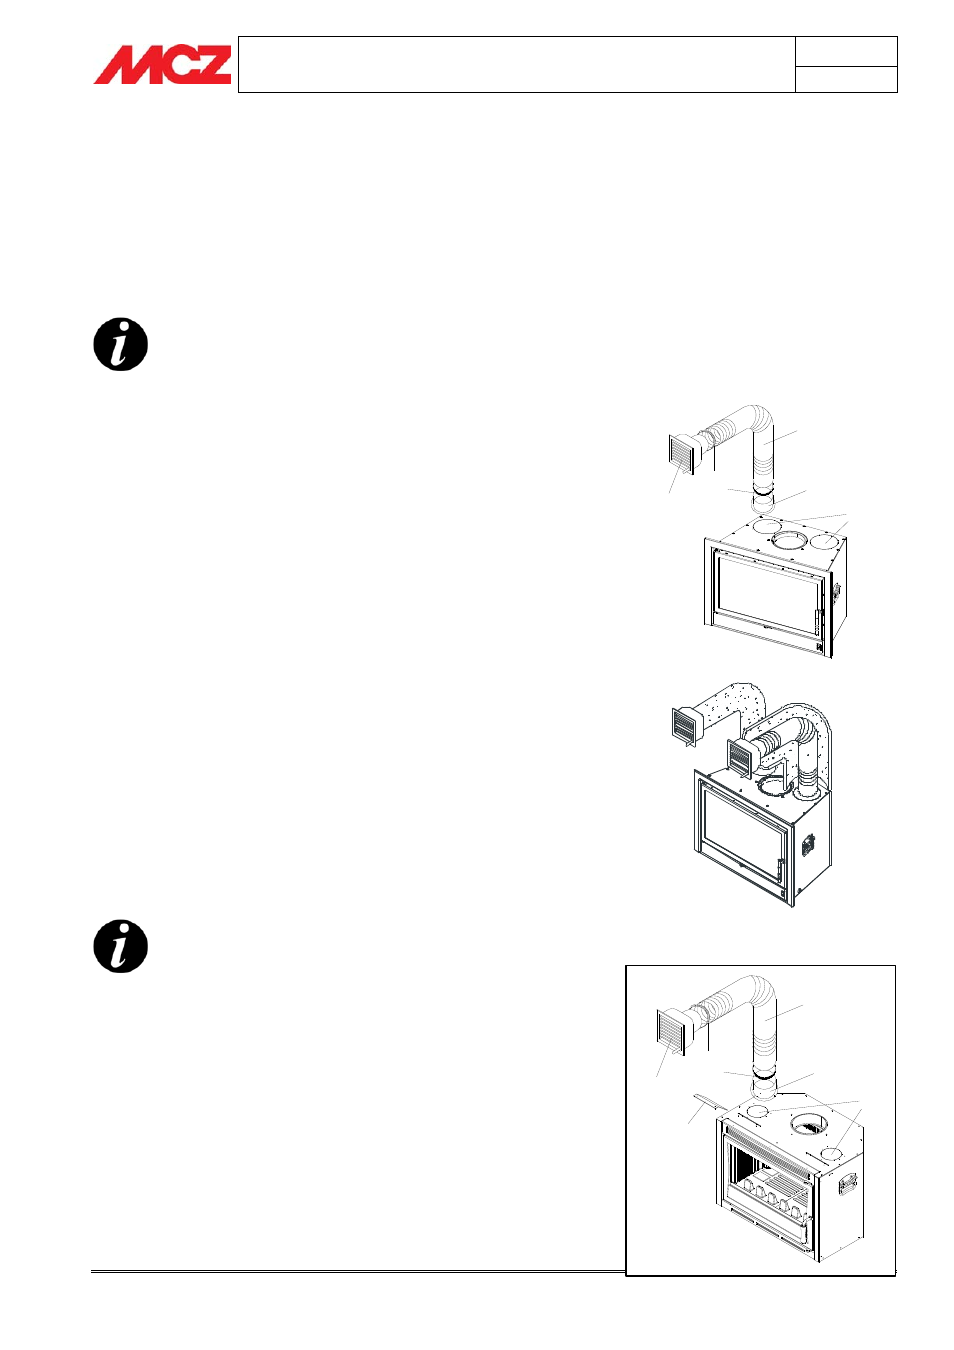
4.7. HOT AIR OUTLET KIT ASSEMBLY for
CLIMASYSTEM and SMARTBOX
If it is desired to use additional fan-assisted air outlets, we can attach
one or two HOT AIR OUTLET KITs (optional)
(figure 5). To
assemble the hot air ducts, it is necessary to break through the semi-
sheared plugs (A), screw on the flanges (B) and insert the flexible
pipes (D) fastening them with the appropriate pipe clamps (E). At the
opposite end of the flexible piping, attach the adjustable air outlets (C)
which will later be fixed to the decorative hood.
It is advisable to:
• Position the hot air outlets at a height of at least 2 mt. above
the floor so that the hot air does not flow directly onto people.
• Insulate the air duct pipes.
• Do not exceed 1.5 mt of ducting for each outlet.
• It is advisable to insulate the ducting pipes to avoid the
vibrations transmitted by the fans and forced air and to
keep the outcoming air warmer.
The front hot air outlet cannot be excluded even
though in the SmartBox model, by manually turning
the fins located above the fire door, it is possible to
direct more hot air through the top outlet pipes and
the hood outlets.
4.8. HOT AIR OUTLET KIT ASSEMBLY SUPERCLIMA
If it is desired to use additional fan-assisted air outlets, we can attach
one or two HOT AIR OUTLET KITs (optional).
To assemble the hot air ducts, it is necessary to break through the
semi-sheared plugs (A), screw on the flanges (B) and insert the
flexible pipes (D) fastening them with the appropriate pipe clamps (E).
At the opposite end of the flexible piping, attach the adjustable air
outlets (C) which will later be fixed to the decorative hood.
Hot air outlet kit assembly
A
B
C
F
D
E
A
B
C
D
E