Neutrino series - quick start guide – Xilica Neutrino Series User Manual
Page 12
Neutrino Series -
Quick Start Guide
XILICA AUDIO DESIGN CANADA / ASIA / EUROPE
Pag
e
12
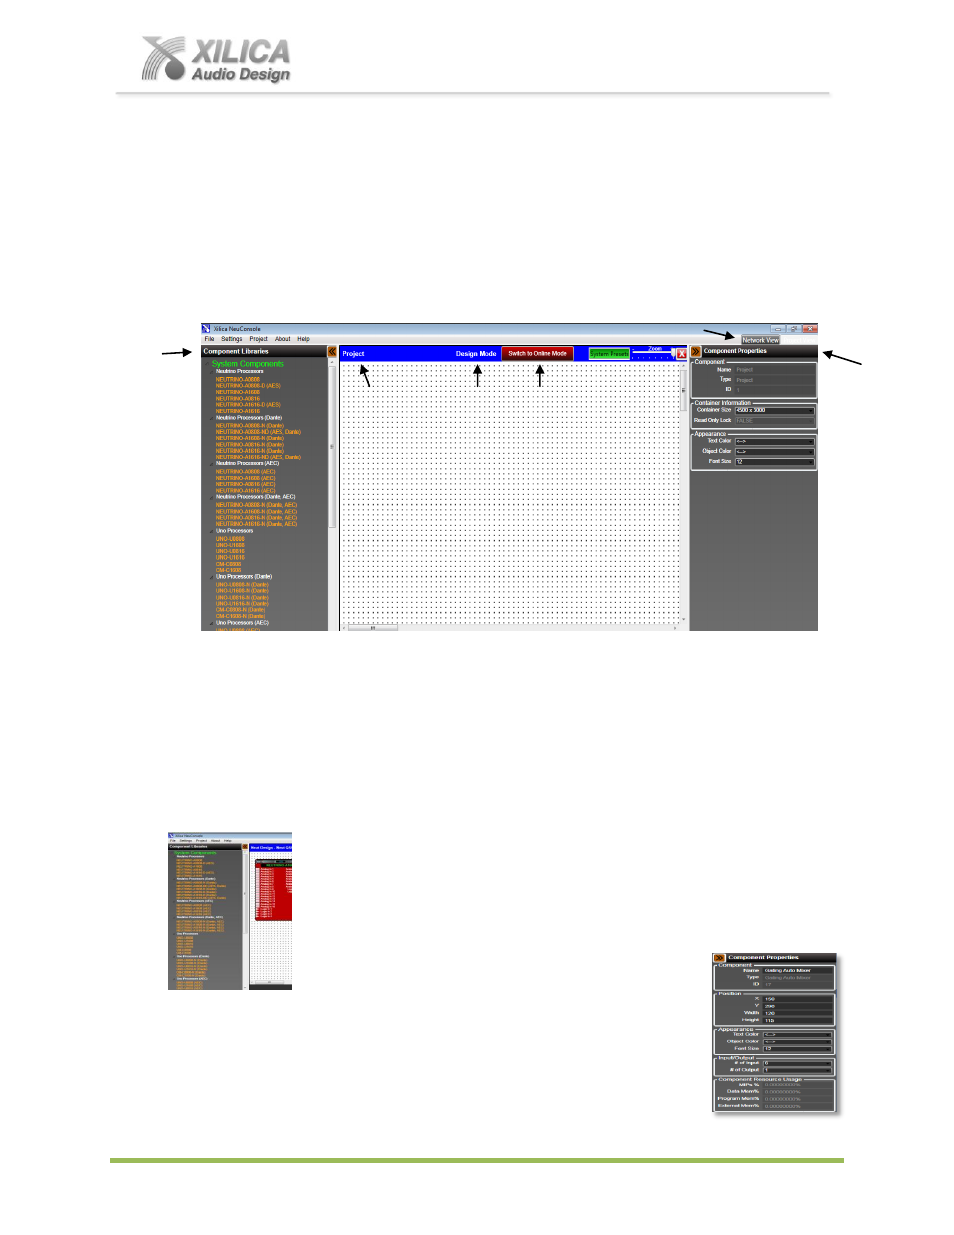
Project View / Design Mode Work Area
Either will open the Project View/Design Mode work area page as identified by the white, dotted
alignment work area shown below.
(a) See the Project, Design Mode, and the red
Switch To Online Mode
headings and button at
the top left and center of the work area. See & the grey Network View (Project View) button
at the top right hand side above component properties. See the Component Libraries menu
on the left and the Component Properties menu at the far right
– as shown below.
(b) Once you are in Project View/Design Mode working on a DSP design you are able to switch
back & forth
between “Project View” and “Network View” by selecting the Network View /
Project View button at the top right of the work page area. Once you do it will take you to
the Network View page and the button will re-
name itself “Project View”. Selecting the
Project View button will take you back to the Project View page to continue working on your
DSP design project.
Component Libraries / Component Properties
The Component Libraries menu on the left side of the Project View/Design
Mode work area is where you will find all the processor, control device, and
DSP modules you will be selecting and working with - found under the
System Components
&
DSP Modules
sub heading and the category
headings of Neutrino Processors, Control Devices and DSP Modules.
The Component Properties menu on the right
side of the Project View work area provides the means to alter the specific
characteristics of DSP Modules and to label items. Click on any module or
wire to open up its specific properties menu. Characteristics such as name,
position, appearance, I/O size (# of inputs and outputs), resource usage, link