Neutrino series - quick start guide – Xilica Neutrino Series User Manual
Page 16
Neutrino Series -
Quick Start Guide
XILICA AUDIO DESIGN CANADA / ASIA / EUROPE
Pag
e
16
(c) The Matrix Mixer as dropped/placed in the schematic design area arrives as a 1x1 I/O Matrix
Mixer. As shown above, I have already re-sized the Matirx Input from 1 to 4 inputs for our
design example.
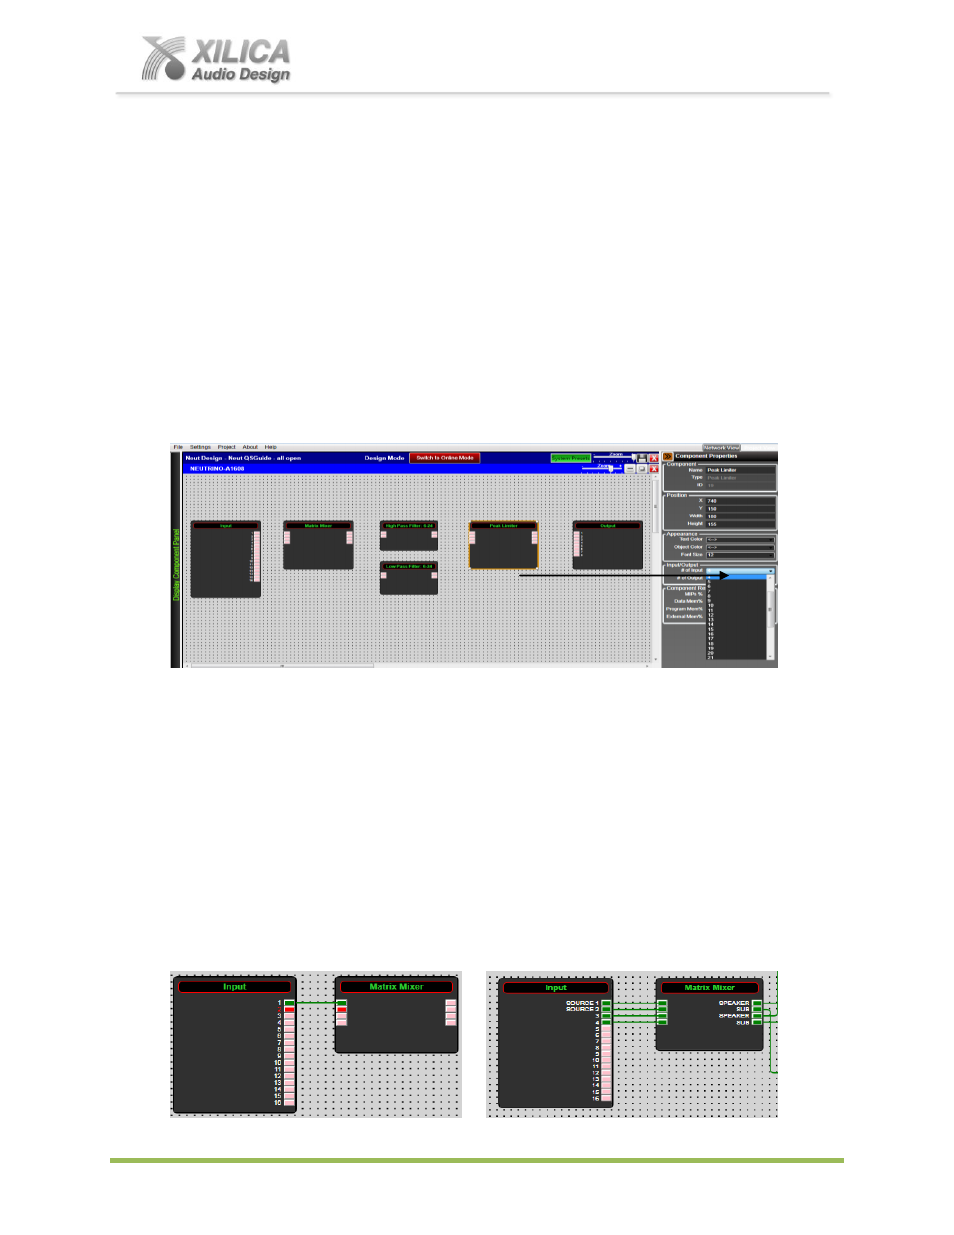
(d) To Re-Size the Matrix Mixer I/O (or any module), click it so it is highlighted in Orange (if not
already highlighted) and see the Input/Output section of the Component Properties menu on the
right. As indicated with the Blue dropdown selection above on Pg 15 & below, I have chosen to
re-size the output side of the Matrix Mixer to 4 outputs
– creating a 4x4 Matrix Mixer (as shown
below).
(e) Next, from
DSP Modules
on the left, drag and drop a High Pass Filter (6-24 db/Oct); a Low
Pass Filter (6-24 db/Oct); and a Peak Limiter onto the grey dotted, schematic design area and
re-size each as we did with the Matrix Mixer
– as 2x2 Filters and a 4x4 Peak Limiter.
(f) Once completed, Minimize the Component Libraries menu on the left using the orange double
arrow symbol so we can create a larger work area to better continue our DSP design work
(positioning, wire DSP modules, label Source/Destination connections, open and configure DSP
modules, etc)
– as shown below.
(g) Next, as shown below left
– point, click, and drag from one DSP module I/O connection node to
another. Release when the destination node is reached and it turns red to create a “wire”
connection between the two modules I/O. Alternatively, you can highlight a box around multiple
nodes (capture them) to make more than one connection at a time.
(h) As shown below right - connect the first 4 connections from the Input module to the Matrix
Mixer. You can name the source and destination labels of each DSP modules inputs/outputs by
pointing at and clicking on
a “wire” and typing in the label name under the appropriate Source or
Destination Label in the Link Information section of the Component Properties menu on the right
hand side of the work area page (that is why it remains open).
Alternatively, you can copy and paste modules by highlighting the desired modules and pressing
ctrl+c to copy and then ctrl+v to paste or selecting copy/paste from the right-click menu.