Adobe After Effects User Manual
Page 535
Source Mask
Destination Mask
Boundary Mask
Percent
Elasticity
Correspondence Pairs
Interpolation Method
Chris Zwar provides a tutorial on the
demonstrates the use of the Reshape effect to morph one face into another. This
tutorial provides many useful tips regarding the use and editing of correspondence points.
This effect works with 8-bpc and 16-bpc color.
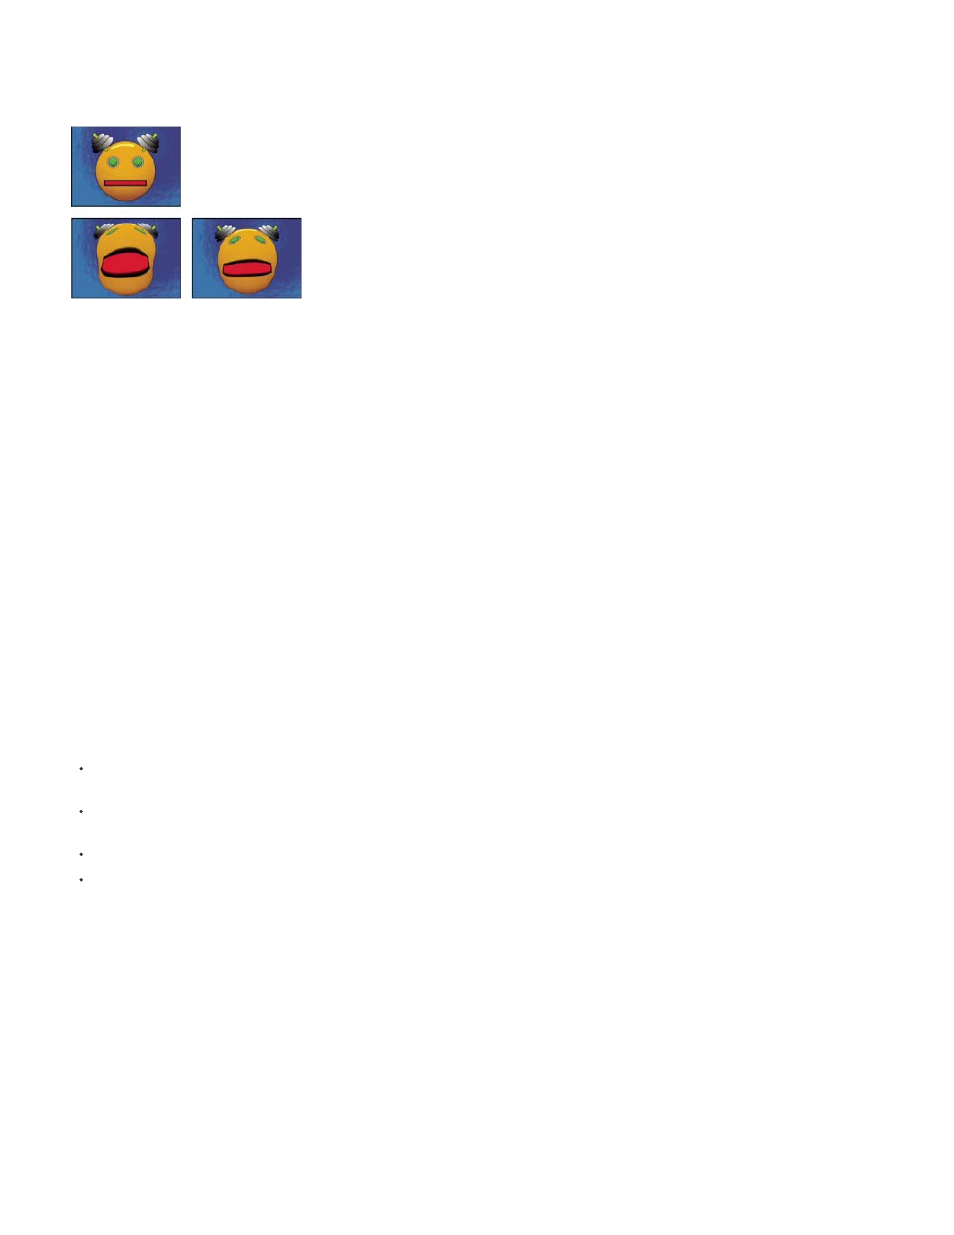
Original including three masks (upper-left), and with variations of Reshape applied (lower-left and right)
By default, After Effects assigns the masks a function (source, destination, or boundary) based on the order in which you create or import them.
You can also specify different masks. Use a closed path for each mask. All three masks must be on the layer to which you apply the Reshape
effect, although you can copy masks from another layer.
The mask that contains the image area you want to reshape. If not specified, After Effects uses the second mask created as the
Source mask. In the Composition and Layer panels, a red outline defines the source mask.
The mask that determines the shape of the final image. If not specified, After Effects uses the third mask created as the
Destination mask. In the Composition and Layer panels, a yellow outline defines the destination mask.
Specifies what part of the image is reshaped. Anything outside the boundary isn’t altered. If not specified, After Effects uses the
first mask created as the Boundary mask. In the Composition and Layer panels, a blue outline defines the boundary mask.
The amount of reshaping. This value is useful for creating partial distortions that increase over time.
Specifies how closely the image follows the shape defined by the curve. Stiff acts like cold rubber, allowing the image to distort the
least amount. Super Fluid acts like hot rubber, allowing the image to distort in a fluid fashion. The other settings fall between. The more fluid
elasticity settings require more rendering time. If the final image doesn’t follow the curve as expected, use the following elasticity guidelines:
In general, use the stiffest setting possible that doesn’t create a polygonal image. Use a higher elasticity setting if the final image looks
polygonal but the curves are smooth.
Use Stiff, Less Stiff, or Below Normal if the source and destination masks are similar in shape and have low curvature (few curved segments
that change direction radically).
Use Normal, Absolutely Normal, or Above Average if the source and destination masks are dissimilar and have mild curvature.
Use Loose, Liquid, or Super Fluid if the masks are very dissimilar and have extreme curvature.
Shows the number of points on the source mask that are associated with, or mapped to, points on the destination mask.
These points appear in the Composition panel and control the interpolation of the distortion through space. To precisely control the distortion, you
can add, delete, or move the points on either mask.
You move the correspondence points with the Selection tool, and you add and remove correspondence points with the Add Vertex and Delete
Vertex tools, which you activate by holding the Alt (WIndows) or Option (Mac OS) key. You can only manipulate correspondence points when the
effect instance is selected in the Effect Controls panel.
A mask can have an unlimited number of correspondence points, but the more correspondence points it has, the longer the effect takes to render.
If the distortion appears twisted, try adding more correspondence points at distinguishing points along the masks. (If the arc lengths of the curves
between correspondence points are too different, twisting may result.)
Specifies how After Effects determines the distortion of each video or animation frame in the interval between keyframes or
if no keyframes exist.
531