Beisler 1225-4 User Manual
Page 36
2-10
( m a x )
3 0 V
1 5 V
1 2 0
0 0
1 5 0
[ m s ]
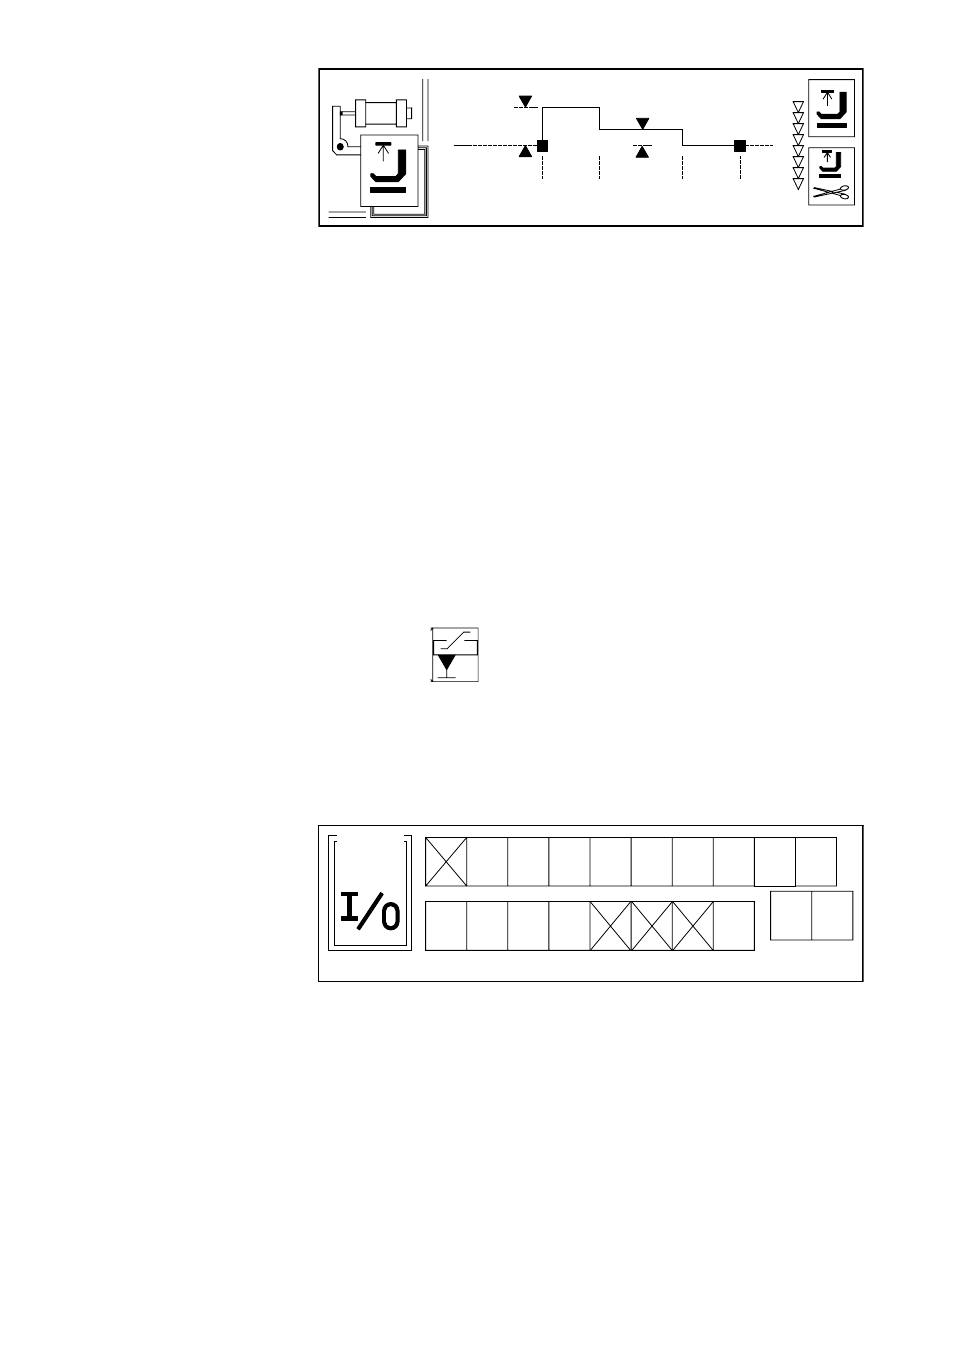
S E T U P - 0 2
1. Position the cursor on the time of maximum power (left value in lower row)
and press the Plus/Minus key until 150 ms is set. This assures that the
presser foot is lifted safely after seam end.
2. Position the cursor on the value of the holding voltage (upper row, value in
the middle of the display) and press the Plus/Minus key until 15 V is set.
This assures that the magnetic valve for the foot release will not be
overloaded.
3. Position the cursor on the value of the start delay (right edge) and enter
120 ms here. This time is required to assure that the sewing foot rests
safely on the cloth before sewing starts.
4. Position the cursor on both presser foot icons and set them to „Presser
foot up“ like shown in the picture.
5. Press the Special key to leave this page.
6. Check, whether the presser foot is programmed on „up“ on page „PROG
000“, too.
3.5.2
Photo cell
A
Position the cursor on the photo cell icon and press the Plus key to set the
photo cell to „switch lighted“. This is indicated by the shown icon.
3.6
Setup page -10
M 8
M 7
M 6
M 5
M 4
M 3
M 2
M 1
F 1 2
F 1 1
F 1 0
F 9
F 8
F 7
F 6
F 5
F 4
F 3
F 2
F 1
S E T U P
- 1 0
All outputs (F1 ... F12) and inputs (M1 ... M8) are displayed here. Inputs and
outputs crossed out are disabled.
At this machine, the output F1 and the inputs M5, M6 and M7 must be
disabled. Position the cursor on the desired input/output and press the Plus
key to enable/disable this input/output.
The inputs are defined by the connector occupation at the switching box and
occupied as follows: