Maintenance – Beisler 2112-4 User Manual
Page 52
- C 52 -
Short Seam Automat 2112-4 Working Instructions
Beisler Automated Sewing Equipment
C.5
Maintenance
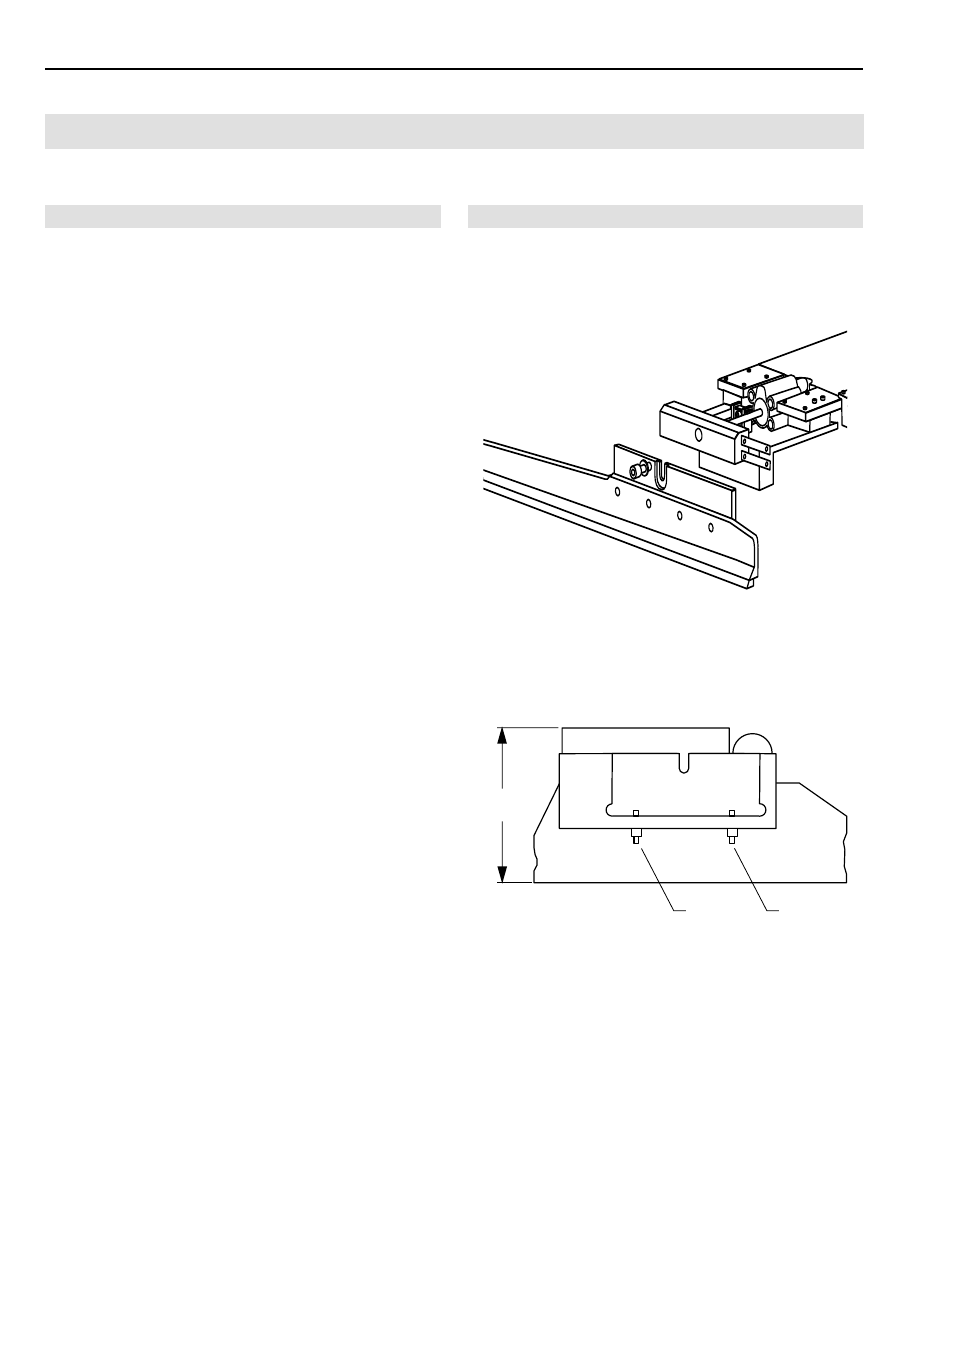
Fig. 12/13
Fig. 12
Fig. 13
C.5.5 Machine set-up
Adjusting clamp rail to machine function:
The machine is equipped with two different clamp rail ver-
sions. Depending on the machine function performed, the
corresponding clamp rail must be installed.
•
For the function "Tucking pocket edge to pocket bag",
the clamp rail
2 with the plain support is required.
•
For the function "Sewing on slash selvages", the clamp
rail
3 with the cranked support is required.
Clamp rail removal:
1. Lift main clamp.
2. Fig. 12: Loosen and partially remove retaining screw
1.
3. Pull clamp rail
2 or 3 downward.
Clamp rail installation:
1. Insert clamp rail into receptacle and push all the way
up. Make sure that the clamp rail is flush with the re-
ceptacle.
2. Tighten retaining screw
1.
Clamp rail clamping pressure adjustment:
After any works to the main clamp, the clamping pressure
and the alignment of the clamp rail to the needle must be
checked.
1. Check to see if the main clamp exerts pressure to the
sewing piece evenly along the entire length of the rail
by lining up a piece of fabric to the insertion position
and lowering the main clamp.
2. Check clamping pressure by trying to pull the sewing
piece out of the clamp at several locations along the
clamp rail.
3. Fig. 13: If the pressure force is uneven or insufficient,
remove clamp rail and change the position of the two
adjusting screws
1 at the inner side of the clamp rail.
If the adjusting screws are screwed in, the pressure of
the clamp rail onto the working plate increases as the
height H of the main clamp in the downward direction
changes.
4. Repeat adjustment and recheck with lowered main
clamp until clamping pressure is distributed evenly alo-
ng the entire length of the clamp rail.
1
1
H