3 press programs – Ivoclar Vivadent EP5000-G2 User Manual
Page 27
6.3 Press programs
The Programat EP 5000/G2 has been especially coordinated with the
materials systems from Ivoclar Vivadent. Therefore, the respective
parameters of the different programs have already been set ex
works. You only have to select the desired program for the
corresponding material.
Parameters for individual programs, which can be manually adjusted
are listed in the table below:
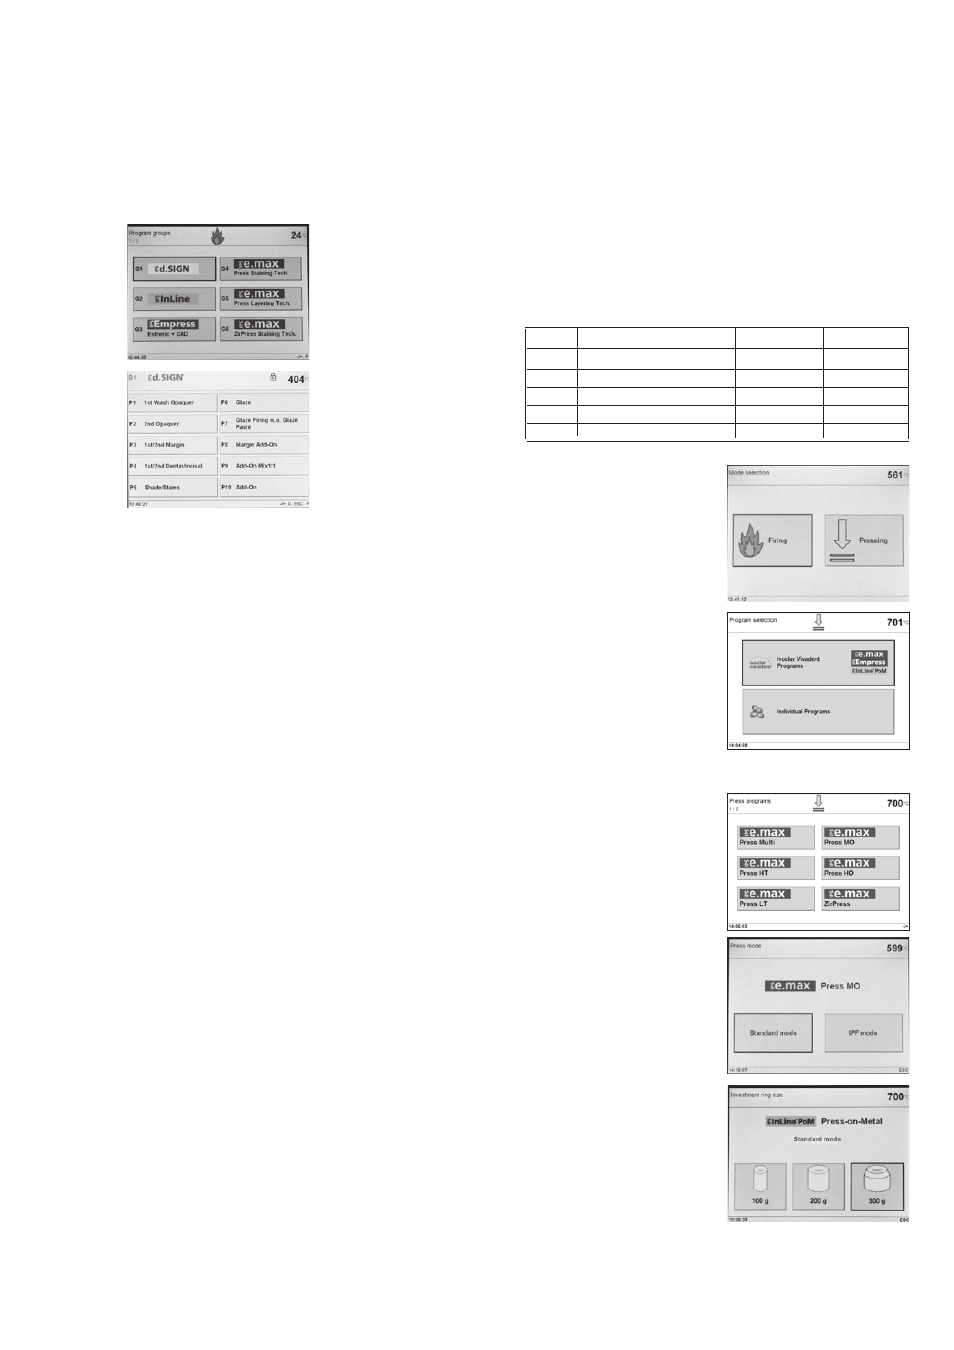
The Operation Mode key can be
used to show the selection screen.
In the Pressing mode, you may
select between Ivoclar Vivadent
press programs and individual press
programs by means of the touch
screen.
6.3.1 Pressing using an Ivoclar Vivadent press programs
If the Ivoclar Vivadent press pro-
grams are called up, the first page
with the Ivoclar Vivadent press pro-
grams is displayed.
In addition to the popular Ivoclar
Vivadent press programs, ”Stand-
ard Mode” certain materials can
also be pressed using the new IPF
mode (Intelligent Press Function)
(see also Chapter 6.3.3). For
materials which offer the IPF mode,
the shown selection screen is dis-
played.
Subsequently, for some materials,
the investment ring size (100 g/200
g/ 300 g) can be chosen. This selec-
tion applies to both standard and
IPF programs (sample: investment
ring 300 g for IPS InLine PoM).
27
6.2.4 Firing using an Ivoclar Vivadent firing program
Step 1:
Select the desired material (e.g.
IPS d.SIGN) in the program group
of your choice.
Now, select the desired program
(e.g. 1st opaquer).
Step 2:
Now, open the furnace head by pressing the „Open furnace head“
key (90) and place the firing tray with the object to be fired in the
furnace.
Step 3:
Activate the program by pressing the „Start“ button (73). The green
Start LED starts flashing. The process is indicated in the operating
indicator firing curve or remaining time.
6.2.5 Firing using an individual program
Step 1:
Select a free program.
Step 2:
– To change a parameter, press the corresponding touch button. In
this way, the cursor (black frame) is positioned there. Now, the
value can be edited either with the +/- keys or the numeric key-
pad.
– Changes made with the +/- keys are accepted immediately and do
not have to be confirmed.
– If the changes are made by means of the numeric keypad, the val-
ue range of the parameter is displayed in the bottom line. An
entry made with the numeric keypad is confirmed and completed
with the ENTER key (or the P or START keys).
– If the cursor is located on one of the parameters V1, V2, pre-
vacuum, or L and the set value is 0, a note to the deactivated
function is shown in the last line 0 = Off (e.g. L = 0 means that
long-term cooling is not activated).
Step 3:
Press the START key (73) to start the program. The process is indicat-
ed in the firing curve display.
Symbol Parameter
Value range
Value range
B
Stand-by temperature
100–700 °C
212–1292 °F
t
Temperature increase rate
10–140 °C/min 18–252 °F/min
T
Holding temperature
100–1200 °C
212–2192 °F
H
Holding time (min : sec)
00:00 – 60:00
E
Abort speed
0-100000
µm/min