6 - effects, Setting up the effect position, Equalization – Teac DV-RA1000 User Manual
Page 38: 6 – effects, Setting up the effect position equalization, 6 – “effects” (p. 38)
38
TASCAM DV-RA1000 Owner’s Manual
6 – Effects
The DV-RA1000 incorporates two signal processors:
a 3-band equalization stage and a dynamics proces-
sor. These can be inserted either before the final
recording process (post-AD conversion) or on play-
back (pre-DA conversion).
These effects can be used on playback to simulate the
effects of pre-mastering effect processing before the
mixed stereo track is actually pre-mastered in another
facility, or may be even used to perform the actual
premastering.
Equalization is carried out a 40-bit resolution, and
dynamics processing is carried out at 32-bit resolu-
tion at the same sampling frequency as the current
project.
NOTE
The effects are not available in quad-frequency or DSD
modes.
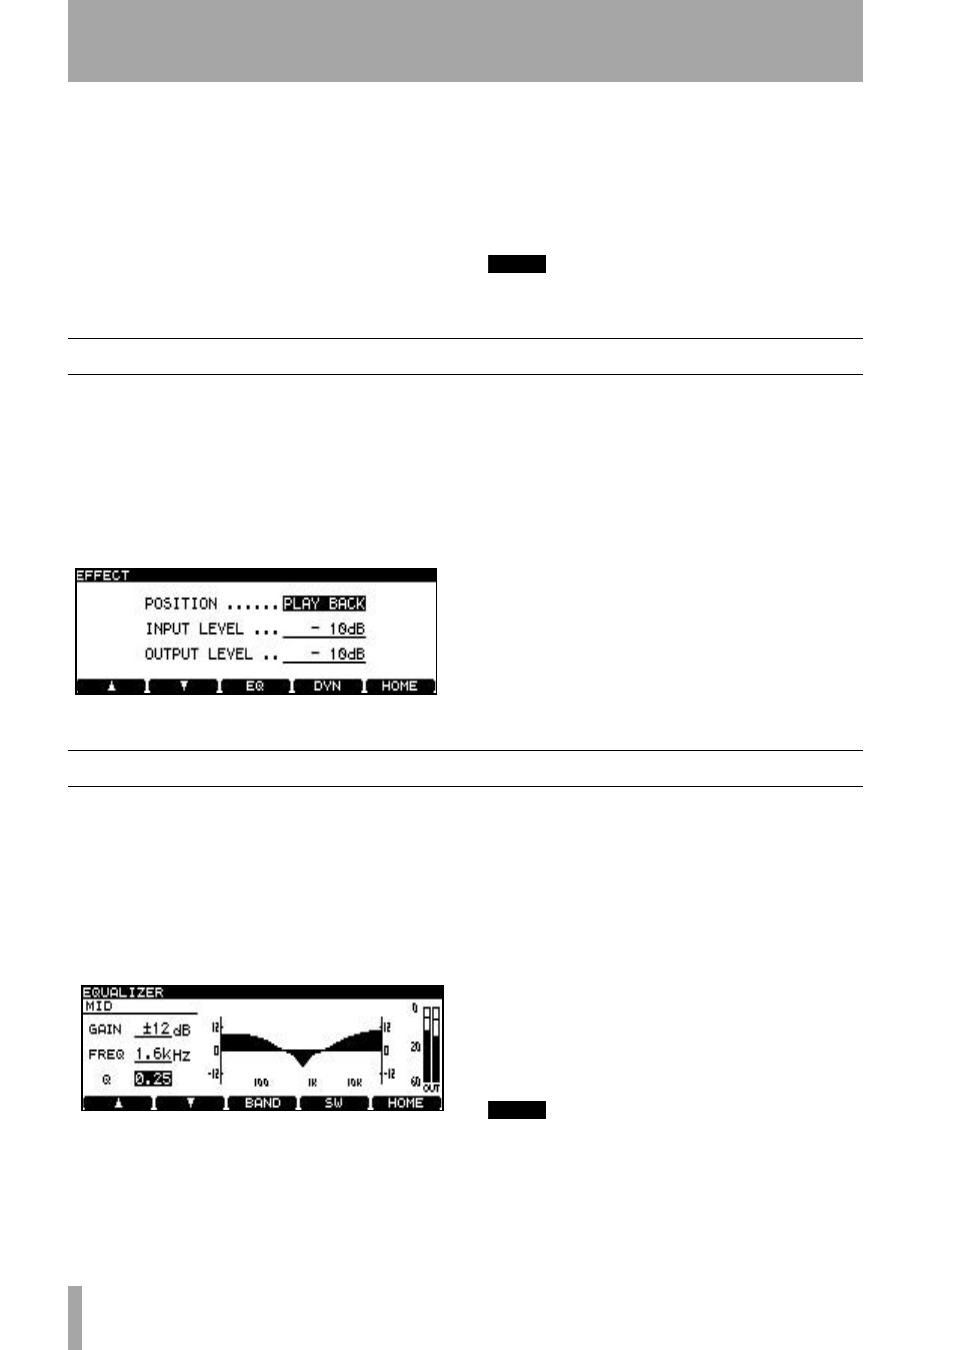
Setting up the effect position
The
EFFECT
key is used to switch the effects on and
off, to set up the parameters, and to set up the posi-
tion of the effect in the signal chain.
Press and release the key to turn the effect chain on
and off (the indicator shows the status).
Press, hold and release the key to bring up the first
setting screen:
Use the wheel to change the effect position between
the playback (
PLAYBACK
) and recording positions
(
RECORD
).
Use the cursor keys to navigate to the
INPUT LEVEL
and
OUTPUT LEVEL
fields, and use the wheel to set the val-
ues of these parameters (that is, the input attenuation
before the signal enters the effects section and the
attenuation after the signal leaves the effects section).
These levels can be set from
0dB
(no attenuation) to
INF
(infinity, i.e. no sound), in 0.5 dB steps from 0 dB
to –10 dB and in 1 dB steps thereafter.
Press
ENTER
to confirm these settings (
CANCEL
cancels them).
Equalization
The equalization effect has three bands: a shelving
sweepable low, a fully parametric mid, and a shelv-
ing sweepable high.
All bands can cut or boost ±12 dB. The slope of the
low and high bands is 6 dB/octave.
1
From the effect setting screen (see Figure 6.1,
Effect setting screen), press the
F3
(
EQ
) key.
•
Pressing the
F3
(
BAND
) key cycles between the
LOW
,
MID
and
HIGH
bands.
•
Use the
F1
(up) and
F2
(down) keys to select
the
GAIN
and
FREQ
(frequency) parameters and
the
Q
parameter for the
MID
band.
•
Use the wheel to change the values. As the val-
ues change, the response curve changes to give
a visual indication of the EQ setting.
2
Press
F4
(
SW
) to switch the EQ effect on and
off. When the effect is turned on, the response
curve is filled solid, as in the figure here (it is
hollow when the effect is turned off).
•
The output level from the EQ effect (which
feeds the dynamics processor) is shown by the
meters at the right of the response curve.
NOTE
Since each band is capable of boosting the level by
12 dB in the digital domain, you should take care not to
overload the outputs.
3
Press
ENTER
to confirm these settings.
Figure 6.1: Effect setting screen
Figure 6.2: EQ setting screen