2 – names and functions of parts, Front panel – Teac DA-3000 User Manual
Page 11
TASCAM DA-3000
11
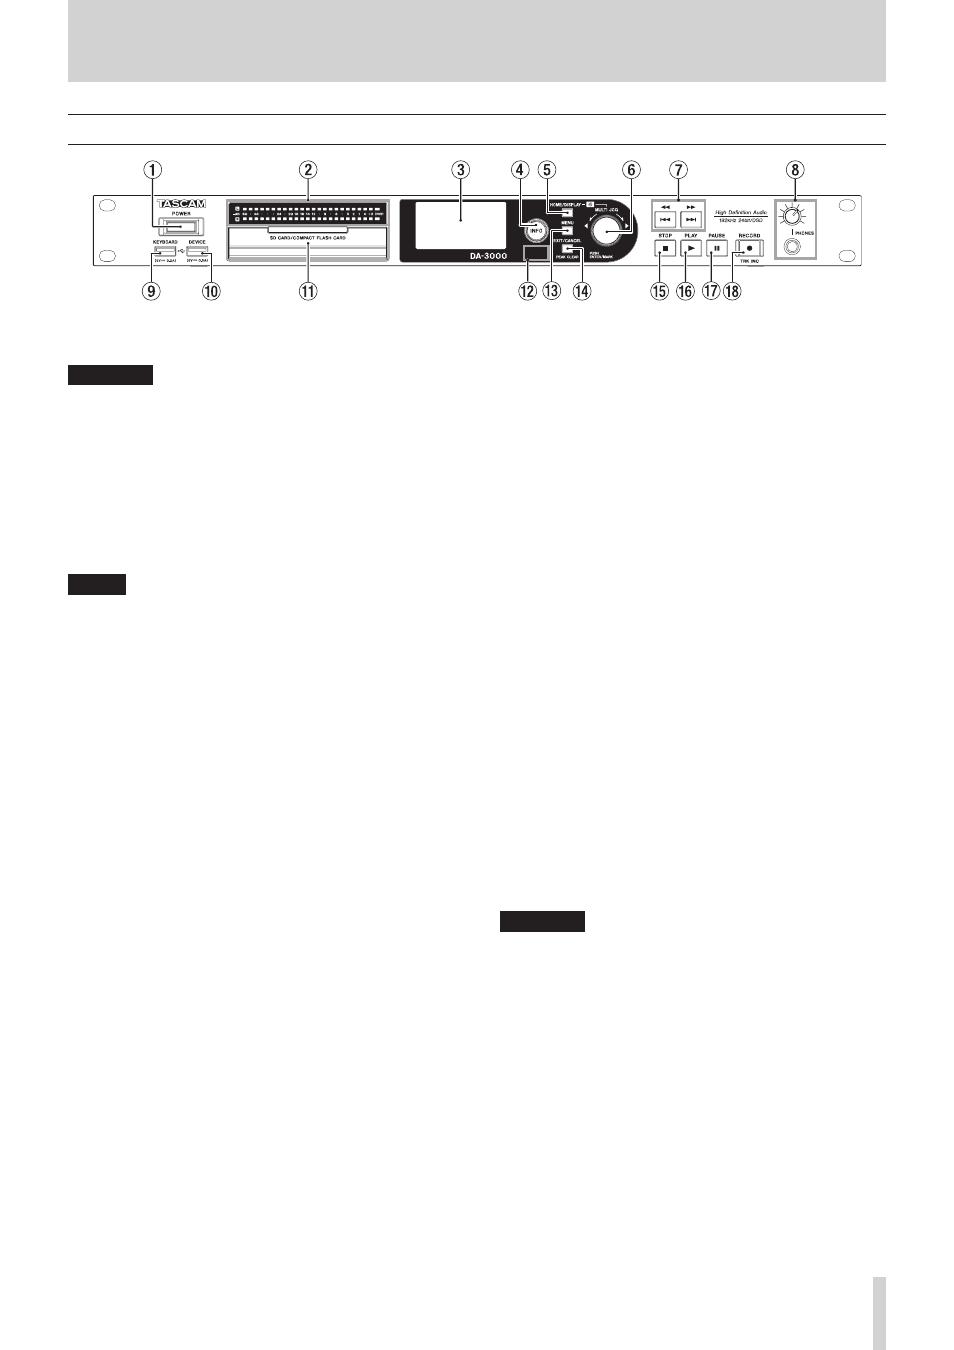
2 – Names and Functions of Parts
Front panel
1
POWER switch
Use to turn the unit on and off.
CAUTION
Before turning the power on, minimize the volume of other
equipment that is connected to this unit. Failure to do so
might cause sudden loud noises, which could harm your
hearing or result in other trouble.
2
Level meters
These show the levels of the input sound, the playback
sound or the oscillator (OSC).
Levels less than the set reference level light green.
Levels greater than the set reference level light orange. (See
“Setting the reference level” on page 25.)
NOTE
When recording in PCM format, +3dB will not light.
3
Display
This shows a variety of information.
4
INFO button/indicator
Press this button when the INFO indicator is lit blue to show
the operation status of the unit on the display and light the
set reference level on the level meters. In addition, pressing
this button when the INFO indicator is lit red will cause a
message to appear on the display. (See “INFO button and
5
HOME/DISPLAY button
When a menu screen is open, press to return to the Home
Screen.
Press when the Home Screen is open to change the display
mode.(See “Home Screen” on page 14.)
Turn the MULTI JOG dial while pressing this button to
adjust the brightness of the display and the indicators. (See
“Adjusting the brightness” on page 19.)
6
MULTI JOG dial
This functions both as a dial and as a button.
Dial functions
When the Home Screen is open, use to skip between
marks.
When in menu mode, use to select menu items and
setting values.
When editing names, use to select characters.
While pressing and holding the HOME/DISPLAY button,
turn to adjust the display and indicator brightness.
Turn when the
BROWSE
screen is open to select subfolders
and files in the same folder. (See “BROWSE screen navigation”
on page 32.)
Button functions
Use to confirm selections and settings (ENTER function).
When the
BROWSE
screen is open, press to open a pop-up
menu for the selected folder or file. (See “Folder operations”
on page 33.) (See “File operations” on page 33.)
Press when stopped, in playback standby, playing back
or recording to add a mark. (See “Adding marks manually
during recording” on page 29.) (See “Adding marks
manually during playback” on page 40.)
7
m[.] / ,[/] buttons
Press briefly to skip to the previous or next track.
Press and hold to search backward or forward.
Press when the
BROWSE
screen is open to move up or
down one level in the folder structure. (See “BROWSE screen
8
PHONES jack/knob
Use this standard stereo jack to connect stereo headphones.
Use an adapter when connecting headphones with a mini
plug.
Use this knob to adjust the headphones output level.
CAUTION
Before connecting headphones, minimize the volume with
the PHONES knob. Failure to do so might cause sudden loud
noises, which could harm your hearing or result in other
trouble.
9
KEYBOARD connector
You can connect a USB keyboard here and use it to input
folder and file names, for example, as well as to control the
unit.
By default, the recorder is set use Japanese keyboards, which
are arranged differently from English keyboards. To use an
English keyboard, change the setting in the
KEYBOARD
TYPE