Using this unit as an ad/da converter, Basic recording operations, 4 – recording – Teac DA-3000 User Manual
Page 26
26
TASCAM DA-3000
4 – Recording
Using this unit as an AD/DA converter
This unit can also be used as an AD/DA converter when
connected to another recorder or DAW, for example.
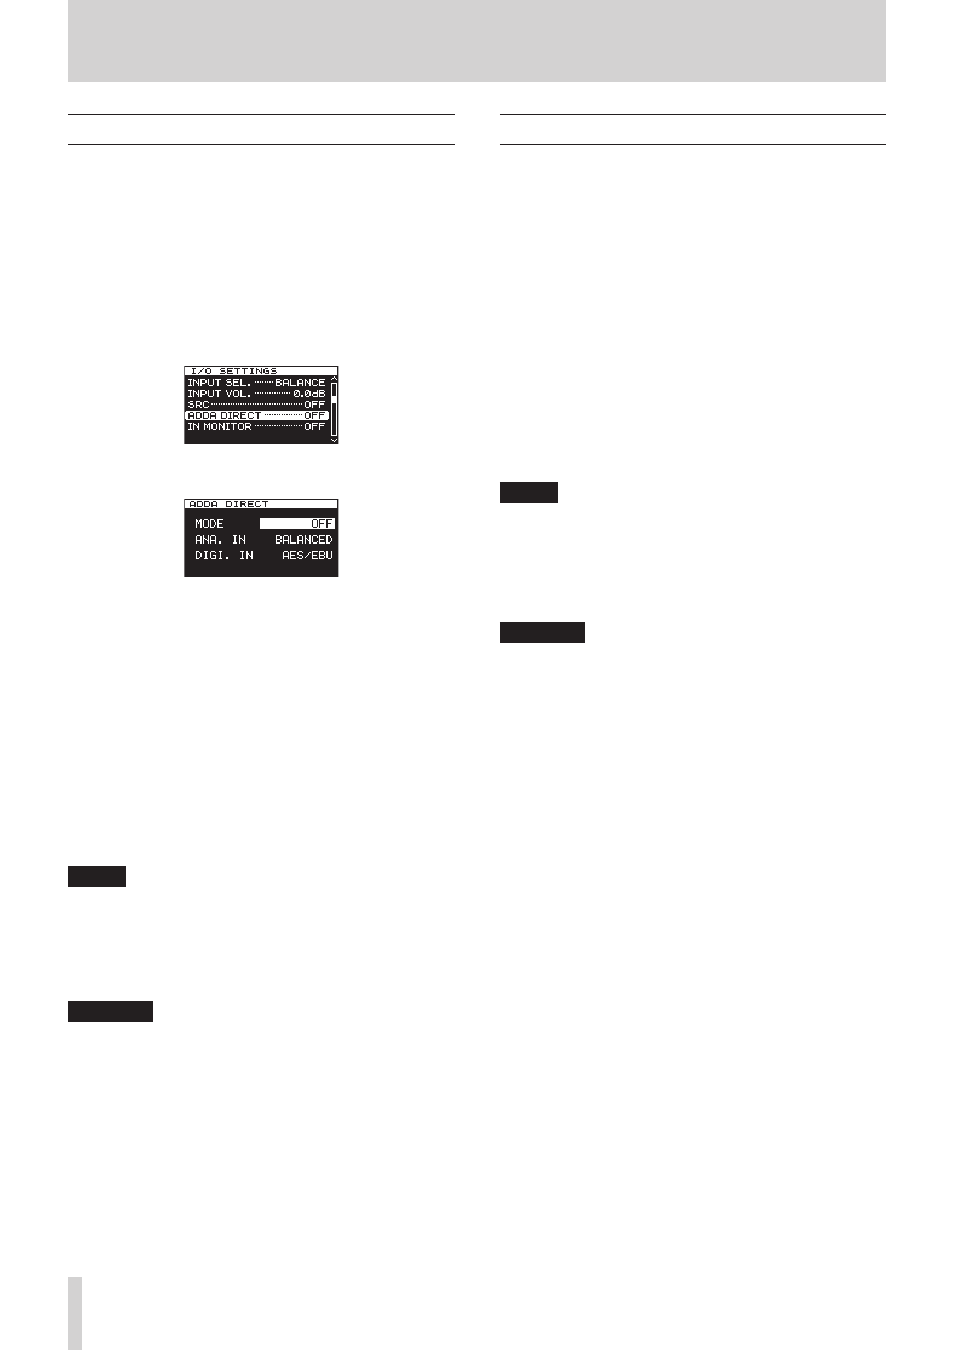
To use this unit as an AD/DA converter, set
ADDA DIRECT
mode to ON. When ON, the
INPUT SELECT
screen setting
does not function, and setting the input selection for the
analog and digital inputs separately is necessary. In addition,
when
ADDA DIRECT
mode is ON, playback is not possible,
but recording the analog input signal is possible. To play back a
recording, set
ADDA DIRECT
mode to OFF.
1. Press the MENU button repeatedly to open the
I/O
SETTINGS
menu, and turn the MULTI JOG dial to select
ADDA DIRECT
.
2. Press the MULTI JOG dial to open the
ADDA DIRECT
screen.
3. Turn the MULTI JOG dial to turn AD/DA DIRECT ON or OFF.
Options: OFF (default), ON
4. Press the MULTI JOG dial to confirm the setting.
The cursor will move to the ANA. IN setting.
5. Turn the MULTI JOG dial to select the ANA. IN.
Options:
BALANCED (default): balanced XLR input jacks
UNBALANCED: unbalanced RCA input jacks
6. Press the MULTI JOG dial to confirm the setting.
The cursor will move to the DIGI. IN setting.
7. Turn the MULTI JOG dial to select the DIGI. IN.
Options:
For PCM recording: AES/EBU, SPDIF
For DSD recording: SDIF-3, DSD-raw
NOTE
The selected options will change automatically according
to the recording file format selected on the
FILE TYPE
screen. (See “Setting the recording file format” on page
8. Press the MULTI JOG dial to confirm the setting and return
to the menu screen.
CAUTION
When ADDA Direct Mode is ON, the input signal level setting
will only affect the Analog Input.
Basic recording operations
You can begin recording after you have finished making the
settings described previously, including input source selection,
recording file format, sampling rate converter activation and
input level adjustment.
To start recording standby from a stopped state:
Press the front panel or remote control RECORD button to
put the unit in recording standby (The RECORD [TRK INC]
and PAUSE buttons on the main unit light).
To start recording from recording standby:
Press the front panel or remote control PLAY button.
To switch from recording to recording standby:
Press the main unit PAUSE button or the remote control F1
button.
To stop recording:
Press the front panel or remote control STOP button. When
the unit stops recording, the recorded data will be written
and an audio file will be created.
NOTE
• On the
FILE NAME
screen, you can set the format of the
names automatically given to audio files when they are
created. (See “Setting the file name format” on page 30.)
• The maximum file size for each track is 2 GB.
• Recorded tracks will be created in the current folder. (See
“Folder operations” on page 33.)
CAUTION
While the recording is being written to the current media,
"WRITING FILE …" will appear the display.
While this message is shown, do not move the unit, turn
off the power or remove the current media. The recorded
content cannot be saved correctly if writing is interrupted.