Advanced setup – ARAG Bravo 400S Seletron User Manual
Page 23
23
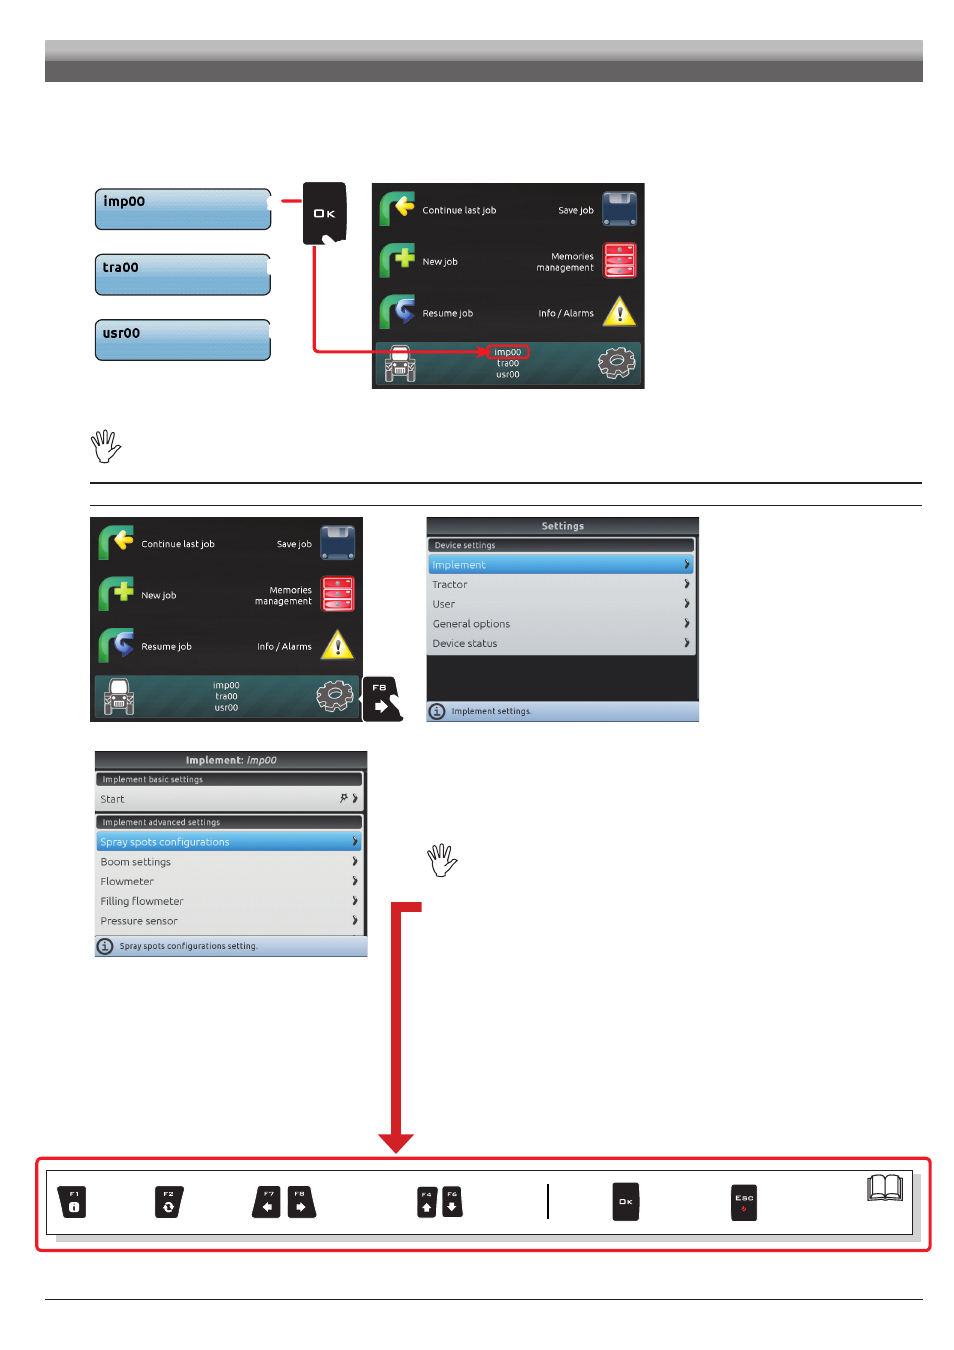
3c SETUP SELECTION:
Instead of saving, you can select a previously saved setup.
Select the setup from the names on the list (
g
in the example of Fig. 55:
imp00
) and press
OK
.
The selected setup is now active on the computer (Fig. 56). Proceed to advanced setup.
You can follow the same procedure for
Tractor
(
h
)
and
User
(
i
)
.
g
h
i
Fig. 55
Fig. 56
Now you can start the advanced setup procedure: all modifications will be applied to the ACTIVE SETUP (in the example
below
imp00
,
tra00
,
usr00
).
ADVANCED SETUP
Fig. 57
Fig. 58
- In the "Home" screen (Fig. 57) press
F8
to enter the
Settings
menu (Fig. 58).
Fig. 59
- Start guided setup procedure for Bravo 400S: select the desired menu item (with
F4
or
F6
) and
press
OK
to enter settings for the selected item.
THE BASIC SETTINGS (Chap. 9), AFFECT WHICH MENU ITEMS ARE
DISPLAYED IN Fig. 59 AND WHICH ADVANCED SETTINGS IT IS
POSSIBLE TO CONTROL.
Below is a summary of key functions during setup.
For the full description, see par. 7.4.
ADVANCED SETUP
Par.
Exit the function or
data change
Confirm access
or data change
Scroll
(LEFT / RIGHT)
Delete
selected
character
Increase /
decrease
value
Scroll
(UP / DOWN)
Enter
selected
character