Removing an interface card, Installing/removing an oap card – H3C Technologies H3C S5800 Series Switches User Manual
Page 78
68
Removing an interface card
1.
Wear an ESD-preventive wrist strap, ensure a good skin contact and make sure that the
ESD-preventive wrist strap is correctly grounded.
2.
Use a Phillips screwdriver to loosen the captive screws at both sides of the interface card until all
spring pressure is released.
3.
Hold the ejector levers at both sides of the interface card and push them outward. Pull the interface
card along the guide rails until it completely comes out of the switch chassis.
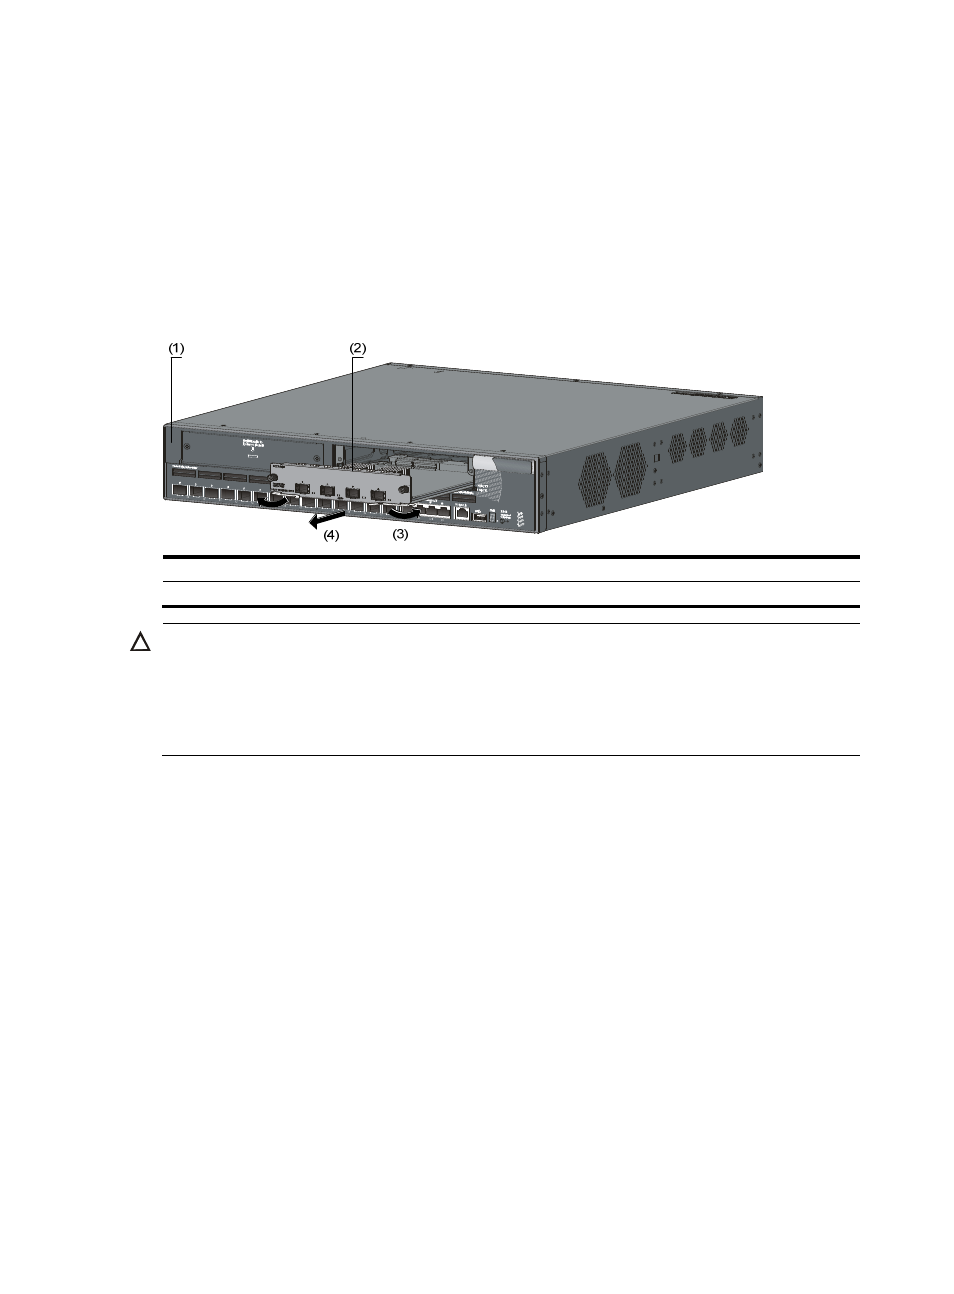
Figure 77 Remove an interface card
(1) Chassis front panel
(2) Interface card
(3) Pull the ejector levers outward
(4) Pull out the interface card
CAUTION:
•
Do not touch the surface-mounted components directly with your hands.
•
Do not use excessive force in the operation.
•
If no new card is to be installed after you remove an interface card, install the filler panel to prevent dust
and ensure good ventilation in the switch.
Installing/Removing an OAP card
Before you install an OAP card, use
or
to check the compatibility of the OAP card with
your switch and identify in which slot you can install the OAP card.
Installing an OAP card in the OAP card slot (only for the
S5800-60C-PWR)
1.
Wear an ESD-preventive wrist strap, ensure a good skin contact and make sure that the
ESD-preventive wrist strap is correctly grounded.
2.
Loosen the captive screws on the filler panel over the OAP card slot with a Phillips screwdriver
(see
) to remove the filler panel. Put away the removed filler panel for future use.