H3C Technologies H3C SecPath F1000-E User Manual
Page 56
48
ARP automatic scanning may take a long time. You can abort the scanning by clicking Interrupt on the
ARP scan page.
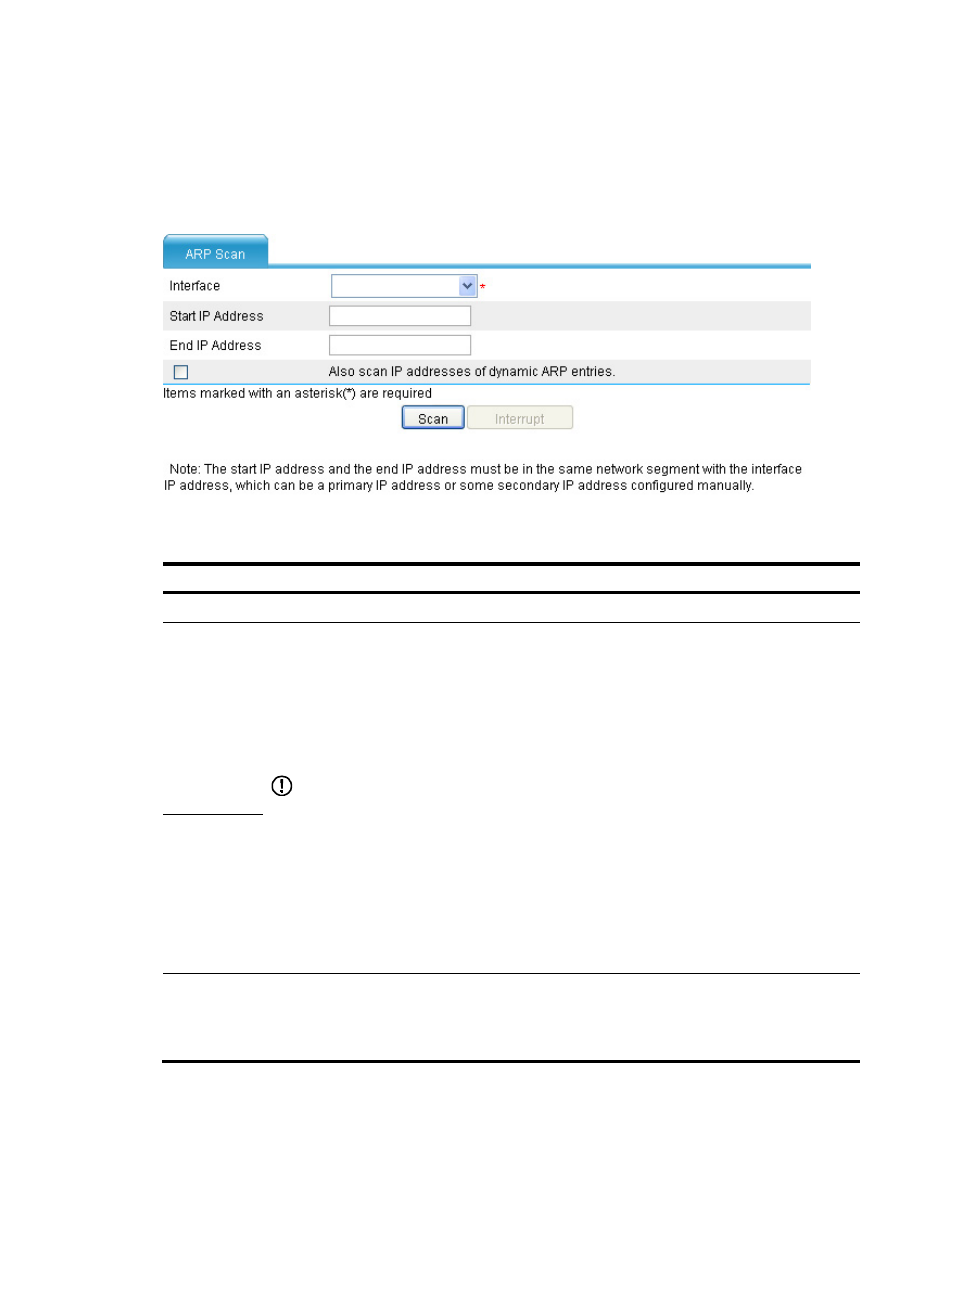
To configure ARP automatic scanning, select Firewall > ARP Anti-Attack > Scan from the navigation tree
to enter the ARP scanning configuration page, as shown in
Figure 51 ARP scanning
Table 17 Configuration items
Item Description
Interface
Select the interface to be configured to perform ARP automatic scanning.
Start IP
Address
Specify the start and end IP addresses of the IP address range for ARP automatic scanning.
To reduce the scanning time, you can specify the IP address range for scanning if you know the
IP address range assigned to the neighbors in a LAN. The specified start and end IP addresses
must be in the same network segment as the primary IP address or manually configured
secondary IP address of the interface. If the specified address range covers multiple network
segments of the interface, the source IP address in the ARP request is the interface address on
the smallest network segment
IMPORTANT:
•
Both the start and end IP addresses must be specified or not specified at the same time.
•
The start and end IP addresses must be in the same network segment as the primary
IP address or manually configured secondary IP address of the interface.
•
The start IP address must be lower than or equal to the end IP address.
•
With no IP address range specified, the firewall scans only the network segment of the
primary IP address of the interface for neighbors. The source IP address of the sent
ARP request is the primary IP address of the interface.
End IP
address
Also scan IP
addresses of
dynamic ARP
entries
Set whether to scan the IP addresses of the existing dynamic ARP entries.
After the above configuration, click Scan to begin ARP automatic scanning. To abort scanning, click
Interrupt.
- H3C SecPath F5000-A5 Firewall H3C SecPath F1000-A-EI H3C SecPath F1000-E-SI H3C SecPath F1000-S-AI H3C SecPath F5000-S Firewall H3C SecPath F5000-C Firewall H3C SecPath F100-C-SI H3C SecPath F1000-C-SI H3C SecPath F100-A-SI H3C SecBlade FW Cards H3C SecBlade FW Enhanced Cards H3C SecPath U200-A U200-M U200-S H3C SecPath U200-CA U200-CM U200-CS