Operating the tape drives, Monitoring the tape drive leds, Chapter – Grass Valley PLS200 User Manual
Page 75
PLS200 Library Installation and Operation
53
Chapter
4
Operating the Tape Drives
Once installed and configured, the Media Manager or similar software
automatically controls the tape drives as you perform store and retrieve
operations. Unless there is a problem with the tape drives, you should never
need to touch them. However, you may need to perform the following tasks,
which are described in this chapter:
• Monitoring the tape drive LEDs
• Displaying information about tape drives
• Ejecting a cartridge manually
NOTE: You cannot control the tape drives from the operator panel. However, you can
perform diagnostics on the tape drives across the 9-pin or 25-pin serial port.
Monitoring the Tape Drive LEDs
The tape drives use light-emitting diodes (LEDs) to indicate their operating
states. Normally, you do not need to monitor the LEDs when the tape drives are
installed in the library; however, basic tape drive LED states are described
below for your reference.
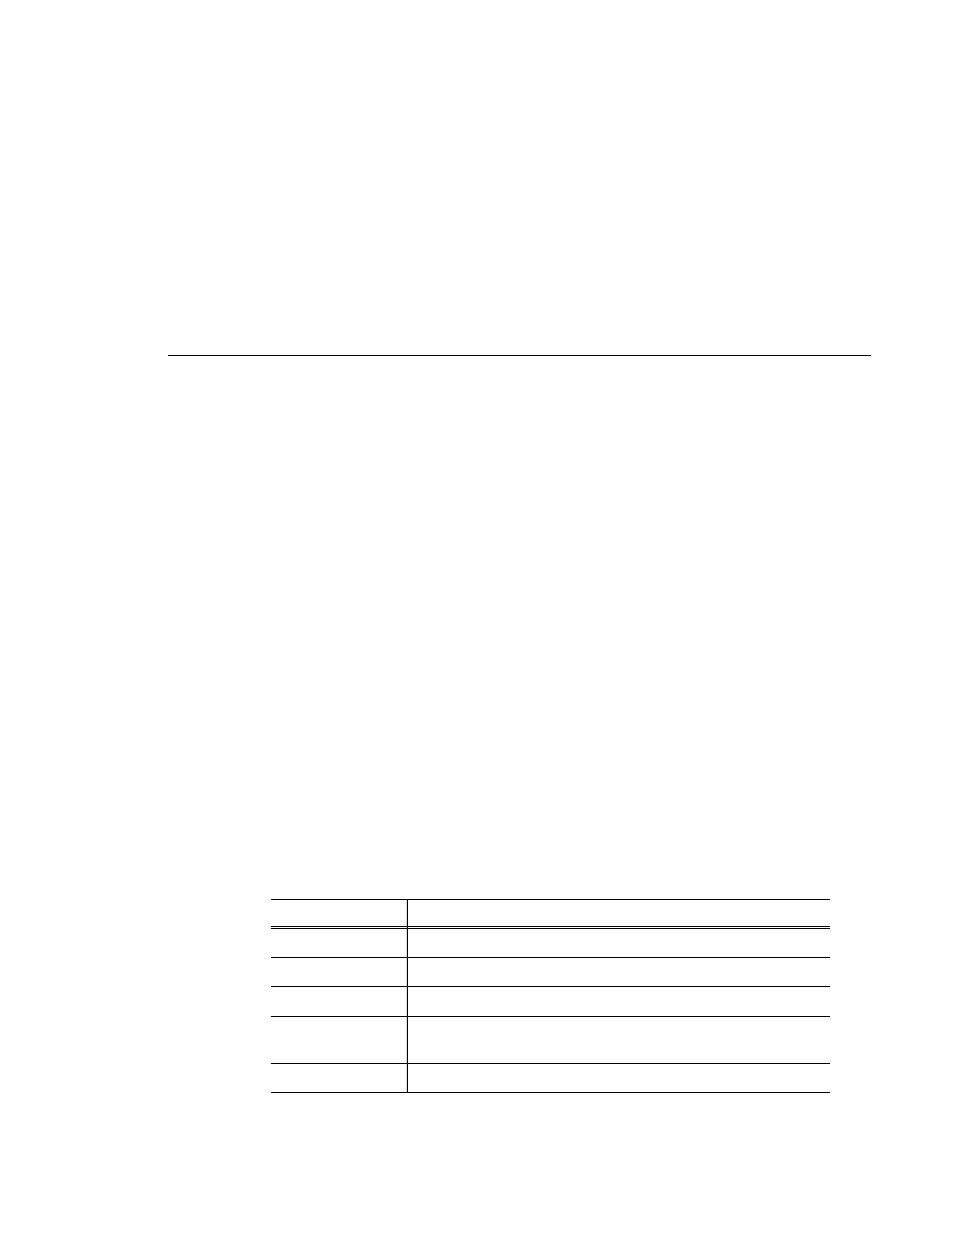
The following table shows basic LED states.
LED state
Condition
All LEDs on
The tape drive was reset or it is performing its power-on self-test.
Top LED on
Cleaning required.
Top LED flashing
Hardware error.
Middle LED on
A tape is loaded, and the tape drive is ready to perform tape motion
activities.
Bottom LED flashing
Tape motion. A fast flash indicates high-speed tape motion.