Casio YA-S10 Setup Guide User Manual
Page 18
E-17
Getting Ready
12.
Press the remote controller’s [BLANK] key.
z This will project from Projector B again so the adjustment patterns of both Projector A and
Projector B are being projected.
13.
Perform the steps below to get the adjustment pattern of Projector B as closely
aligned as possible with the Projector A adjustment pattern.
14.
After the adjustment is the way you want, press the remote controller’s [ESC] key.
z This will cause the Projector A and Projector B adjustment patterns to disappear, and project the
“Image Shaping” menu.
15.
Next, perform the procedure under “Shaping the Image to Match the Projection
Screen” (page E-18).
Important!
Important!
Important!
z During the adjustment procedures from this point onwards, do not alter the position of the
projector(s) or the screen, and do not change a projector zoom or focus setting. If any one of
these is altered, return to step 2 of the procedure and perform the other steps again.
To adjust the position of the projector (one projector)
1.
If you shut off power after finishing the procedure under “To configure initial Control
Box settings” (page E-14), turn on Control Box power.
2.
Adjust the position and size of the projector image so it slightly runs off the edges of
the target screen.
3.
On the remote controller, press the [CORRECT] key.
4.
On the “Image Shaping” menu that appears, select “Adjust Image Position” and
then press the [ENTER] key.
z This should display an adjustment pattern.
z Adjust the focus of the pattern as required.
5.
While watching the adjustment pattern make adjustments in accordance with the
guidelines below.
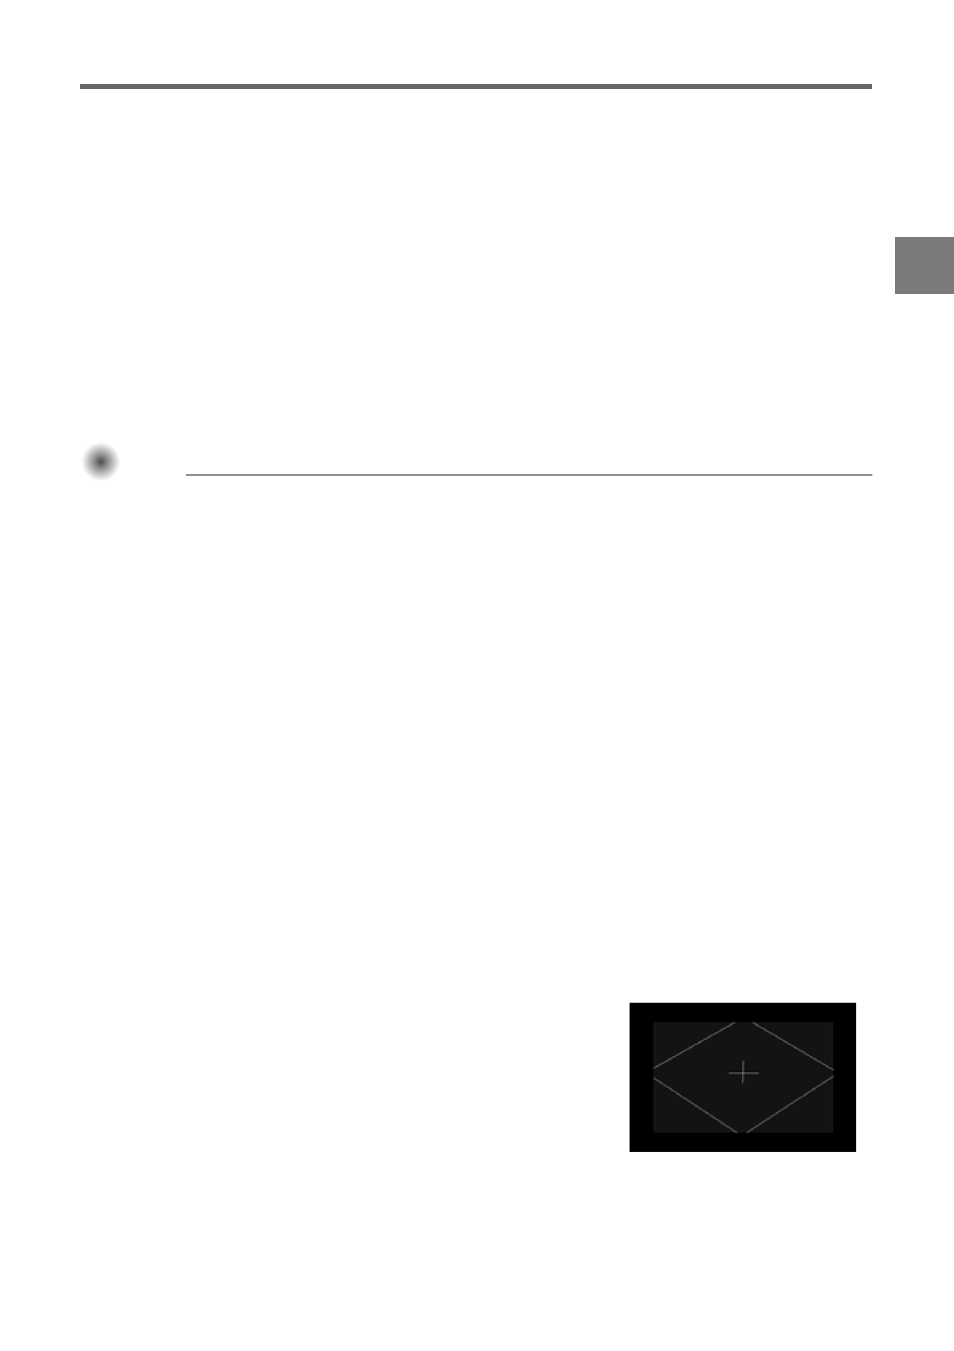
z Adjust the horizontal line of the crosshairs in the center of the
adjustment pattern so it is horizontal.
z The crosshairs of the adjustment pattern should be in the
center of the target screen and the outer border of the
adjustment pattern should be just outside of target projection
area, as shown in the nearby figure.
Perform the same adjustments as in step 2 of this procedure.
6.
After the adjustment is the way you want, press the remote controller’s [ESC] key.
z This will cause the adjustment pattern to disappear, and project the “Image Shaping” menu.
(1) Adjust the vertical inclination of Projector B.
(2) Adjust the size of the Projector B image.
Perform the following steps.
(1) Adjust the position and orientation of the projector.
(2) Adjust the size of the projector image.