Adjusting the aspect ratio of the projected image – Casio YA-S10 Setup Guide User Manual
Page 31
E-30
Adjusting the Aspect Ratio of the Projected Image
After performing a shaping operation, you can also adjust the aspect ratio of the projected image. Note
that this operation does not adjust the aspect ratio of the input source image (which determines how the
input source image fits within the projection area), but rather the aspect ratio of the image being
projected. Perform the procedures in this section using the Control Box remote controller.
Adjusting the Aspect Ratio
1.
Press the [CORRECT] key to display the Image Shaping menu.
2.
On the “Image Shaping” menu, select “Screen Aspect
Ratio Adjustment” and then press the [ENTER] key.
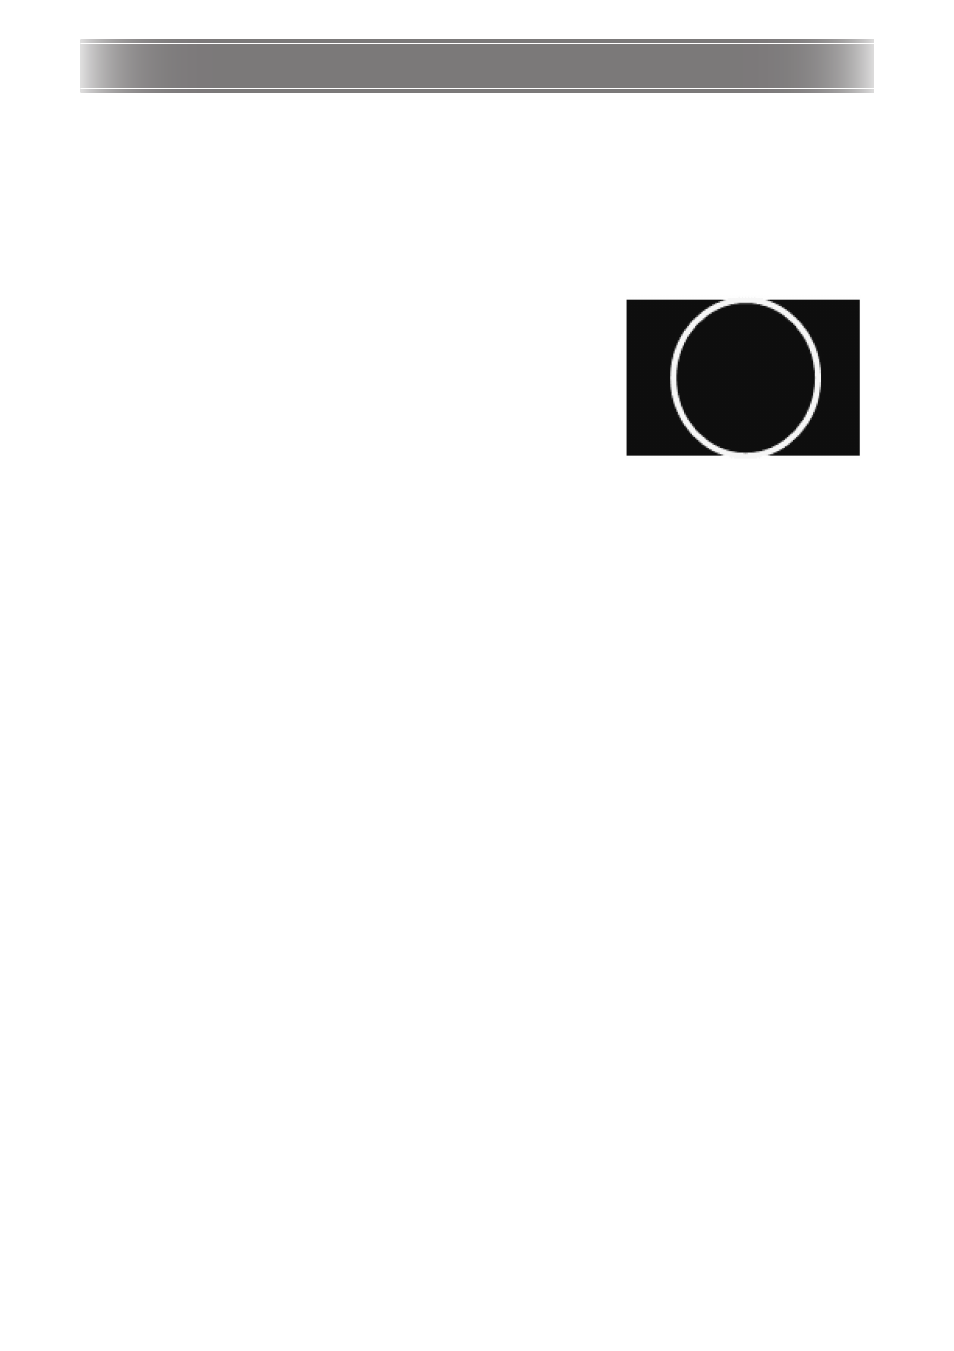
z This should display a circular adjustment pattern. If the
adjustment pattern does not appear as a circle (if it looks
more like a vertical or horizontal oval), perform the steps
below to adjust it. If the adjustment pattern does appear as a
circle, press the [ESC] twice to exit the adjustment procedure.
3.
On the menu, select “Applicable Screen” and then use the [W] and [X] keys to cycle
the setting and select “Auto Detect”, “16:10”, “16:9” or “4:3”.
z Select the setting that causes the adjustment pattern to become most circular. If none of the
settings produces a circle, proceed with step 4.
4.
On the menu, select “Adjust Aspect Ratio” and then use the [W] and [X] keys to
adjust the adjustment pattern until it becomes a circle.
5.
After everything is the way you want, press the [ESC] key twice to exit the
adjustment procedure.